About Manage Dates
Use the Manage Dates tool to view, bulk edit, and bulk offset the date availability and set the calendar status of course objects from one central location. These objects include:
- Content topics and modules
- Discussion topics and forums
- Assignment submissions folders
- Grades categories and items
- Announcement items
- Quizzes
- Checklists
- Surveys
These course objects display in a grid that you can sort by any of the column headings. You can also use the Type column to sort the Manage Dates page based on the tool-specific order and use advanced filter options to work with smaller sets of objects. If you filter your course objects, any bulk changes you make apply only to the filtered results. This enables you to update multiple availability dates based on specific criteria.
In addition to managing dates, you can open each course object in a new window by clicking on its name. This launches the object’s edit page where you can edit additional properties for that object without leaving the Manage Dates tool.

Figure: The Manage Dates tool enables you to filter, bulk edit, or bulk offset selections of learning objects in your course.
- Filter the list by tool or course object.
- Select specific tools or learning objects and select Bulk Edit Dates or Bulk Offset Dates.
- Review a list of course objects. Select to open and edit individual course object dates.
Bulk edit dates in Manage Dates
The Manage Dates tool enables you to bulk edit due dates and availability dates of your course content.
- On the navbar, click Course Admin.
- Click Manage Dates.
- Select the check box of the items for which you want to bulk edit dates.
- Click Bulk Edit Dates.
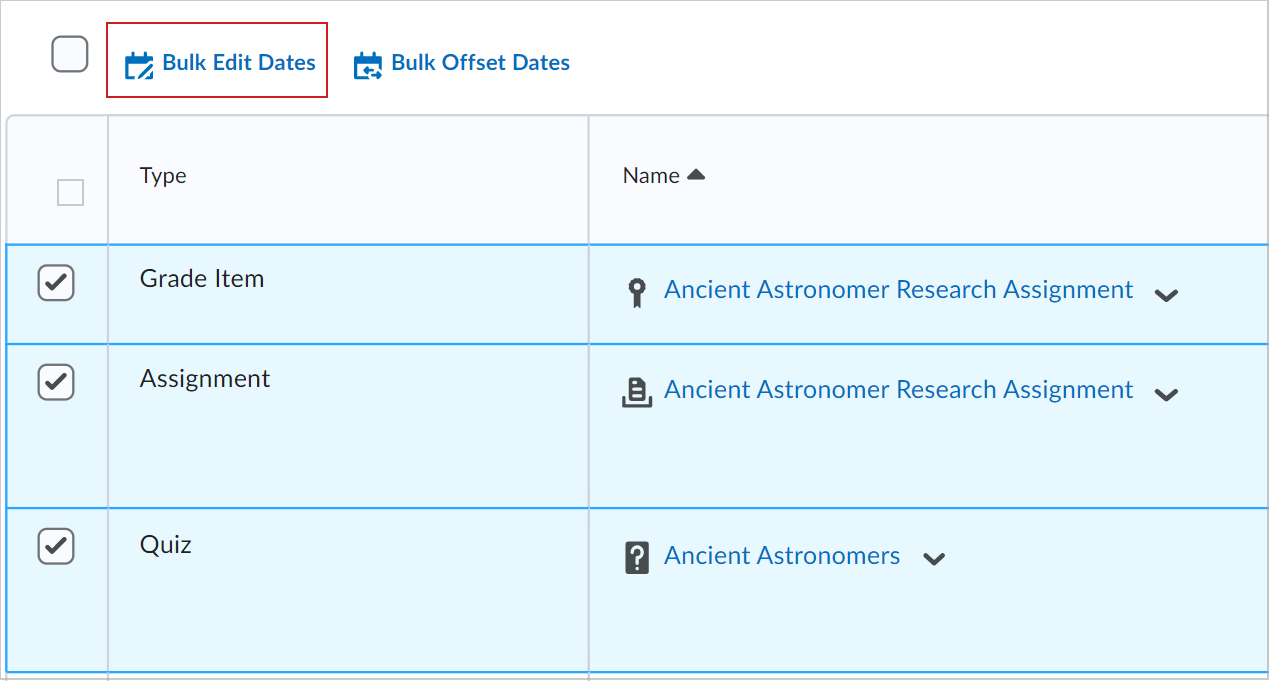
Figure: The Bulk Edit Dates option on the Manage Dates page.
- In the Bulk Edit Dates dialog box, update the due dates and availability dates.
- Click Save.
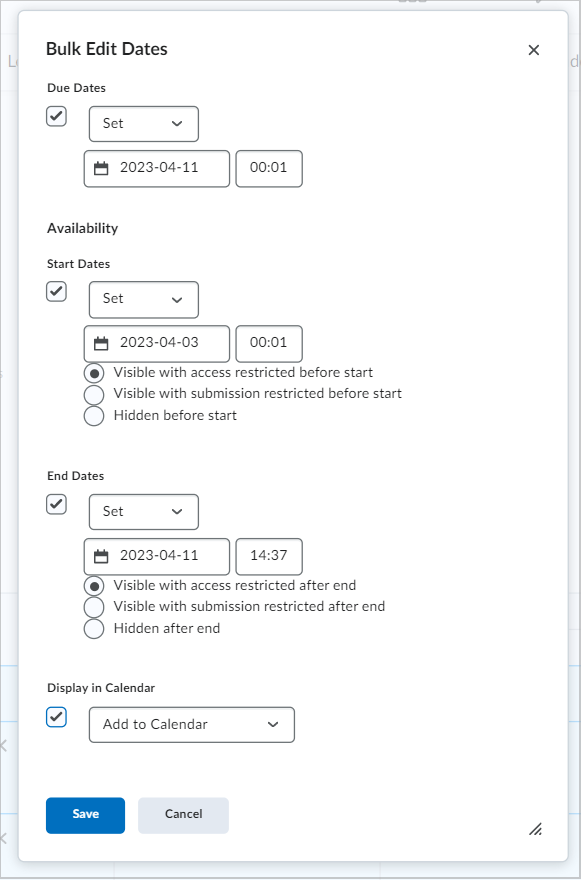
Figure: The Bulk Edit Dates dialog.
Offset dates in Manage Dates
The Manage Dates tool enables you to move start dates and end dates forward or backward by a specified number of days. You can use this to move course content forward to a new term.
To offset dates in Manage Dates
- On the navbar, click Course Admin.
- Click Manage Dates.
- Select the check box for any item for which you want to offset dates.
- Click Bulk Offset Dates.
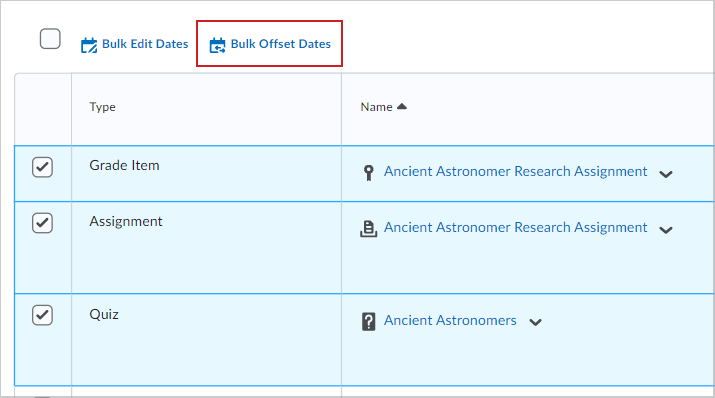
Figure: The Bulk Offset Dates option.
- In the Bulk Offset Dates dialog box, enter your offset details.
- Click Save.
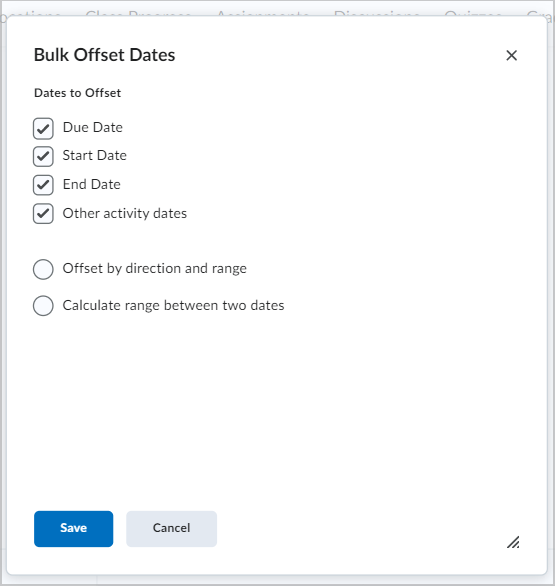
Figure: The Bulk Offset Dates dialog.
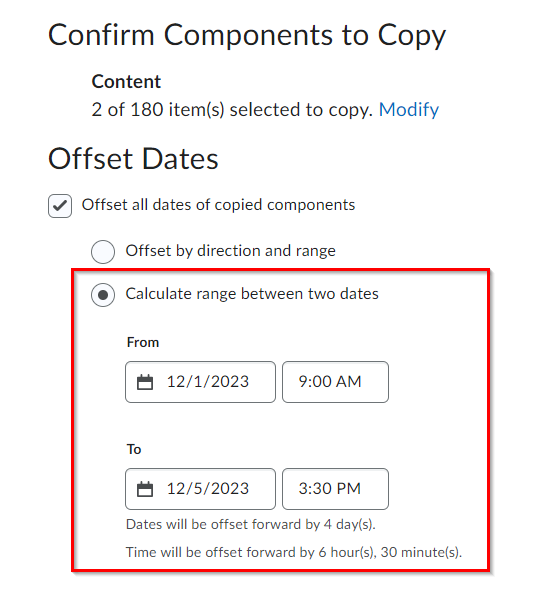
Calculate the Range between Two Dates
When offsetting dates, you are asked to enter the range between days and dates. You can calculate this by inputting the dates and times from which you want to move to.
You can find this here:
- Under Manage Dates:
- Go to Course Admin >Manage Dates.
- Choose the Type of tool you want to offset dates for.
- Click on Bulk Offset Dates just above the table.
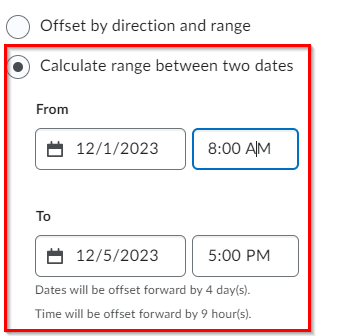
- Click on Calculate the range between two dates.
- Enter the From date and time and To date and time.
- The offset dates and hours will be displayed below.
- You can enter this range under Offset by direction and range
- Offset Dates before you complete copying:
- Before you complete copying course content from Import/Export/Copy Components, when you get to the Offset Dates page.
- Click on Calculate the range between two dates.
- Enter the From date and time and To date and time.
- The offset dates and hours will be displayed below.
- You can enter this range under Offset by direction and range