If you are importing course material from publishers (E.g., test banks), or receiving content from another instructor who has provided it in a file to be uploaded, follow these instructions to Import the Content into your own course offering. The content should already have been prepared in .zip file format.
Note: These instructions are for importing .zip files from external sources. To copy content between two existing courses, see Copy Content from Another Course.
- In the Course to which you want to add the shared content, click on “Import/Export/Copy Components“.
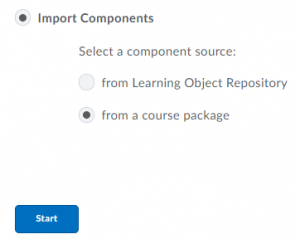
- Select Import Components. Click on the Browse button to select the .zip file with the shared content and click Start.
- Upload the zip file.
- The process will take a few minutes. If you want to import all the components in the Zip file, click on Import. If you want to select components from the zip file to import into the course, click on Advanced options. After “Preprocessing” confirms “Reading the Package” click Continue.
- In the Select Course Material dialog, you will be asked to specify some options.
- It is recommended that you leave the defaults for “Import File to:” and Existing file options.
- Unless you know there are specific course components that you do not wish to use, it is recommended to “Select All Components”. You can delete unwanted items later if necessary.
- Click Continue.
- You will be asked to Confirm Import Selections. If you are satisfied with your selections, click Continue. Otherwise, click Go Back and repeat step 4, making new selections.
- You will see an “Importing Course Material” progress screen. when the process is complete, click View Content.
- The Import Summary screen will provide details of what was successfully imported. If the process was successful, you can return to your course homepage and begin editing your course.
