A checklist contains important or required assignments, readings, or other items to complete. Each checklist contains one or more categories, into which checklist items are organized. For example, you might have an “Assignments” checklist with categories for written assignments and quizzes, both of which could have multiple items that must be completed.
Checklist items must reside in a category, which are used to organize checklist items. For example, you might create the categories Week 1, Week 2, and Week 3, and place week-specific checklist items into the appropriate categories. Alternately, you might use a checklist to organize steps of an assignment. You can assign due dates for checklist items.
Create a Checklist
Checklist items must reside in a category.
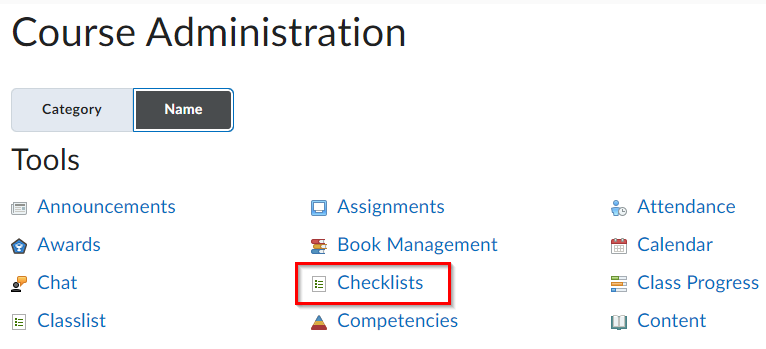
- From the navbar, click on Course Admin, and choose Checklists.
- Select New Checklist.
- Enter your checklist details- Name and Description.
- To open the checklist in a new window, check the box below New Window.
- Under Categories and Items area, do any of the following:
- To add a category to the checklist, click New Category. Enter your category name and description and click Save.
- To add an item to the checklist, click New Item. From the Category drop-down list, select the category for your item. Enter your item details. If you want the item to be due by a certain date or time, select the check box and enter your Due Date information. Click Save and new to add more items or Save.
Note: The default due date for a checklist item is one month from the date the checklist is created.
- Repeat step 5 until you’ve added all your items to the checklist.
- Click Save and Close.
Copy a Checklist
- On the navbar, click Checklist.
- Open the context menu for the checklist you want to copy, and click Copy.
- A new checklist is now visible at the bottom of the list of checklists with the title Copy of {original checklist name}.
NOTE: You cannot use an individual checklist as a release condition for more than one learning object. If you want to use a checklist in association with more than one learning object, you will need to create a copy of the original checklist.
Set Release Conditions for a Checklist
- Go to Checklist tool.
- From the context menu of the checklist for which you want to set release conditions, click Edit.
- In the Restrictions tab, do any of the following:
- Click Attach Existing, then select the check box for any condition you want to attach. Click Attach.
- Click Create and Attach, then select a Condition Type from the drop-down list. Complete any additional Condition Details that appear and click Create.
- To set how accessing the checklist is controlled, from the drop-down list, select if All conditions must be met or Any condition must be met.
- Click Save and Close.
Previewing Checklists
Previewing a checklist from Content does not give you the student view, even if your course is set to “View as a Student”. To test out the look and feel of a checklist:
- To access Checklists, go to Course Admin and select Checklists.
- From the drop-down arrow next to the checklist’s title, select Preview in a new window.
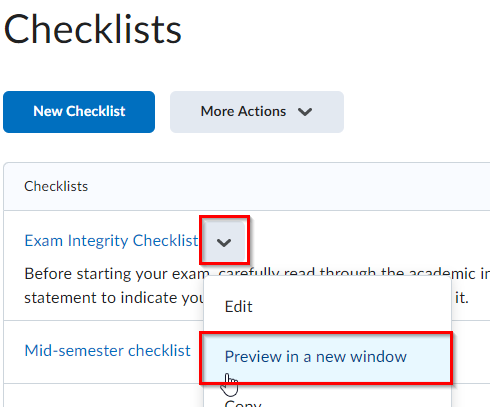
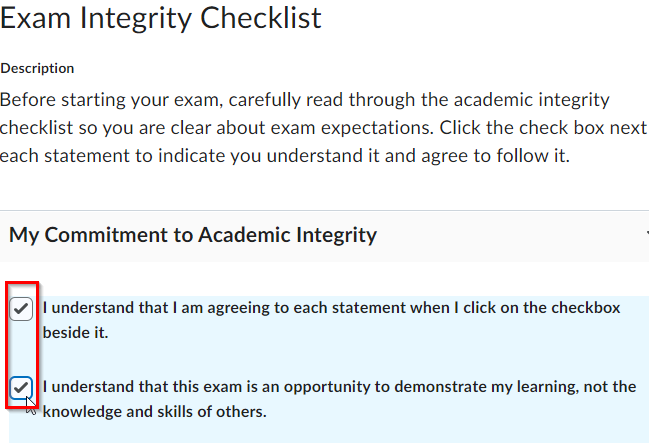
- You will get a pop-up with an interactive checklist you can try out
Adding Checklists to Content for Student Access
Once the checklists are created, they need to be added under the Contents page for the students to access it. Students do not have access to the Course admin tool.
To add checklists to content:
- Go to Course Materials > Content.
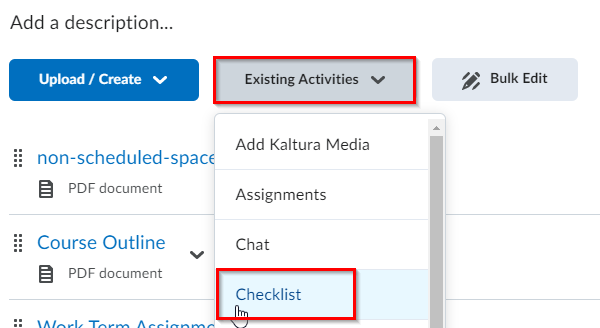
- Navigate to the Module/Sub-module where you want to place the checklist and click on Existing Activities.
- From the Existing Activities drop-down menu, choose Checklist.
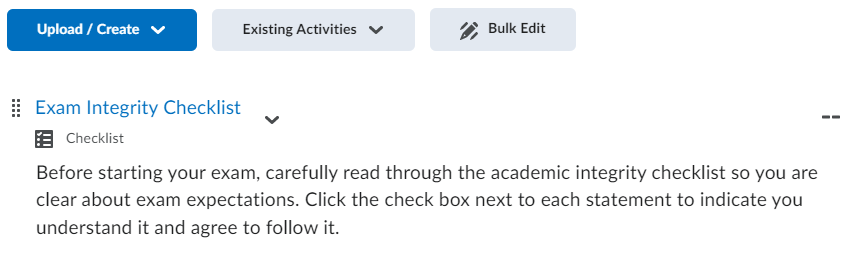
- Select the checklist that you want to add to the Content.
- In the content module, under the Checklists title, the description of the checklist is visible to the student. Students can click on the title of the checklists to access the checklist items.
- Optional: Once the checklist is added to Content, links to the checklist can be created in other locations that are easy to find. For example, you can create a link to the checklist in an Announcement on the homepage. To create an announcement:
- Go to Communication and Announcements
- Type your message
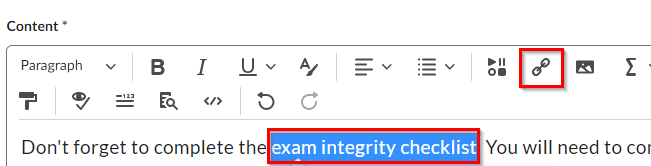
- Highlight the text that you want to link
- Click the link icon in the editor
- Select the checklist you want to link to.
Using a Checklist as a Release Condition
A release condition is an action that must be completed or an achievement that must be attained by students before another element of the Brightspace course is available to them. A checklist can be added as a release condition before a Quiz, Assignment folder or other learning objects can be accessed. In some cases, an Academic integrity checklist is set as a release condition before students can write a quiz. For example, you might require students to complete an Academic Integrity Checklist in Content before they’re allowed to see a Quiz.
After creating and adding a checklist to the content, you can add the checklist as a release condition under different tools(Quizzes, Discussions, Assignments, etc).
To Add Checklists as a Release Condition to Quizzes
- Go to Quizzes settings > under the restrictions tab > under Release conditions > Select Create and attach
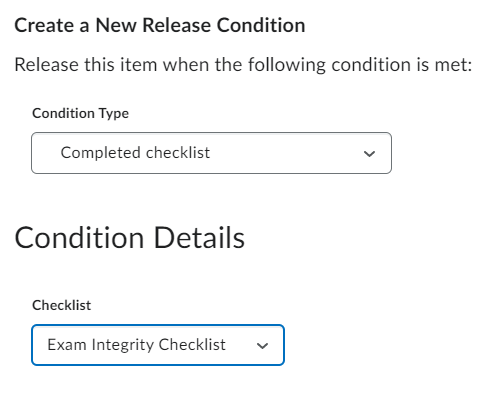
- From the Condition type dropdown, make your selection (“Completed Checklist” in this example). Then choose which Checklist you’re connecting to the release condition. Click Create.
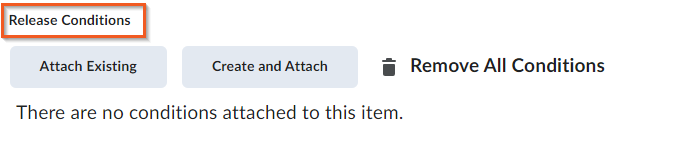
- The release condition will now be visible on the restrictions page. Clicking Remove All Conditions will allow you to delete the release condition
- Click Save and Close on the bottom of the screen or the release condition(s) you created won’t be saved.
To Add a Release Condition to an Assignment Folder
Go to Assessments and Assignments and create or edit a submission folder. Expand the Availability Dates & Conditions options along the right-hand side. Click Add Release Condition and follow the same procedure for a quiz release condition (above).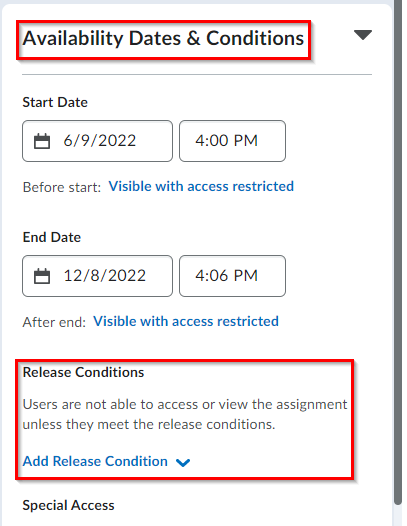
To Add a Release Condition to a Discussion
Go to Communication and Discussions and create or edit a discussion topic. Click on the Restrictions tab along the top. In the Release Conditions section, click Create and Attach and follow the same procedure for a quiz release condition (above).