Improve Students’ Experience in Brightspace by Adding Dates

Adding dates in Brightspace is a great way to support students’ time management. Dates populate the Work To Do and Calendar widgets so that student can keep track of what’s due and when. Due dates can be added to almost all items, activities, and modules in Brightspace.

Students have two options for seeing upcoming items with a due date — The Work To Do widget and the Calendar widget.

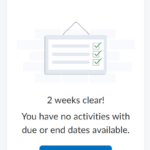
Work To Do is an organizational widget, meaning that it appears on Langara’s Brightspace homepage and provides learners with a summary of assigned learning activities from all their courses that are overdue or have an upcoming due date or end date. Work To Do can also be added to a course homepage to show only due and overdue learning activities from the course.

The Calendar widget can be added to a course homepage and displays content items with due dates and all calendar events.

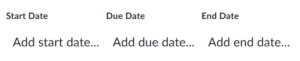
Start Dates, Dues Dates, End Dates, Access, and Availability

In Brightspace, Start Date, Due Date, and End Date can be set for Assignments, Quizzes, and Content modules and module content items. Start and End dates can also be set for Discussions.

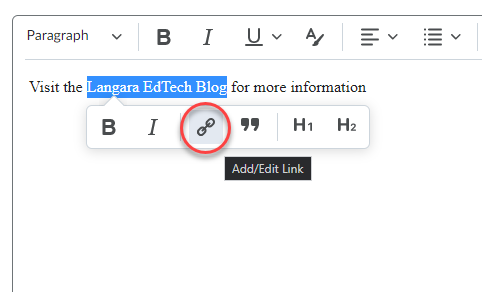
Due Date: Due dates specify when an activity or item is due. When you add a due date to an item, activity, or module, it will automatically be visible in the students’ Calendar.

Note about Due Date: Due dates do not restrict students’ ability to submit materials. If students submit work past the due date, the submission will be identified as late. To restrict access to an item, add a start and/or end date.

Start Date: Start dates specify when students can access items, activities, or modules. Before the start date students can see that an item exists, but they cannot access it. If no start date is set, students will be able to access the item immediately (unless it is hidden).

End Date: End dates specify when students will no longer be able to access an item, activity, or module. After the end date, students will only be able to see the title. If you want students to be able to submit late, do not set an end date.

If you want students to be able to submit late, do not set an end date.

Tip: Since items, activities, or modules with an end date are not accessible and students cannot submit their work after the date, it is important to clearly communicate expectations to students to prevent any misunderstandings.

Special access: It is possible to make exceptions for the end date for specific students with the Special Access option. You can use special access conditions to open content access for certain students outside the specified dates.

Availability: You will sometimes see this header before the option to add a start date and end dates. These start and end dates work the same as listed above.

Note about Availability: Be careful with Availability and Hide from Users. Clicking the Hide From Users checkbox will hide content from users until you uncheck the box. An Availability start date does not override the Hide from Users option. We recommend you only use one.

Display to calendar: Not all dates/times show up automatically on the Brightspace calendar. If a Display to calendar check box appears, select this option to push the dates to the calendar.

Our Recommendations

  • Add due dates to marked activities and assessments, so students can use the Calendar, Work To Do Widget, and Notifications to help manage their time.
  • Add Start and End dates when you want to limit access.
  • Use Due Dates or End Dates, but not both.
  • Use Dates judiciously, marking only those activities and assessments that have a firm due or end date.
  • For content due dates, rather than placing the due date on the content item, create a checklist with a due date for all the content and ungraded work that must be completed for a specific class.

Brightspace Accessibility in Five, 1: Link Text

Brightspace plus accessibility logo

Brightspace is an exceptionally accessible platform. Using Brightspace for your course content, documents, and media is an excellent way to provide equitable, inclusive access to learning material.

Take advantage of Brightspace’s built-in tools and the Accessibility Checker to ensure what you share is accessible. Accessible content is inclusive, democratic, and maximizes learner independence.

In the first of this five-part series, we will learn about adding link text to your Brightspace content.

Link Text

Link text should provide a clear description of the destination, independent of the surrounding text.

Students that with a visual impairement may use screen reader software that allows them to navigate by links. Descriptive link text helps orient and guide them to resources. A list of “click here”, “click here”, “Read more”, etc. is not going to provide users with any meaningful information. Pasting raw URLs in Brightspace should also be avoided as, for example, heading “https://iweb.langara.ca/edtech/blog” is jarring and not a useful indicator of what that link would lead to.

Additionally, sighted users can easily spot or relocate a link when it has a clear text description. As well, all users benefit from quality link text to understand why they would want to click on the link.

Effective link text should be:

  • Descriptive
    • Describe the destination
  • Concise
    • Try to limit link text to a few words
  • Unique
    • If two links on a page go to the same destination, they should have the same link text, otherwise ensure all link text is unique
  • Visually distinct
    • Links should be visually distinct from surrounding text. In Brightspace, stick with default formatting (blue underlined text) for links.

To Link Text in Brightspace

  1. Highlight the text to be linked and select Add/Edit Link
  2. The highlighted text will appear in the Title field. Paste the URL in the Link field and select Create.

Find more information about link text in the Langara Accessibility Handbook and read more about adding hyperlinks in Brightspace.

Accessibility Checker

Brightspace includes a built-in accessibility checker. The checker appears on the second row of the editor toolbar.

  1. Select More Actions to reveal the second row of the toolbar
  2. Select Accessibility Checker

The accessibility checker will highlight many accessibility issues and offer solutions to correct them.


Watch for more posts in the Brightspace Accessibility in Five series coming soon, including:

  1. Link Text
  2. Colour
  3. Headings
  4. Tables
  5. Text Equivalents
  6. Bonus: Accessible Uploads

New Text to Speech Tools in Brightspace

EdTech is excited to announce new text to speech tools in Brightspace.

A new toolbar (pictured below) automatically appears on content pages, Quizzes, Assignments, and Discussions.

Screenshot of ReadSpeaker toolbar

The simple, intuitive interface allows for users to hear text read aloud. In Brightspace, simply select Listen and the toolbar instantly creates an audio version of text.

This tool offers students the choice of reading, listening, or both simultaneously. Allowing users choice and customization accounts for learner needs and preferences.

This tool may assist learners with:

  • Increased understanding
  • Improved reading comprehension
  • Information retention and recall
  • Vocabulary
  • Fluency and accuracy
  • Motivation and attitudes toward reading

Available user features include:

  • Customization of colour, style, and size of font
  • Choice of reading voice and speed
  • Synchronous text highlighting
  • Page masking and text-only view
  • Ability to select content to be read aloud
  • No download required
    • Learners can use this tool on campus, at home, on their phone, or on the bus

In addition to Brightspace pages, Word and PDF documents uploaded to Brightspace also have a text to speech reader option.

While a benefit to all learners, this tool is especially important to users that need content to be read aloud. The addition of text to speech is an important step in Langara’s work toward accessibility and universal design for learning.

For more information, read about the toolbar’s features or contact assistivetech@langara.

What’s an Assistive Technologist?

What’s an Assistive Technologist?

To find out the answer to this question and learn a bit about what Langara’s Assistive Technologist Team has been working on, check out the accompanying video. 

If you have any questions or would like to learn more about how the Assistive Technologist can support you and your students, please email assisitvetech@langara.ca. If you would like to demo the course, you can self-register from the Brightspace homepage. 


Captions are now automatic on all new Kaltura media

New media content added to Kaltura MediaSpace will be automatically captioned, whether uploaded via the Langara MediaSpace website at https://mediaspace.langara.ca, or via My Tools > My Media in Brightspace. These captions are machine-generated and should be available within 30 minutes of uploading your file. All media, including screen recordings, file uploads, web recordings, and most YouTube imports, will have captions added when uploaded to Kaltura. These are closed captions that can be deactivated by the media owner and when available, toggled on and off by the viewer. Existing media—uploaded before October 18th, 2022—will not have captions automatically added but you can request captions for this media.

Keep in mind, machine-generated captions are only 85% accurate and will not meet the requirements of students with closed captioning accommodations. Students requiring an accommodation will contact Accessibility Services, who will inform you directly. If you have a student that requires closed captions, edit your captions to ensure they are 99% accurate or contact Langara’s Assistive Technologist to request assistance with human-edited closed captions. 

We developed a Closed Captions slideshow (below) to provide step-by-step instructions for all you need to know about captioning your media in Kaltura MediaSpace/My Media.

PebblePad Brief: Activity Logs

Langara’s pilot of the ePortfolio learning platform, PebblePad, is now in its second year. This is the third in a series highlighting some of the platform’s features. Whether you’re already using PebblePad or considering using it at some point in the future, our hope is that the PebblePad Brief series extends your understanding of the platform’s capabilities.

This month’s “Brief” is going to focus on activity logs. Whether you’re asking students to track how many minutes or hours they spend on a task, or you have developed a “point” system based on your own criteria to log an activity, this can all be digitized and linked to a PebblePad workbook. In addition, instructors can run reports to get a snapshot of how the entire class is progressing towards their targets.

Please watch the video for an example of how this works, or read the article below.

Activity logs can be used when you want a student to document how many times they’ve engaged in an activity, or how much time they’ve spent on the activity.

Time Sheets

Let’s look at an example of how this works. In a practicum, a student may have to complete a required number of hours in their placement… let’s say 120 hours.

In their practicum workbook, the student goes to a page called “Activity Log”. Here they find a link to their timesheet.

They click on the link and enter their time:

When they go back to the workbook it tells them how many hours are now left to complete. Since they should be in the workbook regularly doing other course-related tasks, this makes it very easy for the student to keep track of their hours.

These types of workbooks are usually shared with the instructor for feedback and assessment. That being the case, it’s easy for the instructor to see whether the student is on track to complete their hours. There’s a demonstration of how instructors can monitor activity logs in the video above.

Feedback on timesheets has been positive from both students and instructors who have used them in PebblePad. It’s easy for students to track their hours right where they’re completing the work for the course, and it’s easy for instructors to check on the students’ progress towards the goal.

If you have questions about PebblePad or any other learning technology that EdTech supports, we can be contacted at edtech@langara.ca

PebblePad Brief: Feedback Options

Langara’s pilot of the ePortfolio learning platform, PebblePad, is now in its second year. This is the second in a series highlighting some of the platform’s features. Whether you’re already using PebblePad or considering using it at some point in the future, our hope is that the PebblePad Brief series extends your understanding of the platform’s capabilities.
This month’s “Brief” is going to focus on the variety of feedback options available within PebblePad, and how they can benefit students and instructors. Whether you’re looking for a tool to give formative or summative feedback, PebblePad has multiple options.

Feedback in Brightspace Versus PebblePad:

PebblePad functions differently than Brightspace when it comes to assignments. In Brightspace, students usually submit a file by a due date and the instructor has no way of giving formative feedback on the developing assignment unless they ask students to submit a draft of their work. PebblePad, on the other hand, doesn’t work with file submissions but with shared links. If an assignment is set up for auto-submission, the instructor is able to see the students’ work in real time as soon as they start it. This enables instructors to give formative feedback any time prior to a due date, as well as summative assessment after a due date. Further, unlike Brightspace, students have access to the feedback after their course finishes and even after they graduate.

Feedback Options:

Simple Comments:

  • The simplest way to give feedback in PebblePad is through general comments. To use the comment feature, a student shares a link with someone else. When that person clicks on the link, there’s a comment icon on to the top-right which can be used to by instructors, mentors, or peers to provide feedback. The student can reply to the comments so feedback is potentially dialogic.
Adding Comments Via the Comment Icon


Feedback Comments:

  • By using the tools in the formal assessment part of the platform called ATLAS, there are extended options. Here we can to a specific answer, a page, or the entire assignment. If an instructor will be using the same comments for many students, feedback statements can be created that will be available when marking. Any comments added via ATLAS have the advantage that they are only visible to the student and won’t be seen by anyone they share their work with. When assessing in ATLAS, instructors have the option to release feedback as it’s added, or hold all feedback for later release so that the whole class receives it at the same time.
Adding Block Feedback Comments via ATLAS

 Assessor Fields:

  • When creating scaffolded learning activities for students, assessor fields can be inserted right into body of the assignment. It’s possible to assign “blocks” or sections to either the students or the instructor to complete. Instructors can be assigned text fields, drop-downs, radio buttons, checkboxes, and rubrics that only they can complete (the student will see them but not be able to complete them). These fields are easy for instructors to find when they’re assessing, and easy for the student to see when they’re looking for feedback. This type of feedback will always be visible so is generally used for activities to develop knowledge or skills, rather than assignments that might be used as a showcase in future.
Adding Feedback via Assessor Fields

Feedback Templates:

  • These are very similar to rubrics in Brightspace, and can be created and used to assess students’ work in ATLAS. They can include any or all of: clickable rubric components, comment fields, radio buttons, drop-downs, and checkboxes. Because this feedback will only be visible to the student, this is a better option to use with assignments that the student might want to use as a showcase to show to others.
Providing Feedback via Feedback Templates

Grades:

  • Assignments can also be graded in ATLAS. Grading is flexible as instructors can enter percentages, letter grades, or even pass/fail wording such as “meets expectations/does not meet expectations”. Although PebblePad is not currently integrated with Brightspace, it is possible to get a CSV file of all grades and easily transfer them to a gradebook.

    Adding Grades

Feedback Longevity:

  • We all know that it takes time and effort to provide meaningful feedback to learners. One of the advantages of using PebblePad is that the students have access to feedback long after the course ends and even after they graduate as students can get an alumni account. This will help them make meaningful connections between assignments, between courses, and between studies and career. Feedback can be fed forward.

If you have questions about PebblePad or any other learning technology that EdTech supports, we can be contacted at edtech@langara.ca

PebblePad Brief: Interactive Curriculum Materials

Langara’s pilot of the ePortfolio learning platform, PebblePad, is now in its second year. This will be the first in a series highlighting some of the platform’s features. Whether you’re already using PebblePad or considering using it at some point in the future, our hope is that the PebblePad Brief series extends your understanding of the platform’s capabilities.
Our first “Brief” is going to focus on what components you can include in learning materials.  Although ePortfolio (electronic/digital portfolio) technology is a tool for students to showcase their work, that’s not all PebblePad can do. In fact, it’s also a great platform to build scaffolded learning activities.
When building learning resources in PebblePad, content can be multimodal and responses can be dynamic. A learning activity, for example, might have text for students to read, a podcast for them to listen to, and a video for them to watch.  You could then add interactive fields for the students to respond to this content by checking their comprehension, rating their response, reflecting on what they’ve learned, or planning their next steps – all on the same page (or in a separate tab or resource if you’d prefer).
Content types that can be added to a learning resource include:

  • text
  • image
  • audio
  • video
  • links to other resources

Interactive response fields that can be added for students to actively engage in learning can include:

  • text fields (single or multi-line)
  • radio buttons (one answer only), checkboxes (multiple answers possible) or drop-downs
  • ratings (binary, Likert, numeric)
  • fillable tables
  • rubrics
  • add evidence buttons (allows comment or file upload)
  • date pickers
  • signature fields

Those at Langara already using PebblePad have provided feedback that the templates look great and, even more importantly, students find them easy to use.
It’s also easy to share these learning resources with your students… but we’ll leave that for another PebblePad Brief.
If you have questions about PebblePad or any other learning technology that EdTech supports, we can be contacted at edtech@langara.ca

PebblePad template with text and video in the top half and questions for students to answer in the bottom half
PebblePad Interactive Worksheet

PebblePad Briefs: Interactive Curriculum Materials

Langara’s pilot of the ePortfolio learning platform, PebblePad, is now in its second year. This will be the first in a series highlighting some of the platform’s features. Whether you’re already using PebblePad or considering using it at some point in the future, our hope is that the PebblePad Briefs extend your understanding of the platform’s capabilities.
Our first “Brief” is going to focus on what components you can include in learning materials.  Although ePortfolio (electronic/digital portfolio) technology is a tool for students to showcase their work, that’s not all PebblePad can do. In fact, it’s also a great platform to build scaffolded learning activities.
When building learning resources in PebblePad, content can be multimodal and responses can be dynamic. A learning activity, for example, might have text for students to read, a podcast for them to listen to, and a video for them to watch.  You could then add interactive fields for the students to respond to this content by checking their comprehension, rating their response, reflecting on what they’ve learned, or planning their next steps – all on the same page (or in a separate tab or resource if you’d prefer).
Content types that can be added to a learning resource include:

  • text
  • image
  • audio
  • video
  • links to other resource

Interactive response fields that can be added for students to actively engage in learning can include:

  • text fields (single or multi-line)
  • radio buttons (one answer only), checkboxes (multiple answers possible) or drop-downs
  • ratings (binary, Likert, numeric)
  • fillable tables
  • rubrics
  • add evidence buttons (allows comment or file upload)
  • date pickers
  • signature fields

Those at Langara already using PebblePad have provided feedback that the templates look great and, even more importantly, students find them easy to use.
It’s also easy to share these learning resources with your students… but we’ll leave that for another PebblePad Brief.
If you have questions about PebblePad or any other learning technology that EdTech supports, we can be contacted at edtech@langara.ca

PebblePad template with text and video in the top half and questions for students to answer in the bottom half
PebblePad Interactive Worksheet

Zoom – Live Transcripts

Zoom’s Live Transcript

""

Langara recently enabled a new Zoom feature – Live Transcript. Live Transcript provides machine-generated live speech-to-text transcription of a Zoom meeting. This feature is enabled by the host after a meeting is started. Participants only see the Live Transcript option if the host enables it.

Turning on Live Transcript during a meeting

  1. Begin your meeting 
  2. At the bottom of the screen, select Live Transcript. If you don’t see it, you might need to maximize the window. 
  3. Click Enable Auto-Transcription. The button will turn blue, indicating that live transcription is on. 

""
Once enabled, the Live Transcript button includes a tiny arrow on the top right corner. Clicking on it gives participants the option to view the transcript.  
""
The transcript is updated live as participants speak. At the end of the meeting the host and participants will be prompted to save the entire transcript. 

Limitations

  • The captions and transcript are machine-generated and do not meet accommodation standards for students requiring captions. 
  • The meeting host must start Live Transcription before participants can view the transcript. Any conversation that occurs prior to enabling the feature will not be transcribed.  
  • Live Transcripts are not available in Breakout Rooms. 
  • Live Transcripts only supports English.