Generative Artificial Intelligence (Gen AI) Resources

AI generated image of a humanoid robot teacher with a pointer in a classroom, standing in front of a blackboard with equations
Image generated by DALL-E.

Whether you are a superuser or a novice, the number of resources on generative artificial intelligence can be overwhelming. EdTech and TCDC have curated some that we’d like to recommend.

  • How to access Copilot (Microsoft)
    • Interested in trying a generative AI tool or using it in your course? ChatGPT and Copilot (formerly Bing Chat) are currently available in Canada. Langara College students and employees have access to a premium version of Copilot through Microsoft Enterprise and the Edge browser. Microsoft’s FAQs provide information on how to access Copilot through Microsoft Edge. 
  • Practical AI for Instructors and Students (Ethan Mollick/Wharton School, August 2023)
    • If you’re looking for a great primer on AI, this series of five videos is worth the watch. Each video is approximately 10 minutes so the whole series can be viewed in under an hour. Topics include: 1) an introduction to AI; 2) what large language model (LLM) platforms like ChatGPT are and how to start using them; 3) how to prompt AI; 4) how instructors can leverage AI; and 5) how students can use AI.
    • Note: this series references four LLMs: ChatGPT, BingCopilot, Bard, and Claude. Bard and Claude are not yet available in Canada. 
  • AI Primer by Educause
    • This article is a reading (and viewing) list that links to resources that do a deeper dive into generative AI. A good resource for those who know the basics and would like to learn more.  

EdTech and TCDC also regularly offer professional learning opportunities on AI topics. Check the PD Events Calendar for current offerings.

As always, if you’re planning to integrate AI into your course, please be aware that: 

  • There are privacy concerns with AI platforms. We recommend using caution when inputting – or having your students input – private, personal, or sensitive information (e.g. resumes or other identifying data).  
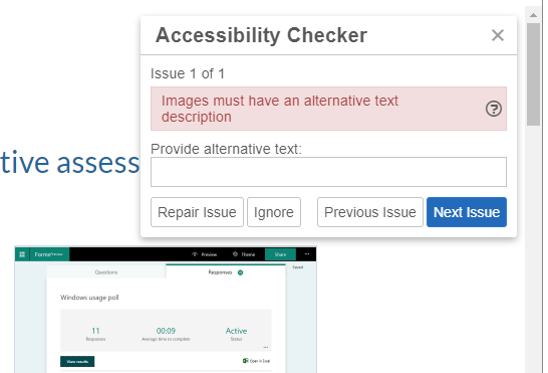
  • For those using assistive technology such as screen readers, some AI platforms are more accessible than others. For more information, please see Accessibility of AI Interfaces by Langara Assistive Technologist, Luke McKnight. 

If you would like more recommendations for AI resources, or any other AI-related support, please contact EdTech or TCDC

Learning Labs

Introducing Learning Labs

Learning Labs are interactive, focused, and supported learning sessions where you can learn how to implement Langara’s teaching and learning technologies and tools. Capacity is limited to ensure all attendees have an opportunity to ask questions, try out tools, and receive support. Support in the room will reflect the technology, tool, and learning outcomes; however, you can expect to interact with EdTech Advisors, Specialists, and Technologists as well as TCDC Curriculum Consultants. The Labs are an opportunity to implement something new or improve what already exists with experts who can answer technical questions and provide advice.

Fall Learning Lab session topics include:

Brightspace HTML Templates

After participating in this lab, participants should be able to:

  • Use the Brightspace HTML editor.
  • Explain the benefits of using the Brightspace HTML templates.
  • Apply the templates to a new Brightspace HTML page.
  • Apply the latest version of the template to an existing Brightspace HTML page.
  • Mix and match HTML elements—such as image placement, accordions, callouts, tables, and tabs—from the various templates.

Adding closed captions to a video in Brightspace

After participating in this lab, participants should be able to:

  • Upload a video to MediaSpace.
  • Add closed captions to a video.
  • Use the MediaSpace captions editor.
  • Use the OneDrive captioning tool.
  • Embed a video in a Brightspace course file.

Creating an accessible Word document

After participating in this lab, participants should be able to:

  • Employ plain language.
  • Select styles that improve legibility of text.
  • Structure a document.
  • Create accessible hyperlinks and tables.
  • Add alternative text to visual content.
  • Use the built-in accessibility checker.

Improving the accessibility of existing PowerPoint slides

After participating in this lab, participants should be able to:

  • Avoid the most common PowerPoint accessibility mistakes.
  • Use the accessibility checker and make corrections.
  • Apply templates.
  • Apply structure.
  • Select accessible fonts and font styling.
  • Employ accessible use of colour.
  • Add alternative text to images.
  • Write meaningful hyperlink text.

Save time marking with Rubrics

After participating in this lab, participants should be able to: 

  • Define the purpose of the assignment or assessment 
  • Decide which type of rubric will be used with assignments
  • Create statements of expected performance at each level of the rubric 
  • Transfer analog rubrics into a digital version on Brightspace 
  • Associate their rubric with the assignment in Brightspace 


Brightspace Accessibility in Five, 1: Link Text

Brightspace plus accessibility logo

Brightspace is an exceptionally accessible platform. Using Brightspace for your course content, documents, and media is an excellent way to provide equitable, inclusive access to learning material.

Take advantage of Brightspace’s built-in tools and the Accessibility Checker to ensure what you share is accessible. Accessible content is inclusive, democratic, and maximizes learner independence.

In the first of this five-part series, we will learn about adding link text to your Brightspace content.

Link Text

Link text should provide a clear description of the destination, independent of the surrounding text.

Students that with a visual impairement may use screen reader software that allows them to navigate by links. Descriptive link text helps orient and guide them to resources. A list of “click here”, “click here”, “Read more”, etc. is not going to provide users with any meaningful information. Pasting raw URLs in Brightspace should also be avoided as, for example, heading “https://iweb.langara.ca/edtech/blog” is jarring and not a useful indicator of what that link would lead to.

Additionally, sighted users can easily spot or relocate a link when it has a clear text description. As well, all users benefit from quality link text to understand why they would want to click on the link.

Effective link text should be:

  • Descriptive
    • Describe the destination
  • Concise
    • Try to limit link text to a few words
  • Unique
    • If two links on a page go to the same destination, they should have the same link text, otherwise ensure all link text is unique
  • Visually distinct
    • Links should be visually distinct from surrounding text. In Brightspace, stick with default formatting (blue underlined text) for links.

To Link Text in Brightspace

  1. Highlight the text to be linked and select Add/Edit Link
  2. The highlighted text will appear in the Title field. Paste the URL in the Link field and select Create.

Find more information about link text in the Langara Accessibility Handbook and read more about adding hyperlinks in Brightspace.

Accessibility Checker

Brightspace includes a built-in accessibility checker. The checker appears on the second row of the editor toolbar.

  1. Select More Actions to reveal the second row of the toolbar
  2. Select Accessibility Checker

The accessibility checker will highlight many accessibility issues and offer solutions to correct them.


Watch for more posts in the Brightspace Accessibility in Five series coming soon, including:

  1. Link Text
  2. Colour
  3. Headings
  4. Tables
  5. Text Equivalents
  6. Bonus: Accessible Uploads

PebblePad Brief: Feedback Options

Langara’s pilot of the ePortfolio learning platform, PebblePad, is now in its second year. This is the second in a series highlighting some of the platform’s features. Whether you’re already using PebblePad or considering using it at some point in the future, our hope is that the PebblePad Brief series extends your understanding of the platform’s capabilities.
This month’s “Brief” is going to focus on the variety of feedback options available within PebblePad, and how they can benefit students and instructors. Whether you’re looking for a tool to give formative or summative feedback, PebblePad has multiple options.

Feedback in Brightspace Versus PebblePad:

PebblePad functions differently than Brightspace when it comes to assignments. In Brightspace, students usually submit a file by a due date and the instructor has no way of giving formative feedback on the developing assignment unless they ask students to submit a draft of their work. PebblePad, on the other hand, doesn’t work with file submissions but with shared links. If an assignment is set up for auto-submission, the instructor is able to see the students’ work in real time as soon as they start it. This enables instructors to give formative feedback any time prior to a due date, as well as summative assessment after a due date. Further, unlike Brightspace, students have access to the feedback after their course finishes and even after they graduate.

Feedback Options:

Simple Comments:

  • The simplest way to give feedback in PebblePad is through general comments. To use the comment feature, a student shares a link with someone else. When that person clicks on the link, there’s a comment icon on to the top-right which can be used to by instructors, mentors, or peers to provide feedback. The student can reply to the comments so feedback is potentially dialogic.

Adding Comments Via the Comment Icon


Feedback Comments:

  • By using the tools in the formal assessment part of the platform called ATLAS, there are extended options. Here we can to a specific answer, a page, or the entire assignment. If an instructor will be using the same comments for many students, feedback statements can be created that will be available when marking. Any comments added via ATLAS have the advantage that they are only visible to the student and won’t be seen by anyone they share their work with. When assessing in ATLAS, instructors have the option to release feedback as it’s added, or hold all feedback for later release so that the whole class receives it at the same time.

Adding Block Feedback Comments via ATLAS

 Assessor Fields:

  • When creating scaffolded learning activities for students, assessor fields can be inserted right into body of the assignment. It’s possible to assign “blocks” or sections to either the students or the instructor to complete. Instructors can be assigned text fields, drop-downs, radio buttons, checkboxes, and rubrics that only they can complete (the student will see them but not be able to complete them). These fields are easy for instructors to find when they’re assessing, and easy for the student to see when they’re looking for feedback. This type of feedback will always be visible so is generally used for activities to develop knowledge or skills, rather than assignments that might be used as a showcase in future.

Adding Feedback via Assessor Fields

Feedback Templates:

  • These are very similar to rubrics in Brightspace, and can be created and used to assess students’ work in ATLAS. They can include any or all of: clickable rubric components, comment fields, radio buttons, drop-downs, and checkboxes. Because this feedback will only be visible to the student, this is a better option to use with assignments that the student might want to use as a showcase to show to others.

Providing Feedback via Feedback Templates

Grades:

  • Assignments can also be graded in ATLAS. Grading is flexible as instructors can enter percentages, letter grades, or even pass/fail wording such as “meets expectations/does not meet expectations”. Although PebblePad is not currently integrated with Brightspace, it is possible to get a CSV file of all grades and easily transfer them to a gradebook.

    Adding Grades

Feedback Longevity:

  • We all know that it takes time and effort to provide meaningful feedback to learners. One of the advantages of using PebblePad is that the students have access to feedback long after the course ends and even after they graduate as students can get an alumni account. This will help them make meaningful connections between assignments, between courses, and between studies and career. Feedback can be fed forward.

If you have questions about PebblePad or any other learning technology that EdTech supports, we can be contacted at edtech@langara.ca

PebblePad Brief: Interactive Curriculum Materials

Langara’s pilot of the ePortfolio learning platform, PebblePad, is now in its second year. This will be the first in a series highlighting some of the platform’s features. Whether you’re already using PebblePad or considering using it at some point in the future, our hope is that the PebblePad Brief series extends your understanding of the platform’s capabilities.
Our first “Brief” is going to focus on what components you can include in learning materials.  Although ePortfolio (electronic/digital portfolio) technology is a tool for students to showcase their work, that’s not all PebblePad can do. In fact, it’s also a great platform to build scaffolded learning activities.
When building learning resources in PebblePad, content can be multimodal and responses can be dynamic. A learning activity, for example, might have text for students to read, a podcast for them to listen to, and a video for them to watch.  You could then add interactive fields for the students to respond to this content by checking their comprehension, rating their response, reflecting on what they’ve learned, or planning their next steps – all on the same page (or in a separate tab or resource if you’d prefer).
Content types that can be added to a learning resource include:

  • text
  • image
  • audio
  • video
  • links to other resources

Interactive response fields that can be added for students to actively engage in learning can include:

  • text fields (single or multi-line)
  • radio buttons (one answer only), checkboxes (multiple answers possible) or drop-downs
  • ratings (binary, Likert, numeric)
  • fillable tables
  • rubrics
  • add evidence buttons (allows comment or file upload)
  • date pickers
  • signature fields

Those at Langara already using PebblePad have provided feedback that the templates look great and, even more importantly, students find them easy to use.
It’s also easy to share these learning resources with your students… but we’ll leave that for another PebblePad Brief.
If you have questions about PebblePad or any other learning technology that EdTech supports, we can be contacted at edtech@langara.ca

PebblePad template with text and video in the top half and questions for students to answer in the bottom half
PebblePad Interactive Worksheet

PebblePad Briefs: Interactive Curriculum Materials

Langara’s pilot of the ePortfolio learning platform, PebblePad, is now in its second year. This will be the first in a series highlighting some of the platform’s features. Whether you’re already using PebblePad or considering using it at some point in the future, our hope is that the PebblePad Briefs extend your understanding of the platform’s capabilities.
Our first “Brief” is going to focus on what components you can include in learning materials.  Although ePortfolio (electronic/digital portfolio) technology is a tool for students to showcase their work, that’s not all PebblePad can do. In fact, it’s also a great platform to build scaffolded learning activities.
When building learning resources in PebblePad, content can be multimodal and responses can be dynamic. A learning activity, for example, might have text for students to read, a podcast for them to listen to, and a video for them to watch.  You could then add interactive fields for the students to respond to this content by checking their comprehension, rating their response, reflecting on what they’ve learned, or planning their next steps – all on the same page (or in a separate tab or resource if you’d prefer).
Content types that can be added to a learning resource include:

  • text
  • image
  • audio
  • video
  • links to other resource

Interactive response fields that can be added for students to actively engage in learning can include:

  • text fields (single or multi-line)
  • radio buttons (one answer only), checkboxes (multiple answers possible) or drop-downs
  • ratings (binary, Likert, numeric)
  • fillable tables
  • rubrics
  • add evidence buttons (allows comment or file upload)
  • date pickers
  • signature fields

Those at Langara already using PebblePad have provided feedback that the templates look great and, even more importantly, students find them easy to use.
It’s also easy to share these learning resources with your students… but we’ll leave that for another PebblePad Brief.
If you have questions about PebblePad or any other learning technology that EdTech supports, we can be contacted at edtech@langara.ca

PebblePad template with text and video in the top half and questions for students to answer in the bottom half
PebblePad Interactive Worksheet

Padlet, What is It, and How It Will Improve Student Engagement?

Decorative

Have you worked within a discussion board and wished it was more engaging? Hoped for a platform that had a visually appealing user experience? Have you longed for an intuitive space that allowed intuitive posting across all devices? Padlet may be the tool you are looking for.

Padlet is a digital notice board that allows users to post media, documents and links and collaborate with a “wall” based environment. An online platform that describes itself as “somewhere between a doc and a full-fledged website builder”, Padlet allows open dialogue from all users, instructors or students.

The interactive nature of Padlet is generally described as easy to use and engaging. Users can collaborate on real-time, shared boards by adding and editing posts. Users can add rich multimedia, such as images, links, and documents. Posts can be arranged in various formats to best suit the content, including whiteboards, grids, timelines, and maps. Padlet offers a range of interactive features such as anonymous contributions, comments, and reactions.

An example of how a Padlet wall can be organized.


Padlet is a highly versatile tool, limited only by our imagination. Some of the benefits of using Padlet to improve student engagement include:

  • Allows brainstorming and live question bank.
  • Ease of collaboration and organization.
  • Create a gallery of student work.
  • Get feedback from students with exit tickets.
  • Anonymous posting allows for inclusive participation and can empower students to share ideas.
  • Makes learning visible to the instructor and the students.
  • Allows the instructor to adjust their level of instruction to fit with students’ current level of learning.
  • Responses remain on the Padlet board for future reference while being shared in real-time with the whole class.
  • The Padlet walls can be embedded into the Langara learning management system (Brightspace).

Screenshot of a Padlet wall embedded within a Brightspace course.

Padlet can be used to:

  • Assess
  • Collaborate
  • Communicate
  • Create
  • Engage
  • Reflect

We will explore specific features of Padlet in future posts. If you are interested in triallingPadlet, please email EdTech to request a license. Afterwards, visit the Langara Padlet login page to login with your Langara account. This tool is centrally supported by Langara EdTech, and detailed help is available on our EdTech website or through the Padlet Help website.

Primary photograph by Keira Burton from Pexels used under Pexels License.

References and Additional Reading

Edwards, L. (2020, October 19). What is Padlet and how does it work for education? Retrieved January 11, 2022, from Tech Teaching website.

Meyer, K. A. (2014). Student engagement in online learning: What works and why. In Student Engagement Online: What Works and Why (pp. 1–14). John Wiley & Sons, Inc. DOI link.

Norman, M. (2017). Synchronous Online Classes: 10 Tips for Engaging Students. Faculty Focus. Faculty Focus website.

Padlet Features. (n.d.). Retrieved January 1, 2022, from https://padlet.com/features.

Simon, E. (2018). 10 Tips for Effective Online Discussions. EDUCAUSE Review. EduCause website.

Stake, J. (2021, January 22). Padlet For teachers: The best tips, tricks, and ideas for your classroom. We Are Teachers. We Are Teachers website.

PebblePad at Langara

What is PebblePad*?

PebblePad logo

PebblePad is Langara’s online portfolio and experiential learning platform. Digital portfolios, or ePortfolios, are powerful tools for learning, assessment, and career development because they enable users to document their skills, learning, and creativity, as well as reflect on what/how/why they learn. Using PebblePad, students can create portfolios, blogs, basic webpages, online collections of files, formal and informal reflections, action plans, and more. For authentic and scaffolded experiential learning, PebblePad is also a great fit.

How Might it Be Used Within a Course or Formal Learning Experience?

PebblePad is being used in many practicum and clinical courses at Langara. Students use interactive digital workbooks to document their experiences and demonstrate what they have learned. Links to these workbook assignments are then shared with faculty for feedback and assessment.

For programs where students have more open-ended and/or creative assignments, classic portfolios can be created on PebblePad where students document, showcase, and reflect on their creative work. This type of assignment empowers students to design and collate content ranging from text and hyperlinks, to images and video.

To find out more about the possibilities, we encourage you to go to the PebblePad Community Learner Showcase to explore some of the work being done at other institutions.

Why Use PebblePad?

PebblePad is student-owned. Once a student takes a course using PebblePad, they will be issued a PebblePad account that they will have for their entire time at Langara and beyond.  This makes it a great tool for them to make connections across their learning journey, and it can support the transition to further studies or employment.

Research indicates that using digital portfolios like PebblePad within courses and programs also seems to advance student retention and success (Eynon, Gambino, & Török, 2014). Proponents theorize that ePortfolios are beneficial because they support learning in the following ways:

  • learning can be made visible, including through reflection activities
  • connections can be made across and between academic (course, program), extracurricular (work experience, volunteering), and personal (family, community life) learning
  • personal, academic, and professional identity construction can be supported
  • social pedagogies can be employed, supporting group work, peer feedback, mentorship, etc.
  • competencies – within and outside of formal academic courses – can be documented and assessed

Want to Learn More?

If you are interested in learning more about PebblePad, contact EdTech to talk to an Advisor. Please also check the EdTech calendar for upcoming workshops.

Email edtech@langara.ca for more information.


*PebblePad is now the preferred ePortfolio technology of BCNET.

References

Blake Yancey, K. (Ed.). (2019). ePortfolio as Curriculum: Models and Practices for Developing Students’ ePortfolio Literacy. Sterling, VA: Stylus.

Eynon, B., & Gambino, L.M. (2017). High-Impact ePortfolio Practice: A Catalyst for Student, Faculty, and Institutional Learning. Sterling, VA: Stylus.

Eynon, B., Gambino, L. M., & Török, J. (2014). What difference can ePortfolio make? A field report from the Connect to Learning Project. International Journal of ePortfolio, 4(1), 95-114. https://www.theijep.com/pdf/IJEP127.pdf

Penny Light, T., Chen, H., & Ittelson, J. (2011). Documenting learning with ePortfolios: A guide for college instructors. San Francisco, CA: Jossey-Bass.

Watson, C. E., Kuh, G. D., Rhodes, T., Light, T. P., & Chen, H. L. (2016). Editorial: ePortfolios – The Eleventh High Impact Practice. International Journal of EPortfolio6(2), 65–69.

Yeo, N., & Rowley, J. (2020). ‘Putting on a Show’ Non-Placement WIL in the Performing Arts: Documenting Professional Rehearsal and Performance Using Eportfolio Reflections. Journal of University Teaching & Learning Practice, 17(4).

Increasing Accessibility of Course Content: Tips for using the Brightspace Accessibility Checker

Increasing accessibility of course content: Tips for using the Brightspace Accessibility Checker

Web Accessibility refers to the inclusive practice of making websites and online content usable by people of all abilities and disabilities. Use the Brightspace Accessibility Checker to identify common accessibility issues on your Brightspace course pages.

How to run the Accessibility Checker

The Check Accessibility button is located on the bottom right of the Brightspace HTML EditorThe Accessibility Checker is available within the HTML Editor. When you are in edit HTML mode, the checker is located on the bottom right corner of the Editor, next to the Spellcheck button.

Alternative Text

The most common accessibility issue is missing image alternative text (alt text). Alt text is background code added to a digital image that allows a screen reader or other assistive technology to describe the image’s content and meaning to those who cannot see the image or may be unable to process the image due to a cognitive disability. When alt text is missing, the Brightspace Accessibility Checker will flag the issue, noting Images must have an alternative text description.

The Accessibility Checker flags missing alternative text with the message Images must have an alternative text description

How to add alt text

The easiest way to add alt text is to include it when inserting images into a Brightspace page. When you insert an image using the HTML editor, a pop-up appears, prompting you to add alt text. Brightspace add the alt text to the HTML code (e.g., <img src=”filename.jpg” alt=”Example of Microsoft Forms response results.” />).

Treat informative images as decorative by supplying an empty alt attribute or checking the box next to This image is decorative. Brightspace will add alt text of “” to indicate an empty alt attribute.

Brightspace prompts users to add alt text when inserting images

If the Accessibility Checker flags an image as missing alternative text, you can fix the issue by adding alt text inside the report panel or by adding it directly to the HTML code.

Tips for creating alt text

When deciding what to include as alternative text, imagine that you are describing the image aloud over the phone to someone who needs to understand the image.

According to WebAIM, alternative text should:

  • Be accurate and equivalent in presenting the same content and function of the image.
  • Be succinct.
  • Not be redundant or provide the same information as text within the context of the image.
  • Not use the phrases “image of…” or “graphic of…” to describe the image unless the fact that an image is a photograph or illustration, etc. is important content.

WebAIM offers a fantastic guide to creating appropriate alternative text for images.

Note: It is always a good idea to double-check the alt text included in your HTML code. An accessibility checker only indicates whether alt text is included, it cannot check the quality or usability of the alt text.

Contrast

Low colour contrast is another common accessibility issue. Insufficient contrast between the foreground and background reduces readers’ ability to perceive content on the page.

Insufficient colour contrast is flagged by the checher

The W3C Web Content Accessibility Guidelines 2.0 define specific contrast ratios that must be met in order to comply at particular levels. To meet the guidelines, text or images of text must have a contrast ratio of at least 4.5:1 (or 3:1 for large text).

The maximum contrast is black vs. white but other options are available such as navy/white, cream/dark brown, yellow/black, and similar color schemes. A colour scheme is considered legible if it can be read in grayscale/black and white mode.

The Accessibility Checker flags:

  • Large text that does not have a contrast ratio of at least 3:1.
  • Visual presentation that does not have a contrast ratio of at least 4.5:1.

Adjusting contrast

Try using the WebAIM Color Contrast Checker to adjust the contrast by lightening or darkening elements.

Headings

A heading describes the content that follows it, giving uses a sense of the page’s organization and structure. Headings give sighted users a way to quickly find what they want on the page.

If the underlying code for a page’s headings is correct, screen reader users can also benefit from headings. Screen reader and other assistive technology users can also skip from heading to heading.

The checker flags improperly applied heading styles

How to create headings in Brightspace

Select the text then set it to the proper heading using the Format dropdown menu. Do not skip levels. If the heading levels are not in the correct order, the Accessibility Checker will flag the issue.

Tips for creating headings

    • Headings are ranked <h1> through <h6>.
    • Every page should have an H1 heading, representing the most important idea on the page, and sub-sections organized with <h2> level headings. Those sub-sections can themselves be divided with <h3> level headings, and so on.
  • Headings need to be used in the correct order.
  • Do not skip heading levels to be more specific (for example, do not skip from <h2> to <h5>).
  • Do not select heading levels based on their appearance. Select the appropriate heading rank in your hierarchy.

Note: The Brightspace Accessibility Checker will not flag a page without headings; it only flags incorrectly ordered headings. 

Lists

Lists are great from an accessibility standpoint because they provide structured order to content in a linear fashion. Lists are recommended as potential replacements for simple tables, as tables can be more challenging to navigate. Properly code the lists so that they convey the hierarchical content structure to screen reader users. Use unordered lists <ul> when there is no specific order intended for the list you are creating. Use ordered lists <ol> when there is a defined sequence or order for the list.

The checker flags text that appears to be a list but has not been properly styled.

The Brightspace Accessibility Checker will flag items that appear to be a list but do have  unordered or ordered list styles applied.

How to use lists

Select the items, then choose the Unordered List icon if the order does not matter, or select Ordered List from the dropdown menu if it is sequential.

Use bullets for unordered lists and numbers for ordered lists

Descriptive Hyperlink Text

The Accessibility Checker cannot assess whether links are meaningful or accessible; however, making hypertext links accessible is one of the most basic and most important aspects of web accessibility.

How to create a hyperlink

Select Insert Quicklink icon, then select URL in the popup window, enter the URL and a title that describes the link’s destination.

Suggestions for creating meaningful and accessible hyperlinks

  • Link text should be unique within a page, should be meaningful when read out of context, and should help users to know something about their destination if they click on it. Link text such as “Click here” and “More” fail to meet these criteria.
  • Avoid providing two links right next to each other that point to the same location (it can be confusing for screen reader users).

To request help with improving the accessibility of your course content, email edtech@langara.ca

New Ed Tech Online Course Assistance Program

Have you heard about Ed Tech’s Online Course Assistants (OCA) pilot program? We have hired and trained three Co-op students who can provide online course support for your department or individual instructors.

Our Co-op students are all hard-working and detail-oriented, with strong technical skills.  They have had specific training on BrightSpace, Kaltura Capture, and Adobe Acrobat, in addition to the technical skills they acquired prior to joining Ed Tech, such as video editing.  They are very keen to take some of the non-teaching and non-marking work off your plate, including helping to get test banks into Brightspace for Fall final exams, and helping you prep your Spring 2021 courses.

Through the OCA pilot program, the OCAs can:

  • help you to organize and populate your courses, making sure there is a consistent look and feel to everything;
  • ensure course links are working, or add in new links;
  • organize your modules and submodules so that students find it easier to navigate the course, with the likelihood that you’ll have less student confusion and fewer inquiries to deal with;
  • turn your printed handouts into interactive PDF fillable files that students can type in and upload to assignment folders – no scanners needed;
  • edit your videos, such as breaking them into chapters and adding titles;
  • assist you with other functions as appropriate.

All we need is content, such as Word or PDF documents or your exam in a Word format and we’ll work with the Online Course Assistants (OCAs) to upload this content to your course. In most situations the OCAs will work in a course that isn’t live, thus protecting your students’ data. If they must work in a live course, they will sign a non-disclosure form.

Taking advantage of the OCA program may help you enjoy your winter break more. Please contact us edtech@langara.ca  to find out more about how we can help.

Who are the OCAs?

Picture of Fredrick Chen

Frederick Chen

Frederick is a 4th year BBA Marketing Management Student. He has worked in technology sales, acquiring advanced knowledge of productivity software and file transfer support, as well as developing excellent customer service skills.  He has advanced Excel skills, as well as experience course building in BrightSpace, and making Adobe fillable files. Frederick is excited about this opportunity to provide support for instructors in their transition to an online teaching environment.

Picture of Michael Cui

Michael Cui

Mike is a 4th year BBA Student. Mike is detail-oriented and highly committed to excellence in project execution.  Well-versed with educational technologies like Brightspace, Kaltura, and Zoom, he also has excellent skills converting handouts into fillable PDF documents. He looks forward to helping relieve some of the pressure instructors are experiencing because of the transition to online course delivery.

Photo of Lily Tran

Lily Tran

Lily is a 4th year accounting student who is proficient in Microsoft Office, BrightSpace, WordPress, and Sage 50, as well as video editing. She has 3 years’ experience as a Langara accounting marker, a position that has honed her attention to detail. She looks forward to helping instructors save time and create a better distant learning experience.

Video Introduction to the OCAs

Video Showcasing OCA Skills