EdTech Monthly Tip

The New Quiz Experience

Brightspace has released a New Quiz Creation Experience, a similar appearance to what you find in the Assignment tool. Over the coming weeks, we’ll highlight a couple changes that you should be aware of.

Changes to Timing & Display View

By default, no time limit is set on new quizzes. Use Time Limit to set the amount of time students are given to complete the quiz once they have started it.

To set a time limit:

  • Click Set Time Limit to add a countdown clock to the quiz. If this box is left unchecked, no time limit will be set. Be aware that setting a time limit does not, on its own, enforce the time limit — it only shows a countdown clock for the student.

Timer Settings

Timer settings are made once “Set Time Limit” is checked. Click on Timer Settings to control how a quiz behave once students exceed the time limit.

Timer setting options include:

  • Automatically submit the quiz attempt
    • This is the default on all new quizzes if the “Set Time Limit” box is checked. Quiz auto-submission automatically hands in quizzes on enforced time limit quizzes at the end of the set time.
  • Flag as “exceeded time limit” and allow the learner to continue working
    • This option allows the student to continue working but adds an “exceeded time limit” notation to the quiz when submitted.
  • Do nothing: the time limit is not enforced
    • The countdown clock is made available to students, but no time limit is enforced.

Old and New Experience Comparison

Previously Available OptionNew Behaviour
Prevent the student from making further changesAutomatically submit the quiz attempt
Allow students to continue working but automatically score zeroAutomatically submit the quiz attempt  
Allow the student to continue workingFlag the attempt as exceeded time limit and allow the learner to continue working
A quiz that has a grace periodGrace period no longer available. Quiz now uses only the time limit set

Adding Time to a Quiz in Progress

Changes to the timer may result in the need to add time to a Brightspace quiz in progress. Adding time is done through the Special Access feature and requires students refresh their browsers for the new time setting to take effect.

To add time to a Quiz in progress:

  • Navigate to the Brightspace Manage Quizzes tab and click on the quiz name to edit.
  • Select Availability Dates & Conditions.
  • Click on the Manage Special Access link.
  • Ensure “Allow selected users special access to this quiz” is selected.
  • Click on Add Users to Special Access.
  • Scroll down to the Timing sections and check the box for “Override time limit.”
  • Enter the new time limit in the minutes field.
  • Scroll down to the Users section and check all the students’ names.
  • Click Save.
  • Click Save and Close.
  • Tell your students to refresh their browsers.

Watch Changes to the Brightspace Quiz Experience (video, 8:56) to learn more about the recent tool updates.

EdTech Tools and Privacy

Peer Assessment and Privacy Risks

Instructors, have you considered how privacy, security, and confidentiality apply to teaching and learning, specifically the data you gather as part of assessment?

To support teaching and learning, you gather and analyze data about students all year and in many ways, including anecdotal notes, test results, grades, and observations. The tools we commonly use in teaching and learning, including Brightspace, gather information. The analytics collected and reports generated by teaching and learning tools are sophisticated and constantly changing. We should, therefore, carefully consider how we can better protect student data.  

When considering privacy, instructors should keep in mind that all student personal information belongs to the student and should be kept private. Students trust their instructors to keep their data confidential and share it carefully. Instructors are responsible for holding every student’s data in confidence.  This information includes things like assessment results, grades, student numbers, and demographic information. 

Although most students are digital natives, they aren’t necessarily digitally literate. Instructors can ensure students’ privacy by coaching them about what is appropriate to share and helping them understand the potential consequences of sharing personal information. 

One area of teaching and learning in which you may not have adequately considered privacy or coached students to withhold personal information and respect confidentiality is peer assessment. Peer assessment or peer review provides a structured learning process for students to critique and provide feedback to each other on their work. It helps students develop lifelong skills in assessing and providing feedback to others and equips them with skills to self-assess and improve their own work. However, in sharing their work, students may also be sharing personal identifying information, such as student numbers, or personal experiences. To help protect students’ personal information and support confidentiality, we recommend that you consider the following points.

Privacy Considerations for Peer Assessment 

  • If student work will be shared with peers, tell students not to disclose sensitive personal information. Sensitive personal information may include, for example, medical history, financial circumstances, traumatic life experiences, or their gender, race, religion, or ethnicity. 
  • Inform students of ways in which their work will be assessed by their peers. 
  • Consider having students evaluate anonymous assignments for more objective feedback.  
  • Coach students to exclude all identifiable information, including student number. 
  • If students’ work is to be posted online, consider associated risks, such as
    • another person posting the work somewhere else online without their consent; and
    • the content being accessed by Generative AI tools like ChatGPT that trawl the internet to craft responses to users’ queries.

This article is part of a collaborative Data Privacy series by Langara’s Privacy Office and EdTech. If you have data privacy questions or would like to suggest a topic for the series, contact Joanne Rajotte (jrajotte@langara.ca), Manager of Records Management and Privacy, or Briana Fraser, Learning Technologist & Department Chair of EdTech.

Learning Labs

Introducing Learning Labs

Learning Labs are interactive, focused, and supported learning sessions where you can learn how to implement Langara’s teaching and learning technologies and tools. Capacity is limited to ensure all attendees have an opportunity to ask questions, try out tools, and receive support. Support in the room will reflect the technology, tool, and learning outcomes; however, you can expect to interact with EdTech Advisors, Specialists, and Technologists as well as TCDC Curriculum Consultants. The Labs are an opportunity to implement something new or improve what already exists with experts who can answer technical questions and provide advice.

Fall Learning Lab session topics include:

Brightspace HTML Templates

After participating in this lab, participants should be able to:

  • Use the Brightspace HTML editor.
  • Explain the benefits of using the Brightspace HTML templates.
  • Apply the templates to a new Brightspace HTML page.
  • Apply the latest version of the template to an existing Brightspace HTML page.
  • Mix and match HTML elements—such as image placement, accordions, callouts, tables, and tabs—from the various templates.

Adding closed captions to a video in Brightspace

After participating in this lab, participants should be able to:

  • Upload a video to MediaSpace.
  • Add closed captions to a video.
  • Use the MediaSpace captions editor.
  • Use the OneDrive captioning tool.
  • Embed a video in a Brightspace course file.

Creating an accessible Word document

After participating in this lab, participants should be able to:

  • Employ plain language.
  • Select styles that improve legibility of text.
  • Structure a document.
  • Create accessible hyperlinks and tables.
  • Add alternative text to visual content.
  • Use the built-in accessibility checker.

Improving the accessibility of existing PowerPoint slides

After participating in this lab, participants should be able to:

  • Avoid the most common PowerPoint accessibility mistakes.
  • Use the accessibility checker and make corrections.
  • Apply templates.
  • Apply structure.
  • Select accessible fonts and font styling.
  • Employ accessible use of colour.
  • Add alternative text to images.
  • Write meaningful hyperlink text.

Save time marking with Rubrics

After participating in this lab, participants should be able to: 

  • Define the purpose of the assignment or assessment 
  • Decide which type of rubric will be used with assignments
  • Create statements of expected performance at each level of the rubric 
  • Transfer analog rubrics into a digital version on Brightspace 
  • Associate their rubric with the assignment in Brightspace 


PebblePad Brief: Feedback Options

Langara’s pilot of the ePortfolio learning platform, PebblePad, is now in its second year. This is the second in a series highlighting some of the platform’s features. Whether you’re already using PebblePad or considering using it at some point in the future, our hope is that the PebblePad Brief series extends your understanding of the platform’s capabilities.
This month’s “Brief” is going to focus on the variety of feedback options available within PebblePad, and how they can benefit students and instructors. Whether you’re looking for a tool to give formative or summative feedback, PebblePad has multiple options.

Feedback in Brightspace Versus PebblePad:

PebblePad functions differently than Brightspace when it comes to assignments. In Brightspace, students usually submit a file by a due date and the instructor has no way of giving formative feedback on the developing assignment unless they ask students to submit a draft of their work. PebblePad, on the other hand, doesn’t work with file submissions but with shared links. If an assignment is set up for auto-submission, the instructor is able to see the students’ work in real time as soon as they start it. This enables instructors to give formative feedback any time prior to a due date, as well as summative assessment after a due date. Further, unlike Brightspace, students have access to the feedback after their course finishes and even after they graduate.

Feedback Options:

Simple Comments:

  • The simplest way to give feedback in PebblePad is through general comments. To use the comment feature, a student shares a link with someone else. When that person clicks on the link, there’s a comment icon on to the top-right which can be used to by instructors, mentors, or peers to provide feedback. The student can reply to the comments so feedback is potentially dialogic.

Adding Comments Via the Comment Icon


Feedback Comments:

  • By using the tools in the formal assessment part of the platform called ATLAS, there are extended options. Here we can to a specific answer, a page, or the entire assignment. If an instructor will be using the same comments for many students, feedback statements can be created that will be available when marking. Any comments added via ATLAS have the advantage that they are only visible to the student and won’t be seen by anyone they share their work with. When assessing in ATLAS, instructors have the option to release feedback as it’s added, or hold all feedback for later release so that the whole class receives it at the same time.

Adding Block Feedback Comments via ATLAS

 Assessor Fields:

  • When creating scaffolded learning activities for students, assessor fields can be inserted right into body of the assignment. It’s possible to assign “blocks” or sections to either the students or the instructor to complete. Instructors can be assigned text fields, drop-downs, radio buttons, checkboxes, and rubrics that only they can complete (the student will see them but not be able to complete them). These fields are easy for instructors to find when they’re assessing, and easy for the student to see when they’re looking for feedback. This type of feedback will always be visible so is generally used for activities to develop knowledge or skills, rather than assignments that might be used as a showcase in future.

Adding Feedback via Assessor Fields

Feedback Templates:

  • These are very similar to rubrics in Brightspace, and can be created and used to assess students’ work in ATLAS. They can include any or all of: clickable rubric components, comment fields, radio buttons, drop-downs, and checkboxes. Because this feedback will only be visible to the student, this is a better option to use with assignments that the student might want to use as a showcase to show to others.

Providing Feedback via Feedback Templates

Grades:

  • Assignments can also be graded in ATLAS. Grading is flexible as instructors can enter percentages, letter grades, or even pass/fail wording such as “meets expectations/does not meet expectations”. Although PebblePad is not currently integrated with Brightspace, it is possible to get a CSV file of all grades and easily transfer them to a gradebook.

    Adding Grades

Feedback Longevity:

  • We all know that it takes time and effort to provide meaningful feedback to learners. One of the advantages of using PebblePad is that the students have access to feedback long after the course ends and even after they graduate as students can get an alumni account. This will help them make meaningful connections between assignments, between courses, and between studies and career. Feedback can be fed forward.

If you have questions about PebblePad or any other learning technology that EdTech supports, we can be contacted at edtech@langara.ca

Embedding Library Media

Due to issues with certain browsers and browser versions, some Brightspace users may encounter problems loading embedded library (EZProxy) media in your Brightspace course. Users should always check their browser’s cookie settings (see the “3rd-party cookies problem” item on the Help with Student Learning Tools FAQ) to ensure that they aren’t actively blocking the content, but this method doesn’t always work.
To make sure that everyone in your course can access library media items, please include the following when embedding library media in your course.

    1. A direct link to the video or audio that loads in a separate window or tab. When creating the Quicklink, please choose “New Window” from the Target options.
      Screencap of the left end of the format options bar in the HTML Editor, with the cursor pointing at the Quicklink button. 
      screencap of the Insert Quicklink options window


      If you are creating a link directly from Content, using Upload/Create > Create a Link, please make sure to choose the “Open as External Resource” option.
      screencap of the Upload/Create menu, with the Create a Link option selected
       
      Screencap of the options window for the Create Link option in Content


  1. It’s also a good idea to include basic Title/Author/Publication information for the media, if applicable; when using embed code, please include this before or after the video. This allows students to search for the content on their own, outside of Brightspace.

PebblePad Briefs: Interactive Curriculum Materials

Langara’s pilot of the ePortfolio learning platform, PebblePad, is now in its second year. This will be the first in a series highlighting some of the platform’s features. Whether you’re already using PebblePad or considering using it at some point in the future, our hope is that the PebblePad Briefs extend your understanding of the platform’s capabilities.
Our first “Brief” is going to focus on what components you can include in learning materials.  Although ePortfolio (electronic/digital portfolio) technology is a tool for students to showcase their work, that’s not all PebblePad can do. In fact, it’s also a great platform to build scaffolded learning activities.
When building learning resources in PebblePad, content can be multimodal and responses can be dynamic. A learning activity, for example, might have text for students to read, a podcast for them to listen to, and a video for them to watch.  You could then add interactive fields for the students to respond to this content by checking their comprehension, rating their response, reflecting on what they’ve learned, or planning their next steps – all on the same page (or in a separate tab or resource if you’d prefer).
Content types that can be added to a learning resource include:

  • text
  • image
  • audio
  • video
  • links to other resource

Interactive response fields that can be added for students to actively engage in learning can include:

  • text fields (single or multi-line)
  • radio buttons (one answer only), checkboxes (multiple answers possible) or drop-downs
  • ratings (binary, Likert, numeric)
  • fillable tables
  • rubrics
  • add evidence buttons (allows comment or file upload)
  • date pickers
  • signature fields

Those at Langara already using PebblePad have provided feedback that the templates look great and, even more importantly, students find them easy to use.
It’s also easy to share these learning resources with your students… but we’ll leave that for another PebblePad Brief.
If you have questions about PebblePad or any other learning technology that EdTech supports, we can be contacted at edtech@langara.ca

PebblePad template with text and video in the top half and questions for students to answer in the bottom half
PebblePad Interactive Worksheet

PebblePad Brief: Interactive Curriculum Materials

Langara’s pilot of the ePortfolio learning platform, PebblePad, is now in its second year. This will be the first in a series highlighting some of the platform’s features. Whether you’re already using PebblePad or considering using it at some point in the future, our hope is that the PebblePad Brief series extends your understanding of the platform’s capabilities.
Our first “Brief” is going to focus on what components you can include in learning materials.  Although ePortfolio (electronic/digital portfolio) technology is a tool for students to showcase their work, that’s not all PebblePad can do. In fact, it’s also a great platform to build scaffolded learning activities.
When building learning resources in PebblePad, content can be multimodal and responses can be dynamic. A learning activity, for example, might have text for students to read, a podcast for them to listen to, and a video for them to watch.  You could then add interactive fields for the students to respond to this content by checking their comprehension, rating their response, reflecting on what they’ve learned, or planning their next steps – all on the same page (or in a separate tab or resource if you’d prefer).
Content types that can be added to a learning resource include:

  • text
  • image
  • audio
  • video
  • links to other resources

Interactive response fields that can be added for students to actively engage in learning can include:

  • text fields (single or multi-line)
  • radio buttons (one answer only), checkboxes (multiple answers possible) or drop-downs
  • ratings (binary, Likert, numeric)
  • fillable tables
  • rubrics
  • add evidence buttons (allows comment or file upload)
  • date pickers
  • signature fields

Those at Langara already using PebblePad have provided feedback that the templates look great and, even more importantly, students find them easy to use.
It’s also easy to share these learning resources with your students… but we’ll leave that for another PebblePad Brief.
If you have questions about PebblePad or any other learning technology that EdTech supports, we can be contacted at edtech@langara.ca

PebblePad template with text and video in the top half and questions for students to answer in the bottom half
PebblePad Interactive Worksheet

Discontinuing LockDown Browser

LockDown Browser
As the spring semester winds down, you may now be shifting your focus to final exams and wondering if LockDown Browser will be available for the upcoming exam period. After over six months of troubleshooting, it has become clear that, unfortunately, LockDown Browser is no longer compatible with Langara’s computing infrastructure.
While this announcement may disappoint some faculty members, please know that this decision was not taken lightly. There were several key issues that contributed to our decision:

  • Random Freezing on Citrix Computers

    Since LockDown Browser was most frequently used during midterm and final exams, the fact that it might freeze up a Citrix computer during these critical and stressful times made it an unreliable solution—for both instructors and students. Furthermore, the conditions under which Citrix computers froze were quite random. This made it challenging to identify the specific circumstances / scenarios that might trigger these freezes. And given the prevalence of Citrix computers across Langara’s campus, EdTech and IT needed to ensure a solution that would work with all of Langara’s computers.

  • Only an Older Version Worked on Citrix Computers

    In trying to find a solution, EdTech discovered that only an older version (from Summer 2021) worked on the Citrix computers and this older version is no longer supported by Respondus, LockDown Browser’s parent company. Taking into consideration future support and compatibility issues, this was not a viable solution.

  • Reduced Use of LockDown Browser Post-Pandemic

    During the pandemic, many instructors revamped their online exams and quizzes to address academic integrity in new, innovative, and creative ways. As a result, fewer faculty required LockDown Browser after our return to campus.

That said, we are committed to supporting our faculty and instructional staff. So, if you are still concerned about academic integrity, please feel free to read our article, Designing Online Exams / Quizzes, and/or contact us. We are more than happy to help you explore and implement alternative online exam / quiz options!

Turnitin and Student Privacy

Turnitin is a text matching tool that compares students’ written work with a database of student papers, web pages, and academic publications. The two main uses for Turnitin are: 1) for formative or low-stakes assessment of paraphrasing or citation; and 2) for prevention and identification of plagiarism.

Privacy Concerns

When an assignment is submitted to Turnitin for a text matching report, the student’s work is saved as part of Turnitin’s database of more than 1 billion student papers. This raises privacy concerns that include:

  • Students’ inability to remove their work from the database
  • The indefinite length of time that papers are stored
  • Access to the content of the papers, especially personal data or sensitive content, including potential security breaches of the server

Copyright Concerns

In addition, saving a student’s work on Turnitin’s database without their consent may put an institution at risk for legal action based on Canadian copyright law (Strawczynski, 2004). 

Guidelines for Using Turnitin

To mitigate these concerns, we recommend the following guidelines for all instructors using Turnitin:

  1. Be clear and transparent that you will be using Turnitin. Even if a course outline includes a statement indicating that Turnitin will be used in a course, we recommend not relying on that statement alone. Ideally, instructors should also explain to students that their papers will be stored on the company’s database and ask for their consent. If they don’t provide consent, have an alternate plan (see below).
  2. Decide whether or not students’ work needs to be saved on Turnitin’s database. The default is for all papers to be saved, but this can be changed. Not saving papers to the database means that those papers can’t be used to generate future similarity reports, but it does remove the privacy and copyright concerns.
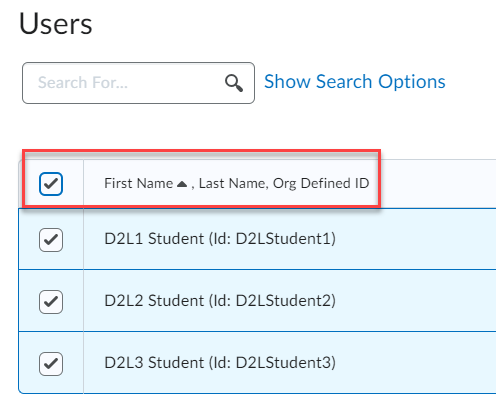
  3. Coach students to remove identifying details. If the students’ submissions will be added to Turnitin’s database, make sure you get them to remove any personal information from their assignment, including their name, student number, address, etc. Meta-data that is embedded should also be removed (e.g. in track changes or file properties). If you’re having them submit to an assignment folder on Brightspace, their name will be with their submission so it shouldn’t be a problem if it’s not on the paper itself.
  4. Don’t run a similarity report for an individual student without their knowledge. Ethical use of Turnitin occurs when it is transparently and equally used for all students. Running a report only on a specific student’s work without their knowledge or consent is not transparent or equal.
  5. Consider whether or not the assignment is appropriate for Turnitin. If the students need to include personal or sensitive information in the assignment, Turnitin should probably not be used. If you do decide to use it, the students’ papers should not be stored in the database.
  6. If contacted by another institution, be cautious about revealing student information. If at some point in the future there is a match to one of your student’s papers in Turnitin’s database, Turnitin does not give the other institution access to the text of the paper but will provide the instructor at the other institution with your email. If you are contacted about a match, consider carefully before forwarding the paper or any identifying details about the student to the other institution. If you do want to forward the paper, you should obtain the student’s consent.

Alternatives to Confirm Authorship When Turnitin is Not Used

If a student objects to having their paper submitted to Turnitin, or if the assignment is not appropriate for submission to Turnitin because it includes personal or sensitive content, you can increase confidence that the students are doing their own work in other ways. For example, an instructor can require any or all of the following:

  • submission of multiple drafts
  • annotation of reference lists
  • oral defence of their work

Requiring students to complete any or all of these will increase the student’s workload which would mean that students who opt out of Turnitin aren’t at an advantage over students who opt in.

Helping Students Make Turnitin Work for Them

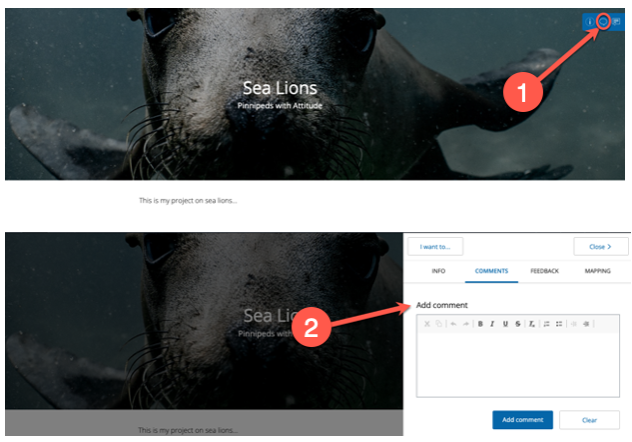
If you’re using Turnitin, it’s highly recommended that you adjust the settings to allow the students to see their similarity reports. You may need to teach students how to interpret the reports if they haven’t learned how to do so from a previous course. Turnitin’s website has resources if you need them (https://help.turnitin.com/feedback-studio/turnitin-website/student/student-category.htm#TheSimilarityReport) and you can also point your students to the Turnitin link on Langara’s Help with Student Learning Tools iweb (https://iweb.langara.ca/lts/brightspace/turnitin/). Finally, remember that these reports won’t be helpful to a student if they’re not given the chance to revise and resubmit after they see the report. In Brightspace, we recommend that instructors set up two separate assignment folders with Turnitin enabled: one for their draft and one for the final submission.

Have questions?

If you need support with Turnitin, please contact edtech@langara.ca

References

Strawczynski, J. (2004). When students won’t Turnitin: An examination of the use of plagiarism prevention services in Canada. Education & Law Journal 14(2), 167-190. 

Vanacker, B. (2011). Returning students’ right to access, choice and notice: a proposed code of ethics for instructors using Turnitin. Ethics & Information Technology, 13(4), 327-338.

Zaza, C., & McKenzie, A. (2018). Turnitin® Use at a Canadian University. Canadian Journal for the Scholarship of Teaching and Learning, 9(2). https://doi.org/10.5206/cjsotl-rcacea.2018.2.4

Zimmerman, T.A. (2018). Twenty years of Turnitin: In an age of big data, even bigger questions remain. The 2017 CCCC Intellectual Property Annual. Retrieved from https://prod-ncte-cdn.azureedge.net/nctefiles/groups/cccc/committees/ip/2017/zimmerman2017.pdf