Ed Tech Sandbox Sessions

What is an Ed Tech sandbox?

Playground

The Ed Tech sandbox is a small, contained space to safely learn and practice using various educational technologies and tools. Participants may explore a specific tool or a range of tools that can be adopted to support a specific teaching or learning goal. To create a safe environment and allow time for practice, enrollment is limited to 10 participants.

Do you want to gain confidence with teaching & learning tools?

These weekly sessions are an opportunity to develop an understanding of how technologies and tools can be effectively used in teaching, learning, and assessment before introducing them in the classroom.

When are the sessions held?

Ed Tech sandbox sessions are planned for every Friday from 11:00 am – 12:30 pm. Participants choose whether to attend via Zoom or in-person.

Upcoming sessions

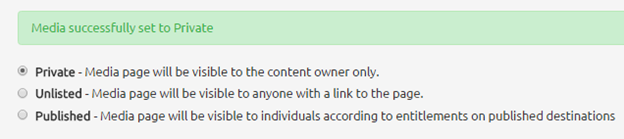
October 22nd – Kaltura Mediaspace and Capture

Kaltura Capture controls.

Using video in your course is a great way to engage students and present learning content in alternative ways, following the principles of UDL.

In this session we will demonstrate recording your screen, using the Kaltura Capture application to record your screen, and uploading the recording to Mediaspace. There will be lots of time to ask questions and play.

October 29th – Brightspace Rubrics Tool

""A Brightspace rubric can:

  • Be reused (they can be copied and used in multiple course shells).
  • Set out expectations and criteria for students.
  • Provide grading transparency and clear feedback.

Join us to learn how to associate rubrics with assignments, graded discussion topics and grade items.

Increasing accessibility of course content: How to create closed-captioned videos

Increasing accessibility of course content: How to create closed-captioned videos

What are closed captions?

Closed captions are a transcription of dialogue that is added to a video or digital presentation and, when turned on, appears as text on the bottom of the screen. The primary purpose of captions is to support people who are deaf or hard-of-hearing. However, captions have also been shown to support the learning of students who speak English as an additional language, students with learning disabilities, and students who are new to a discipline and may be unfamiliar with the jargon and unique terminology.

Share closed-captioned videos with students in four easy steps

Step one: Upload your video to Kaltura MediaSpace

Before you can add closed captions to a video you will need to upload it to your MediaSpace library. If you are unfamiliar with uploading videos, click through the steps below. If you have experience with MediaSpace, skip ahead to find out how to add closed captions.

Step two: Add and edit closed captions in Kaltura MediaSpace

The following video will walk you through the steps of ordering and editing machine-generated closed captions in MediaSpace.

Direct video link: Kaltura MediaSpace: Adding closed captions

Step three: Publish your video in Kaltura MediaSpace

Newly uploaded media is set to Private by default so after adding closed captions, you will need to publish your video.

Setting a video to Unlisted allows you to share your video with students but makes it unsearchable. Setting a video to Published allows you to share your video or make it available in a Channel or playlist.

""Save the changes, and then Click Go To Media to view the video, or Go To My Media to see the video in your MyMedia library.

Step four: Share your video with your students in Brightspace

You are now ready to share your closed-captioned video with students.  In Brightspace, you can insert Kaltura videos anywhere you find the HTML Editor.

End-of-Semester Sharing Session

On Friday, November 27th from 10:30 until 12:00, Ed Tech is hosting an End-of-Semester Sharing Session and we would love for you to participate. 


How can you participate? 

Share your tool or activity

If you have adopted a tool or educational technology-based activity this semester that is effective for both you and your students and you would like to share it with others, we invite you to share. 

Each Ed Tech tool/activity show & tell can be a few minutes long and up to 5 minutes and requires no formal preparation. If you would like, you can share a screenshot or share your screen to show us your activity, but it’s not absolutely necessary.  

To sign-up as a presenter, email Mirabelle Tinio (mtinio@langara.ca) or Briana Fraser (bfraser@langara) and let us know what tool or activity you plan on sharing. 

Ask questions and help solve issues

If you are looking to solve an issue with a tool or educational technology-based activity, we invite you to attend. 

Through sharing our successes and challenges, we hope to brainstorm solutions we can test next semester. 

To sign-up as an audience member, sign-up on the iWeb event page. 

We hope to see you then. 

A Curated List of Ed Tech Articles

A Curated List of Ed Tech Articles

""Whether you are on your NID and preparing for the spring semester or you are currently tackling your debut semester teaching remotely online, this list has something useful for you. In this short curated collection of articles, you will find practical tips for the use of educational technology in online classes, lessons learned and opportunities made possible by the pivot to remote teaching and food for thought related to the use of tech for teaching and learning.

Ideas for Remote Online Classes

""“Structuring Synchronous Classes for Engagement” by Bonni Stachowiak suggests how one can structure a 50-minute online synchronous session followed by an after-party office hour.

Zoom to the next level: Active learning in the virtual classroom An openly licensed Pressbook from Indiana University.

From note-taking tools, to online book creation, to 3D modelling tools, you’ll find a plethora of free tech tools in a “Typology of Free Web-based Learning Technologies” by Matt Bower and Jodi Torrington.

“7 High-impact evidence-based tips for remote online teaching” by Youki Terada offers ideas on organizing your virtual learning space and time, and other simple but powerful practices.

Lessons Learned

""The pandemic is forcing many instructors to rethink and sometimes reinvent their teaching practices. Here are one instructor’s reflections:

“What an Ed-Tech Skeptic Learned About Her Own Teaching in the Covid-19 Crisis” by Manya Whitaker

Nine ways online teaching should be different from face-to-face by Jennifer Gonzalez (Cult of Pedagogy podcast).

For certain courses, technology may be a learning outcome, but for most courses, it isn’t, so it’s useful to be reminded that it’s a tool and re-direct our attention to how we can effectively achieve our learning outcomes.

The images gives examples of how technology can be used as a tool, not a learning outcome.

General Guidelines for using Zoom

Zoom is a modern web-based video communication platform that can be used to introduce a synchronous (real-time) element to online teaching and learning. For example an instructor could use Zoom to conduct online office hours or use the breakout rooms functionality for student group-work.

It takes commitment from all participants in a Zoom session — instructors and students — to develop and maintain a positive learning environment. Everyone is responsible for creating a safe and inclusive collaboration space when using Zoom and is expected to behave in a manner that is professional and ethical.

Before Using Zoom

For resources on using Zoom, visit Langara’s Zoom landing page to learn more about the functionality and use of this platform.

Ensure Zoom is accessible to the students in your classes. Synchronous learning tools often present unique challenges to students including whether they have access to devices with webcams, caps on data, internet speed and stability, finding a quiet place to participate, and the challenge of studying in different time zones. If in doubt consider using pre-recorded video instead.

If you are recording synchronous Zoom sessions, students need to be notified. Zoom recordings are to be used to support student learning only and should not be shared or used for any other purpose. Ask students to turn off their webcam and identify themselves using a first name only. If you upload the recording to Kaltura Mediaspace for sharing, make sure you delete the recording from your personal computer.

Setting up Zoom Sessions

There are a number of recommendations below on how to use Zoom effectively in teaching and learning to increase the safety and security of the learning environment.

  • Set up a password for all Zoom sessions as an added layer of security.
  • Enable the “mute upon entry” feature for your classroom participants
  • Control the chat function and disable private chats. Chats are retained if a session is recorded, and may be accessible under the Freedom of Information and Protection of Privacy Act
  • If possible, set up a co-host to help during Zoom sessions. This could be a colleague,  teaching assistant or other responsible student that can assist you to host the session. Co-hosts can help manage the chat function, set up break out rooms, and help manage the learning environment.
  • If practical, you can enable the “Waiting Room” feature – one of the most secure ways to allow only those invited to the session to attend.
  • The default screen-sharing option for educational accounts is “Host Only” – this allows only instructors to share their screen, unless they change it. If you want others to share their screen content, you can invite them during the session to do so, or via settings beforehand. See here for information on screen sharing.

Adapted from University of Calgary Guidelines for Zoom

This content is available under a Creative Commons Attribution 4.0 International License.