New Text to Speech Tools in Brightspace

EdTech is excited to announce new text to speech tools in Brightspace.

A new toolbar (pictured below) automatically appears on content pages, Quizzes, Assignments, and Discussions.

Screenshot of ReadSpeaker toolbar

The simple, intuitive interface allows for users to hear text read aloud. In Brightspace, simply select Listen and the toolbar instantly creates an audio version of text.

This tool offers students the choice of reading, listening, or both simultaneously. Allowing users choice and customization accounts for learner needs and preferences.

This tool may assist learners with:

  • Increased understanding
  • Improved reading comprehension
  • Information retention and recall
  • Vocabulary
  • Fluency and accuracy
  • Motivation and attitudes toward reading

Available user features include:

  • Customization of colour, style, and size of font
  • Choice of reading voice and speed
  • Synchronous text highlighting
  • Page masking and text-only view
  • Ability to select content to be read aloud
  • No download required
    • Learners can use this tool on campus, at home, on their phone, or on the bus

In addition to Brightspace pages, Word and PDF documents uploaded to Brightspace also have a text to speech reader option.

While a benefit to all learners, this tool is especially important to users that need content to be read aloud. The addition of text to speech is an important step in Langara’s work toward accessibility and universal design for learning.

For more information, read about the toolbar’s features or contact assistivetech@langara.

What’s an Assistive Technologist?

What’s an Assistive Technologist?

To find out the answer to this question and learn a bit about what Langara’s Assistive Technologist Team has been working on, check out the accompanying video. 

If you have any questions or would like to learn more about how the Assistive Technologist can support you and your students, please email assisitvetech@langara.ca. If you would like to demo the course, you can self-register from the Brightspace homepage. 


Captions are now automatic on all new Kaltura media

New media content added to Kaltura MediaSpace will be automatically captioned, whether uploaded via the Langara MediaSpace website at https://mediaspace.langara.ca, or via My Tools > My Media in Brightspace. These captions are machine-generated and should be available within 30 minutes of uploading your file. All media, including screen recordings, file uploads, web recordings, and most YouTube imports, will have captions added when uploaded to Kaltura. These are closed captions that can be deactivated by the media owner and when available, toggled on and off by the viewer. Existing media—uploaded before October 18th, 2022—will not have captions automatically added but you can request captions for this media.

Keep in mind, machine-generated captions are only 85% accurate and will not meet the requirements of students with closed captioning accommodations. Students requiring an accommodation will contact Accessibility Services, who will inform you directly. If you have a student that requires closed captions, edit your captions to ensure they are 99% accurate or contact Langara’s Assistive Technologist to request assistance with human-edited closed captions. 

We developed a Closed Captions slideshow (below) to provide step-by-step instructions for all you need to know about captioning your media in Kaltura MediaSpace/My Media.

Showcasing Innovative Teaching

Join us on December 8, 10 am – 12:30 pm, in C408, and be inspired! The Langara Educational Technology Instructor Gathering brings together educators to showcase their innovative work and foster dialogue and cross-college idea-sharing.

For the main event, instructors will share their teaching ideas using educational technology. Listen to talks about innovative ways to use Brightspace discussions for summative assessments, podcasting, strategies to ensure academic integrity in Brightspace quizzes, ungrading, accessibility, and more! These talks will be followed by a Q&A and a tour of EdTech’s Studio and the newly upgraded lecture theatre in A130. Refreshments and snacks will be served.

Bring a colleague to be eligible to win a draw prize. (Maximum capacity 30)

Register now to save your spot and remember to register your plus-one: Registration Link to the Instructor Gathering.

Improving Colour Accessibility for Students with Colour Deficiency

Improving Colour Accessibility for Students with Colour Deficiency

Colours as perceived by those with normal vision, deuteranoptia (green-blindness), tritanopia (blue-blindness), and protanopia (red-blindness).

Image CC by Johannes Ahlmann

Did you know that approximately 1 in 12 men is colour blind? Colour blindness — or more accurately, poor or deficient colour vision — can affect a person’s ability to distinguish between certain colors, usually greens and reds, and occasionally blues. Because colour vision deficiency reduces the number of color dimensions, it can be difficult for colour blind individuals to distinguish between certain colors. To improve colour accessibility of course content, it is important to ensure adequate colour contrast and not rely on colour alone as a means of conveying information.

Colour blind friendly alternatives

Use sufficient colour contrast

Effective contrast can make the text easier to read and images easier to see for all students. To ensure text is readable it should pass accessibility guidelines based on the combination of text colour, background colour, and text size. Test contrast using the WebAIM colour contrast checker.

Colours used to convey information on diagrams, maps, and other types of images must also be distinguishable from the background. To ensure adequate contrast use a combination of light and dark background and foreground colours.

Color combinations to avoid for people with color blindness include:

  • Red & green
  • Green & brown
  • Green & blue
  • Blue & gray
  • Blue & purple
  • Green & gray
  • Green & black

If you absolutely must use one of these combinations, adjust the contrast, making adjusting the shades so one is extremely dark, and the other extremely light.

Use colour with another cue to show emphasis or differences

Use elements such as patterns to visually distinguish information

Image source Smashing Magazine

Do not rely on colour alone to communicate meaning. Different patterns and textures can help colour-blind people further distinguish between different elements in charts and infographics.

Use color plus another element to emphasize a point or visually distinguish information differences. Emphasis elements include:

  • Bold
  • Size
  • Patterns or shapes

For more information on improving the accessibility and data visualization, visit Penn State’s Charts & Accessibility web page.

Increasing accessibility of course content: How to create closed-captioned videos

Increasing accessibility of course content: How to create closed-captioned videos

What are closed captions?

Closed captions are a transcription of dialogue that is added to a video or digital presentation and, when turned on, appears as text on the bottom of the screen. The primary purpose of captions is to support people who are deaf or hard-of-hearing. However, captions have also been shown to support the learning of students who speak English as an additional language, students with learning disabilities, and students who are new to a discipline and may be unfamiliar with the jargon and unique terminology.

Share closed-captioned videos with students in four easy steps

Step one: Upload your video to Kaltura MediaSpace

Before you can add closed captions to a video you will need to upload it to your MediaSpace library. If you are unfamiliar with uploading videos, click through the steps below. If you have experience with MediaSpace, skip ahead to find out how to add closed captions.

Step two: Add and edit closed captions in Kaltura MediaSpace

The following video will walk you through the steps of ordering and editing machine-generated closed captions in MediaSpace.

Direct video link: Kaltura MediaSpace: Adding closed captions

Step three: Publish your video in Kaltura MediaSpace

Newly uploaded media is set to Private by default so after adding closed captions, you will need to publish your video.

Setting a video to Unlisted allows you to share your video with students but makes it unsearchable. Setting a video to Published allows you to share your video or make it available in a Channel or playlist.

""Save the changes, and then Click Go To Media to view the video, or Go To My Media to see the video in your MyMedia library.

Step four: Share your video with your students in Brightspace

You are now ready to share your closed-captioned video with students.  In Brightspace, you can insert Kaltura videos anywhere you find the HTML Editor.

Increasing Accessibility of Course Content: Tips for using the Brightspace Accessibility Checker

Increasing accessibility of course content: Tips for using the Brightspace Accessibility Checker

Web Accessibility refers to the inclusive practice of making websites and online content usable by people of all abilities and disabilities. Use the Brightspace Accessibility Checker to identify common accessibility issues on your Brightspace course pages.

How to run the Accessibility Checker

The Check Accessibility button is located on the bottom right of the Brightspace HTML EditorThe Accessibility Checker is available within the HTML Editor. When you are in edit HTML mode, the checker is located on the bottom right corner of the Editor, next to the Spellcheck button.

Alternative Text

The most common accessibility issue is missing image alternative text (alt text). Alt text is background code added to a digital image that allows a screen reader or other assistive technology to describe the image’s content and meaning to those who cannot see the image or may be unable to process the image due to a cognitive disability. When alt text is missing, the Brightspace Accessibility Checker will flag the issue, noting Images must have an alternative text description.
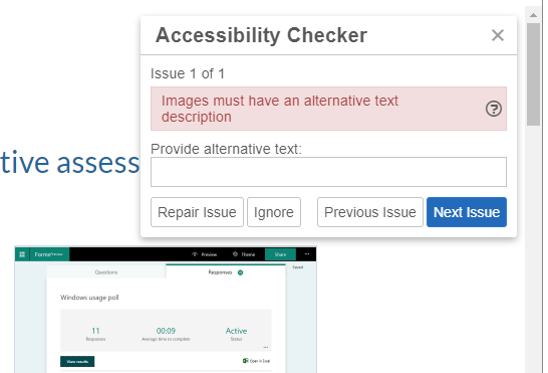
The Accessibility Checker flags missing alternative text with the message Images must have an alternative text description

How to add alt text

The easiest way to add alt text is to include it when inserting images into a Brightspace page. When you insert an image using the HTML editor, a pop-up appears, prompting you to add alt text. Brightspace add the alt text to the HTML code (e.g., <img src=”filename.jpg” alt=”Example of Microsoft Forms response results.” />).

Treat informative images as decorative by supplying an empty alt attribute or checking the box next to This image is decorative. Brightspace will add alt text of “” to indicate an empty alt attribute.

Brightspace prompts users to add alt text when inserting images

If the Accessibility Checker flags an image as missing alternative text, you can fix the issue by adding alt text inside the report panel or by adding it directly to the HTML code.

Tips for creating alt text

When deciding what to include as alternative text, imagine that you are describing the image aloud over the phone to someone who needs to understand the image.

According to WebAIM, alternative text should:

  • Be accurate and equivalent in presenting the same content and function of the image.
  • Be succinct.
  • Not be redundant or provide the same information as text within the context of the image.
  • Not use the phrases “image of…” or “graphic of…” to describe the image unless the fact that an image is a photograph or illustration, etc. is important content.

WebAIM offers a fantastic guide to creating appropriate alternative text for images.

Note: It is always a good idea to double-check the alt text included in your HTML code. An accessibility checker only indicates whether alt text is included, it cannot check the quality or usability of the alt text.

Contrast

Low colour contrast is another common accessibility issue. Insufficient contrast between the foreground and background reduces readers’ ability to perceive content on the page.

Insufficient colour contrast is flagged by the checher

The W3C Web Content Accessibility Guidelines 2.0 define specific contrast ratios that must be met in order to comply at particular levels. To meet the guidelines, text or images of text must have a contrast ratio of at least 4.5:1 (or 3:1 for large text).

The maximum contrast is black vs. white but other options are available such as navy/white, cream/dark brown, yellow/black, and similar color schemes. A colour scheme is considered legible if it can be read in grayscale/black and white mode.

The Accessibility Checker flags:

  • Large text that does not have a contrast ratio of at least 3:1.
  • Visual presentation that does not have a contrast ratio of at least 4.5:1.

Adjusting contrast

Try using the WebAIM Color Contrast Checker to adjust the contrast by lightening or darkening elements.

Headings

A heading describes the content that follows it, giving uses a sense of the page’s organization and structure. Headings give sighted users a way to quickly find what they want on the page.

If the underlying code for a page’s headings is correct, screen reader users can also benefit from headings. Screen reader and other assistive technology users can also skip from heading to heading.

The checker flags improperly applied heading styles

How to create headings in Brightspace

Select the text then set it to the proper heading using the Format dropdown menu. Do not skip levels. If the heading levels are not in the correct order, the Accessibility Checker will flag the issue.

Tips for creating headings

    • Headings are ranked <h1> through <h6>.
    • Every page should have an H1 heading, representing the most important idea on the page, and sub-sections organized with <h2> level headings. Those sub-sections can themselves be divided with <h3> level headings, and so on.
  • Headings need to be used in the correct order.
  • Do not skip heading levels to be more specific (for example, do not skip from <h2> to <h5>).
  • Do not select heading levels based on their appearance. Select the appropriate heading rank in your hierarchy.

Note: The Brightspace Accessibility Checker will not flag a page without headings; it only flags incorrectly ordered headings. 

Lists

Lists are great from an accessibility standpoint because they provide structured order to content in a linear fashion. Lists are recommended as potential replacements for simple tables, as tables can be more challenging to navigate. Properly code the lists so that they convey the hierarchical content structure to screen reader users. Use unordered lists <ul> when there is no specific order intended for the list you are creating. Use ordered lists <ol> when there is a defined sequence or order for the list.

The checker flags text that appears to be a list but has not been properly styled.

The Brightspace Accessibility Checker will flag items that appear to be a list but do have  unordered or ordered list styles applied.

How to use lists

Select the items, then choose the Unordered List icon if the order does not matter, or select Ordered List from the dropdown menu if it is sequential.

Use bullets for unordered lists and numbers for ordered lists

Descriptive Hyperlink Text

The Accessibility Checker cannot assess whether links are meaningful or accessible; however, making hypertext links accessible is one of the most basic and most important aspects of web accessibility.

How to create a hyperlink

Select Insert Quicklink icon, then select URL in the popup window, enter the URL and a title that describes the link’s destination.

Suggestions for creating meaningful and accessible hyperlinks

  • Link text should be unique within a page, should be meaningful when read out of context, and should help users to know something about their destination if they click on it. Link text such as “Click here” and “More” fail to meet these criteria.
  • Avoid providing two links right next to each other that point to the same location (it can be confusing for screen reader users).

To request help with improving the accessibility of your course content, email edtech@langara.ca

Do more with video: Four great features of the new Kaltura

Kaltura (Langara’s multimedia streaming platform) is about to be upgraded. As well as continuing to provide an easily accessible way for instructors and students to upload video and audio content to D2L courses, Kaltura is introducing a number of new features. Here we highlight four that we are excited about – and we hope you will be too.

1. Kaltura MediaSpace

It has always been possible to upload videos to Kaltura in D2L. However, instructors have been asking us for a while whether there is a more user-friendly and visually appealing way to search, watch, upload and share their videos. Kaltura MediaSpace will bring a YouTube-like video portal to Langara with granular user controls over the management of videos, screencasts, audio and other content, including student content. All data is stored in Canada on UBC’s servers and all content uploaded to MediaSpace is private by default.

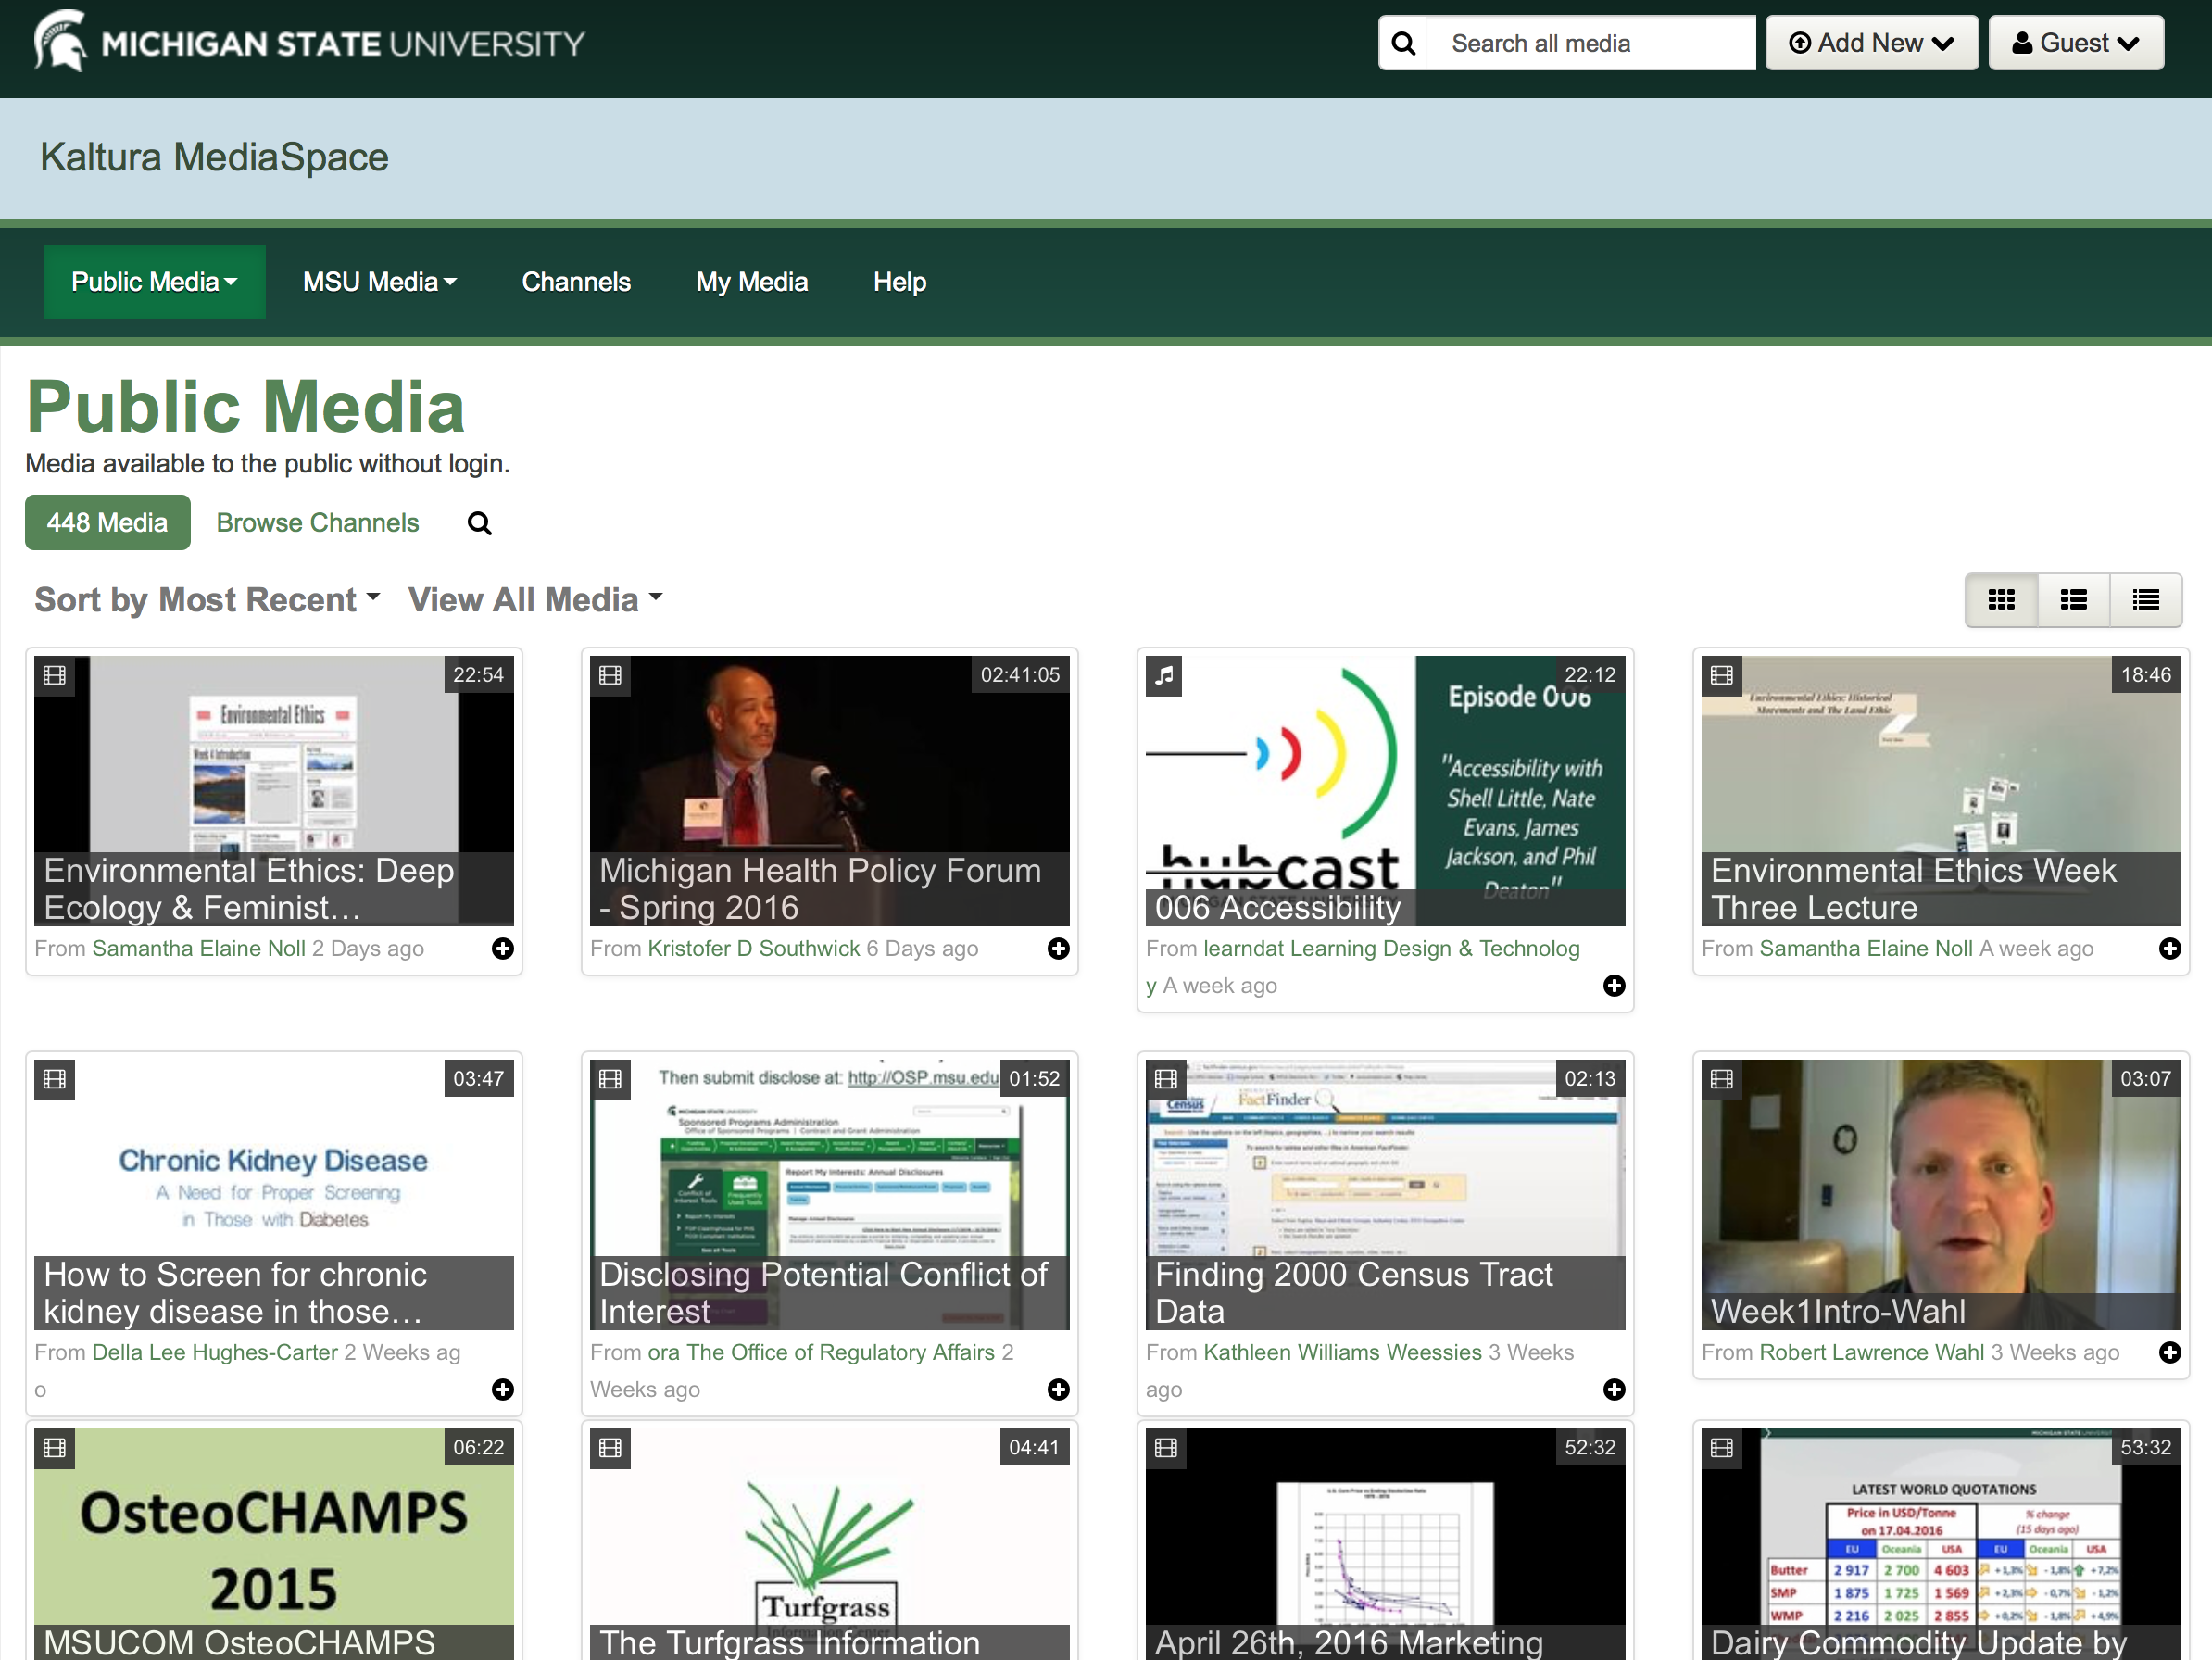
MediaSpace at Michigan State U

2. Closed Captioning

The Canadian Association of the Deaf have long advocated for the high quality captioning of all video for accessibility purposes. Closed captions in Kaltura are not a new feature – they have been available for a while. The upgraded version enables all users to upload SRT and other closed caption files rather than have Ed Tech do this for you. We are also currently evaluating the use of external video captioning services that integrate with Kaltura.

3. CaptureSpace

At Langara ‘Video Screen Capture’ (i.e Screencasting) is very popular with instructors who use it for a variety of purposes – whether that be providing audio and visual feedback on papers to students in the LEAP program, assisting a flipped classroom model or creating software walk-throughs. Up to now we have recommended and supported instructors in the use of a tool called Screencast-o-matic that we subscribe to for creating video screen captures. The upgraded version of Kaltura brings a new application called CaptureSpace that will be available to download for Windows and Mac computers. CaptureSpace allows you to capture your screen, screen and webcam, webcam only or voice. It also integrates nicely with Microsoft Powerpoint so allows instructors (and students) to easily create slides with narration.

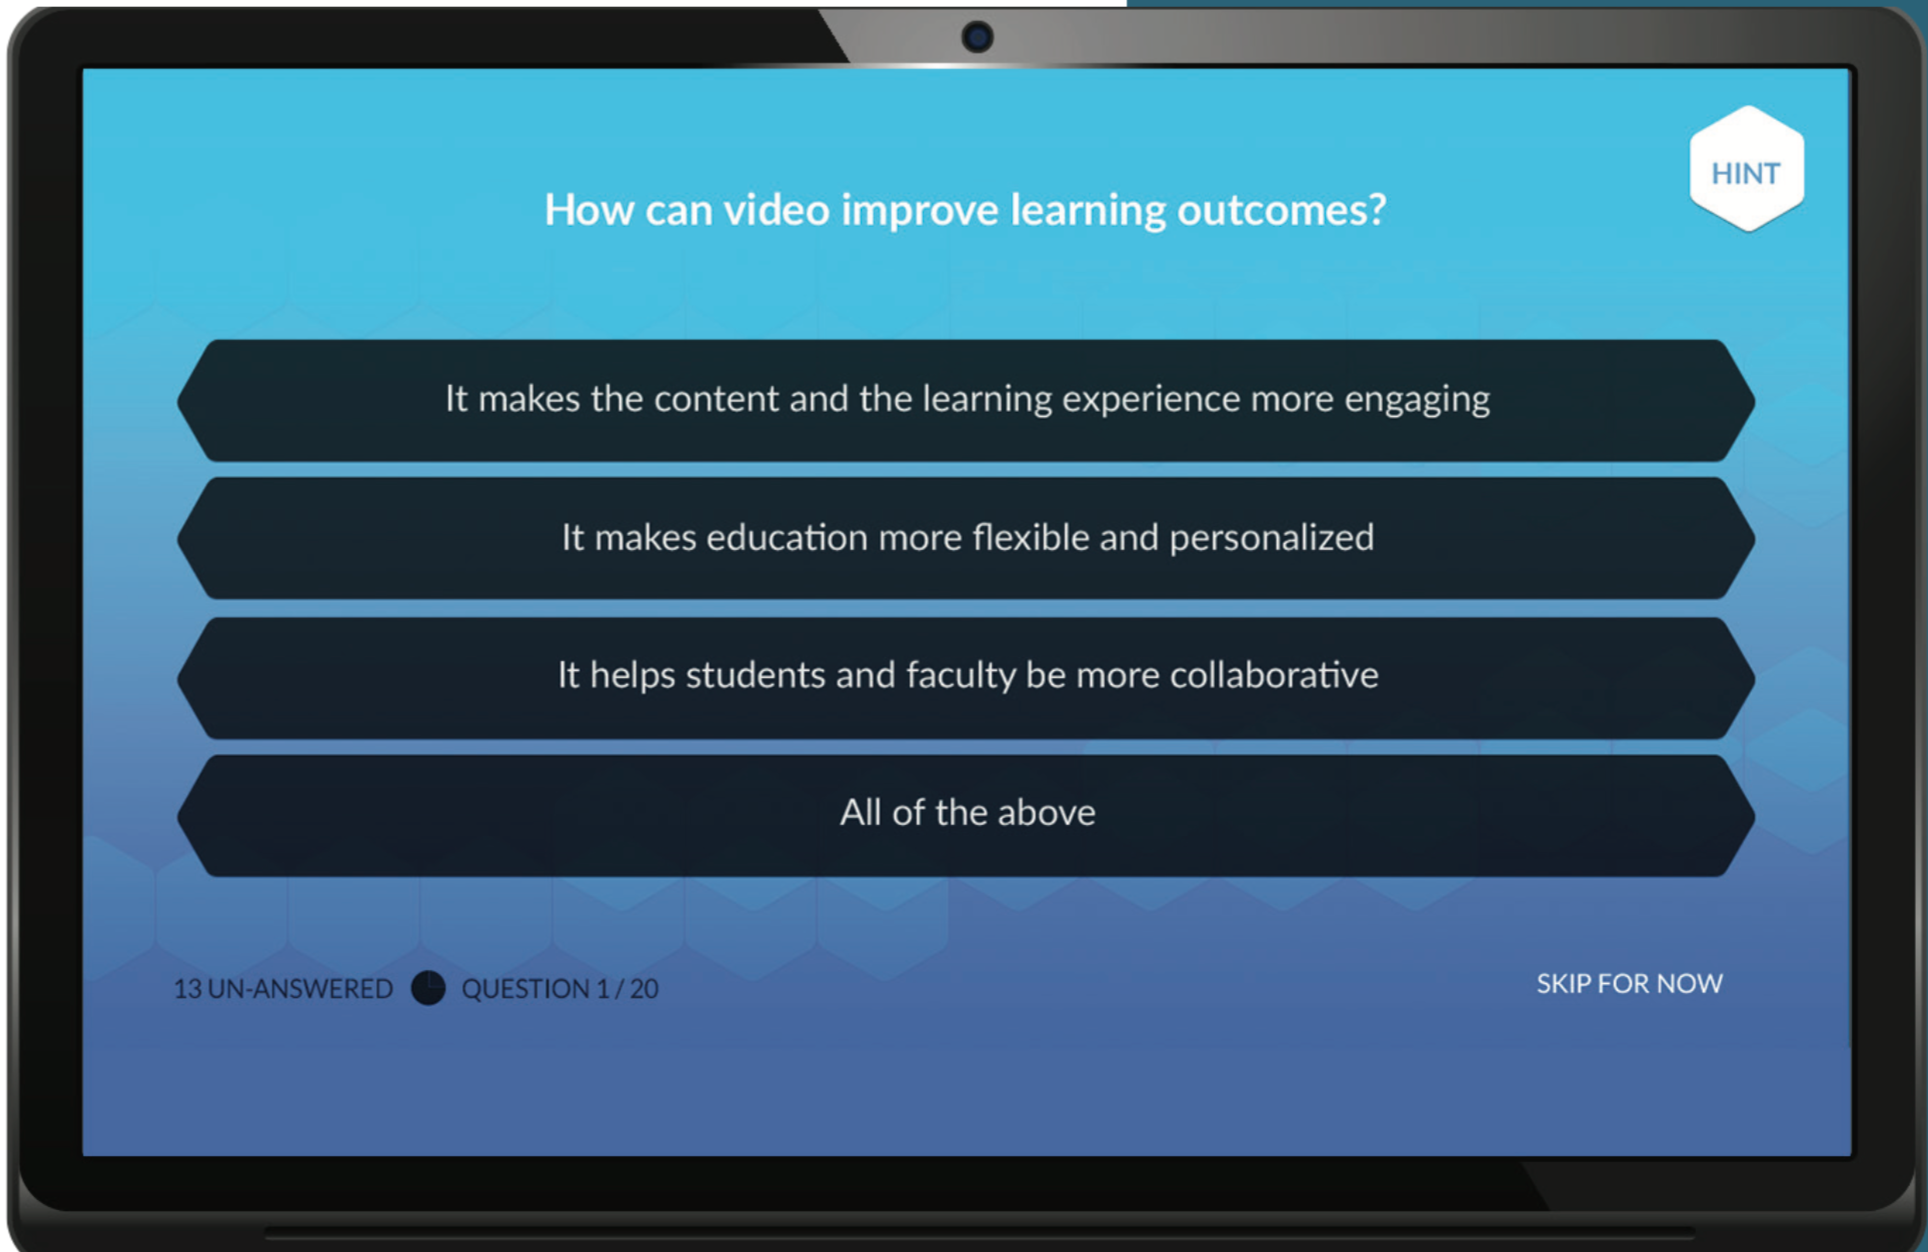
Quizzing in Kaltura

4. Interactive Video Quizzing

Have we saved the best until last? The interactive video quizzing feature in the new Kaltura enables the embedding of multi-choice questions at any point in a video. This is a great way to improve engagement, interactivity and assess understanding. This feature will be available later in the year.

For more information on the Kaltura upgrade please contact Julian, Heidi or Ari in Ed Tech (edtech@langara.ca).

Video and Multimedia in Education

Back in 2008 the NMC/Educause Horizon Report stated “video is everywhere”1 in recognition of the transformative effects that the availability of relatively cheap and easy to use tools to edit and create video were having on teaching and learning. Fast forward seven years and we are continuing to witness the rapid growth of video and interactive multimedia in higher education as the success of platforms such as iTunes U, Khan Academy, Lynda.com and TEDx demonstrates. Our students—labelled by some the “Netflix generation” 2—are coming to Langara with heightened expectations of the role that multimedia should play in the learning lifecycle, from recruitment and course design to content delivery, assessment and feedback. They are equally aware that to succeed in the digital economy they need to demonstrate competence in using multimedia to communicate and collaborate effectively. Being digitally literate requires much more than simply being able to use a word processor or a spreadsheet programme.

This presents new challenges to instructors who perhaps are not always as comfortable as students are working with digital media. They may be understandably sceptical of the idea that binge-watching Netflix translates particularly well to the higher education environment where academic rigor, critical thinking and deep learning are prerequisites for student success. Even if instructors are convinced of the potential of video to enhance student engagement they may have questions about what makes for a compelling video, what the optimum length of a video should be, or how best to distribute it to their students.

In my role as Educational Technology Advisor (Multimedia Specialist) I work with instructors to help answer these questions and assist them in developing the confidence to use, create and share multimedia in their teaching. Using multimedia effectively requires careful planning, an understanding of the importance of accessibility and an awareness of the myriad ways that it can support academic innovation. My job is to help instructors navigate through the potentially bewildering array of applications of multimedia to learning, whether that be screencasting, podcasting, video editing, audio feedback, digital storytelling or flipped learning. Our common aim is to stimulate the appetite of our students for engaging and meaningful learning by harnessing the potential of multimedia to improve learning outcomes.

Julian Prior

Educational Technology

2016-03-10_16-11-38
  1. https://net.educause.edu/ir/library/pdf/CSD5320.pdf
  2. https://bit.ly/1RaJl43