The Kaltura Editor
Watch the video below for a demonstration of the Kaltura Editor, or scroll down for instructions on individual editing tools.
Visit this page for more information on the Kaltura Editor.
Back to top of pageTrimming a Video
You can trim out parts of any video using the Editor. The Trimming tool allows you to edit your videos by setting new start and end times for your media, or by splitting your media into several pieces so that sections can be removed from the beginning, middle, or end.
Back to top of pageNote: Trimming changes the original file, and the change cannot be reversed.
Trimming the beginning or end of a video:
- In My Media, click on the entry you want to trim.
- Click the Actions menu and click Launch Editor.
- Click and drag the yellow handles on the timeline (bottom of screen) to move the markers to new start and/or end times.
- Click Save. The newly-trimmed video will appear in your My Media.
Cutting a section out of the middle of a video:
- In My Media, click on the entry you want to trim.
- Click the Actions menu and click Launch Editor.
- Click the Play button and pause at the beginning of the section you would like to delete (you can also click directly on the timeline below the video to select the start of your cut)
- Hover over the timeline and click the Split (scissors) icon
- Play/pause to the end of the section you want to delete or click the correct place on the timeline
- Hover over the timeline and click the Split (scissors> icon
- Now that you have the section selected, click the trashcan icon to delete
- Save (to overwrite your existing media entry with your changes) or Save a Copy (to create a new media entry with your changes, but leave the original entry intact
You can also use the Split (the line terminating in two dots, on the same pane as the trash can) function to designate a section of a video, then use the Fade In/Fade Out feature to make a section fade in or out.
Back to top of pageCreating a Video Clip
In MediaSpace, you can create clips from existing videos; each clip becomes its own new media entry.
The clipping tool enables you to edit your videos by setting the start time and end time of your clip.
- In My Media, click on the entry you want to trim.
- Click the Actions menu and click Launch Editor.
- Click and drag the yellow handles on the timeline (bottom of screen) to move the markers to new start and/or end times.
- Click Save a Copy. The new clip will appear in your My Media.
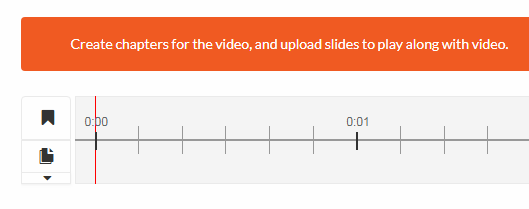
Managing Chapters and Slides
Chapters are like bookmarks, which can be used to navigate through a video. You can use chapters to mark the beginning of a new topic, highlight important segments, or help navigate through a longer video. You can add, edit and delete chapters and slides in the Timeline tab under Edit in your My Media.
A Slide is a visual element synchronized to the main media. Slides can be viewed inside the player, simultaneously with the media.
After Chapters and Slides are created, the player will display the Navigation Panel: a list of chapters and slides available alongside the main video content.
Watch the video below for a demonstration of how to add chapters and slides.
Adding or Editing a Chapter
- Go to your My Media page and click Edit near the entry you want to edit.
- Select the Timeline tab. Here you can view all the chapters and slides in the video.
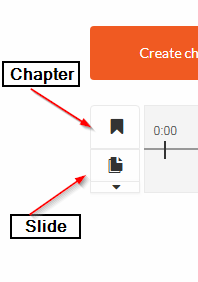
- Place the cursor on the timeline and click the Create Chapter icon to create or update a chapter, or click on the cue point for the chapter you want to edit to view its properties.
- After you create a chapter, you can:
- add or modify the Chapter Title
- add or modify the Chapter Description (optional)
- add Search Tags (optional, but recommended)
- Click View in Player to see your changes.
Deleting a Chapter
- Go to your My Media page and click Edit near the entry you want to edit.
- Select the Timeline tab. Here, you can view all the chapters and slides in the video.
- Click on the cue point of the chapter you want to delete from the video.
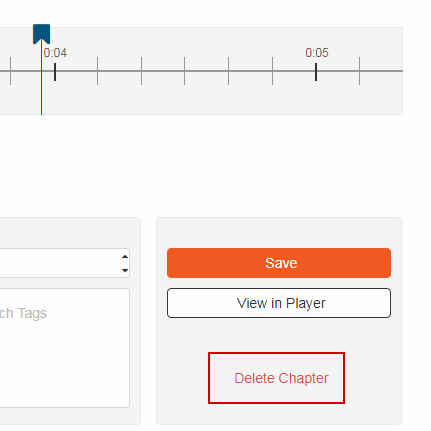
- Click Delete Chapter.
- A confirmation box will appear: click Delete to confirm.
Adding or Editing a Slide
- In My Media, click Edit next to the entry you want to edit.
- Select the Timeline tab. Here, you can view all the chapters and slides in the video.
- Click to place the cursor on the timeline and click the Create a new slide button to add a slide, or click on the cue point for the slide you want to edit to view its properties.
 Deleting a Slide
- In My Media, click Edit next to the entry you want to edit.
- Select the Timeline tab.
- Click on the cue point of the slide you want to delete.
- Click Delete Slide.
- A confirmation box will appear. Click Delete to confirm.
Hotspots
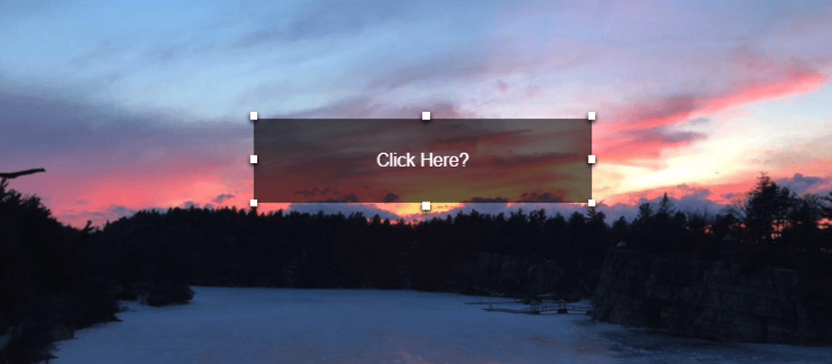
You can use the Hotspots tool to add clickable areas to your videos. These hotspots can lead to other videos, forms, other websites, load files, link to citations, an earlier or later point in the video, or simply be a bit of text that appears over the video.
- In My Media, click on the entry you want to trim.
- Click the Actions menu and click Launch Editor.
- Click the Hotspots icon on the lefthand side (the third icon from the top).
- Use the Hotspot tools to choose:
- Where in the timeline you want your hotspot to appear
- Where on the video you want your hotspot to appear (click and drag)
- Add text or a link (optional)
- Adjust the shape, colour, transparency, and font of your hotspot
For more information, click here.
Back to top of pageReplacing Media
In Kaltura, you can replace media and retain the entry’s data, URL and other settings. The time-based metadata (like chapters and slides) will remain, though after replacement it will probably be out of sync and will need to be adjusted.
- In My Media, click Edit next to the entry you want to replace.
- In Edit Media, select the Replace Video tab.
- Select Upload from Desktop. Locate the file on your hard drive and select it.
- After the upload is complete, click either Approve, to replace the video, or Cancel Replacement to cancel.
Deleting Media
- Locate the video in My Media and click on Edit.
- Click Delete Media to delete the entry.
Back to top of pageAdding Captions in MediaSpace
Automatic Captioning
As of October 2022, machine captions in English are automatically ordered for all media uploaded to Langara Mediaspace, and are available an average of 30 minutes after upload. Adding captions to videos makes them more accessible to various groups, including deaf/Deaf/hard-of-hearing people, people with sensory processing disorders, and people for whom English is a second language, among others. Machine captions are automatically generated by a computer, and are approximately 85-90% accurate. If you require your captions to be closer to 100% accurate, you may need to edit the captions to close that gap. See Editing Captions below for more information.
If you are a student and require captions on your course materials, please contact Accessibility Services for assistance.
Back to top of pageDeactivating or Deleting Captions
If you don’t want captions to appear on your video, you (and any Co-Editors you may have added to the entry) can deactivate them in the settings on your media entry before you share the media.
- Visit your My Media page and click on a media entry
- Click Actions > Edit
- Click the Captions tab
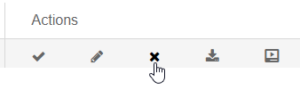
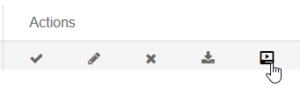
- To the right of the caption, choose the X to Delete the caption (Delete), or the far right icon to hide the caption from viewers (Don’t Show on Player)
Requesting Captions
Captioning tools are available to all users on Langara’s Kaltura MediaSpace platform, both from the website at https://mediaspace.langara.ca, and from within Brightspace via My Tools > My Media. Machine captions are automatically generated when you upload new videos, but see the steps below to manually request additional captions for your media entries.
- Go to your My Media library and click on the entry (video or audio) you want to caption
- Below and to the right of your video, click Actions > Caption and Enrich
- Scroll down to the bottom of the Order Captions area and click the Submit button (do not change any of the dropdown menu options: Service, Source Media Language – currently, only English is available – or Feature)
See the video below for a demonstration of the captioning tool.
Back to top of pageTurnaround averages about 30 minutes. Once your caption file has been created, it will be automatically attached to your video and available via the “CC” closed captioning button at the bottom of any media player. Captions using this service are hosted briefly on a U.S. Server during the captioning process, but are deleted once the captioning file has been completed.
Back to top of pageEditing Captions
Captions created using the MediaSpace machine captioning service are about 85% accurate. You can edit your captions for accuracy using the built-in caption editor.
- Navigate to your media entry and click Actions > Edit
- Click on the Captions tab below the media entry
- Click the Edit Captions button to access the caption editor
- Edit your captions as desired; remember to save often (try to edit the label, E.g. include edited, so users can tell they are not purely machine-captioned)
See the video below for a detailed demonstration of the Closed Caption Editor.
Back to top of pageAdding External Captions to a MediaSpace Entry
If you’ve created your caption file manually, or are adding them from some other source (like a caption file created using a screen capturing program like Screencast-o-Matic) you can upload and attach the caption file to your MediaSpace item after upload. Just go to Actions > Edit, and choose Captions.
Back to top of pageMediaSpace Retention Policy
See the Langara MediaSpace Retention Policy.
Back to top of page