
Preparation
Download Audacity
Audacity is installed on many college computers, but you can also find Audacity on the Audacity download page.
Back to top of pageThe FFMPEG Library
Sometimes, in order to import/export files in certain formats (specifically MP3 files), you will need to install a plugin.
The FFMPEG library is needed to import or export a range of proprietary file formats (you don’t need this if you’re only recording directly into Audacity and not importing files)
To install, download the file to your computer and double-click to install. Then open Audacity. No further configuration should be required.
Back to top of pageNote: Recent versions of Audacity installed as part of the image on a Langara machine should already have this installed.
Recording
Select Input and Output
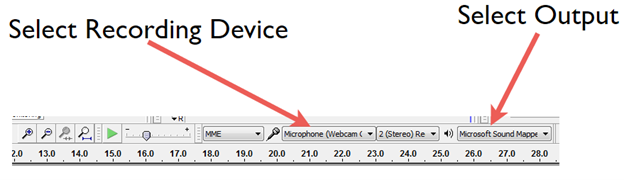
Make sure you’ve selected the correct external microphone (input) and speakers (output). If you’re using a headset mic, these will be the same device.
Back to top of pageNote: If you’re using a new microphone or headphones, plug in the device and make sure your operating system has recognized it (if necessary) before you launch Audacity.
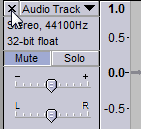
Controls
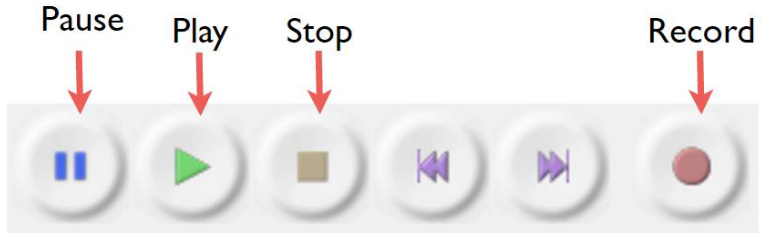

Depending on your operating system, the buttons might have a different shape, but their function is the same.
Back to top of pageTools
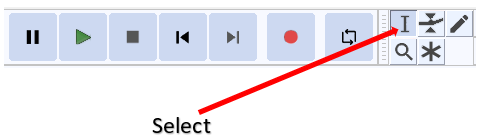
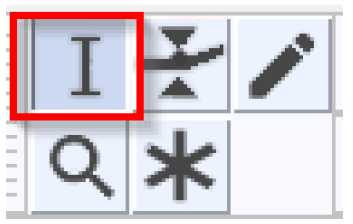
Selection Tool
For choosing start/endpoints, selecting tracks, or parts of tracks, for editing or deletion.
Time Shift
In previous versions of Audacity, you were required to select a specific tool to move tracks or segments around. As of version 3.x, you can just click and drag to shift segments forward or back in time or move them between tracks.
How to record
To start recording
Click the Record button (Audacity will create a new track each time you click Record).
To stop recording
Click the Stop button.
Change start point
Use the Selection Tool (see Tools) to choose a new start point for recording or playback.
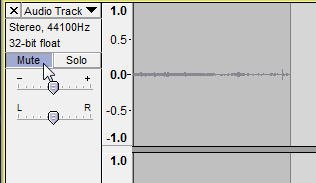
Mute tracks
Remember to mute the previous track(s) if you stop recording and then start again.
Delete tracks
Click on the “x” in the top left corner of the track.
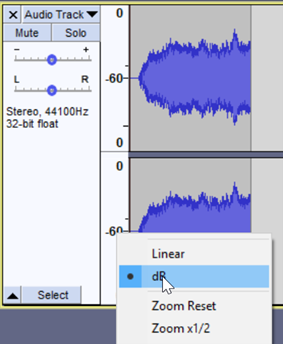
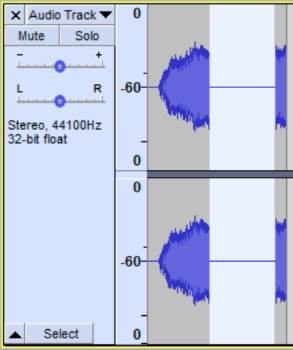
Linear vs. dB track view
To switch between the Linear (basic) and dB track views, right-click and select “dB” – this can often be useful when editing out very short sections or working with very quiet audio.
Recording a “silence” track
This is useful for filtering out background noise later. Just make sure you’re in a quiet space, and then record 20 or more seconds of ambient background noise with no one speaking. When you’re finished, mute this track. You will return to it later.
Back to top of pageNaming tracks
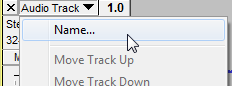
This is important if you end up with multiple tracks. Rename the track by clicking on the track menu and
selecting “Name.”
Save early, save often
Remember to save your Audacity project (File > Save or Ctrl+S) every time you stop recording or make a change to a track.
Back to top of pageProcessing
Remember to un-mute tracks as you edit them.
Editing tracks
Cut out a section
Using the Selection tool, click and drag along the section you want to cut. Then press the Delete key on your keyboard.
Silence a section
Using the Selection tool, click and drag along the section you want to silence. Then press Ctrl + L.
Move a track
Click on the top edge of the track you want to move and drag it forwards, backwards, or up and down into separate tracks.
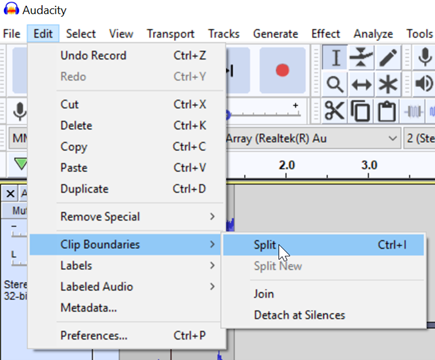
Split a track
To create a split in a track (you might do this if you want to separate two sections, to put something in between, like music), use the Selection tool and click on the spot on the timeline where you’d like to create the split. Then click Edit > Clip Boundaries > Split, or press Ctrl + I.
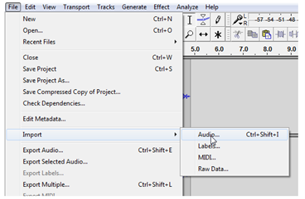
Import music or other files
- Go to File > Import > Audio
- Navigate to the file and click Open
- The imported audio will appear as a new track at the bottom of your project
- Using the Time Shift tool, drag it to where you want it
- Optionally: fade the music in and out by selecting the beginning and end of the file with the
- Selection Tool and going to Effect > Fade Out
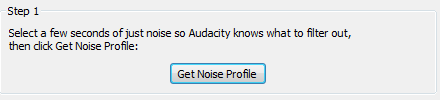
Filter out background noise
- Unmute the “silence” track you recorded earlier and select it with the Selection Tool. You can
also select the entire track by clicking in the track’s Track Control Panel (rather than on any of
the controls or buttons)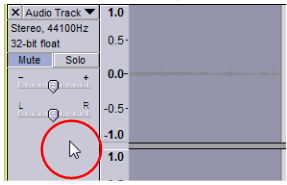
- Go to Effect > Noise Reduction
- Under Step 1, click Get Noise Profile
- The Noise Reduction window will close; now select the track(s) you want to fix and go to Effect >
Noise Reduction again - Under Step 2, change levels if you want and preview with the Preview button; when you’re
finished, click OK and wait while the Noise Reduction processes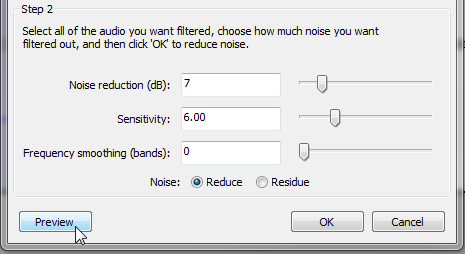
Back to top of pageNote: Be careful how much you use this filter. Turning the “Noise reduction” slider too high can have
distorting effects on the rest of the track.
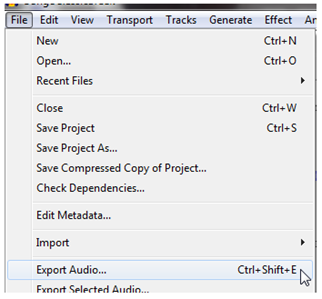
Exporting your podcast
- Go to File > Export Audio to export the entire project (to export only a portion of the project, select it with the Select tool and choose Export Selected Audio instead)
- Choose a place to save, a file name, and a file format under Save as type (.mp3 and default Medium settings recommended)

- Click Save
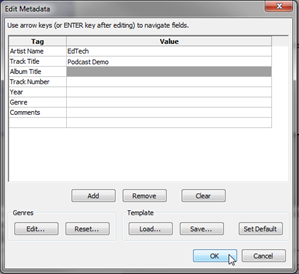
- Enter your metadata (Artist Name and Track Title minimum)
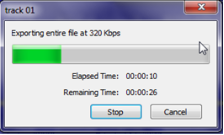
- Click OK and wait for the file to render; this could take anywhere from a few seconds to several minutes, depending on the size of the file and the speed of your computer
- Navigate to where you saved the file and listen to your new podcast
