Zoom is a web conferencing solution that provides screen sharing, meetings, live chat, and a lot more.
- Join By Link
- By Browser
- Launch the Program
- Download Zoom
- Join a Meeting
- Host A Meeting
- Zoom Audio & Video
- Screen Sharing
- Chat
- Record a Meeting
- Mobile and Browser Options
- Using Zoom on Citrix (on-campus labs)
- The Zoom Outlook Plugin
- Authenticated Users Only (logging in before joining a meeting)
- Basic Meeting Etiquette
Join By Link
Most often, you will join a meeting by clicking on a link shared with you by the meeting host, either by email or posted in your Brightspace course – no account required. (See the URL in the red box below.)

By Browser
You can also join a meeting from the browser, by entering the Meeting ID number at https://langara.zoom.us/join.
You can find the Meeting ID, the 7-digit number at the end of the URL, in the email invitation sent to you by the meeting host. (See the highlighted text below.)

Launch the Program
After following one of the steps above to join the meeting, Zoom will attempt to start the meeting.
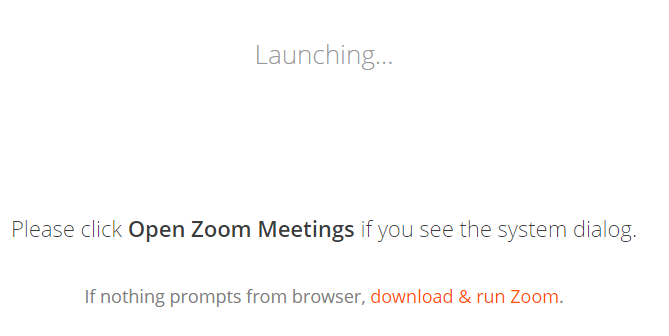
If you have already installed Zoom on your computer, you will see a dialog box; click the “Open Zoom Meetings” button. (Skip to Join a Meeting.)
If the dialog box does not appear, you do not have Zoom installed on your computer. Click “download & run Zoom.”
Back to top of pageDownload Zoom
After you click “download & run Zoom,” you will see a “Save As” window appear. Click Save to download Zoom to your computer.
Once the download is complete, click on the downloaded installation file in your browser to run it.
At the end of the installation, Zoom will launch and invite you to join a meeting.
Note: Make sure to update your version of Zoom regularly. Refer to the Zoom Software Quarterly Lifecycle Policy for more information.
Back to top of pageJoin a Meeting
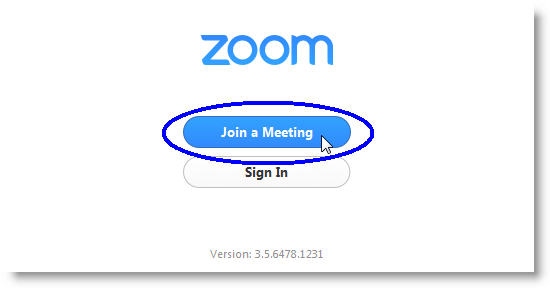
Once Zoom is installed, you will see a window inviting you to sign in or join a meeting.
Click “Join a Meeting.” Zoom will open.
In the next window, enter your name (this is how your name will appear to other people in the meeting) and the Meeting ID, if applicable.
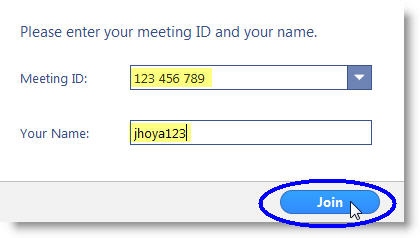
Click “Join.”
If you have arrived to the meeting early, you may see the following window, asking you to wait until the host arrives.

When the host arrives, the meeting will start automatically. In the meantime, you may wish to test your computer audio.
Back to top of pageHost A Meeting
We recommend using the desktop application (Windows or Mac only) when hosting meetings. You can find the desktop client at https://langara.zoom.us/download. Log in to the client by clicking on “SSO” and enter your Office 365 credentials.
To create meetings, either use the desktop client, or log in to Zoom at https://langara.zoom.us. Once you are signed in, you will have access to your account settings and be able to create meetings. You can also use the desktop client to create meetings, but some settings are only available in the browser.
All Langara users have a Pro Zoom account. See https://langara.zoom.us for more information on creating and hosting meetings.
Back to top of pageZoom Audio & Video
When you join a Zoom meeting for the first time, you will be asked how you want to join the meeting audio.
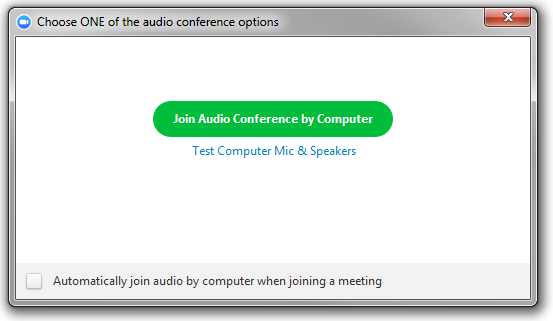
To join using computer audio, click “Join Audio Conference by Computer.” This option will use your default microphone and speakers.
If you are having trouble with your microphone or speakers, or aren’t sure whether they are set up, click “Test Computer Mic & Speakers.”
In the Test Computer Audio window, use the Test Speaker and Test Mic buttons to test your audio setup.
Back to top of pageTest Speaker
Click the Test Speaker button. If your speakers are working correctly, you should hear a series of musical notes.
If you don’t hear anything, try switching speakers in the dropdown menu.
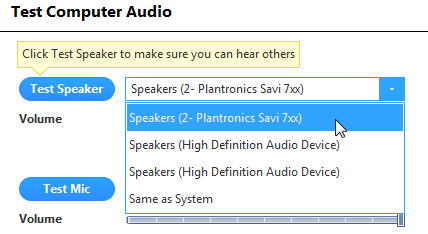
Note: For the best sound quality, headphones are strongly recommended.
Back to top of pageTest Microphone
Click the Test Mic button and speak into your microphone. The button will change to show “Recording.” Click the button again to stop recording and play back your voice. The button will change again to show “Playing.”
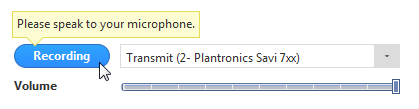
If you don’t hear anything when playing back, try switching microphones in the dropdown menu.
Back to top of pageTest Video
You may also use a webcam in Zoom meetings, so that other people in the meeting can see you. In the Settings window, click Video to view a preview of your live image.
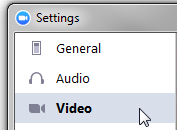
If you don’t see anything, try switching cameras in the dropdown menu.
When you are finished testing, click the X in the top right corner of the Settings window to close it.
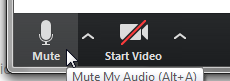
Back to top of pageMuting Audio & Video
You can mute your microphone or webcam at any time during a meeting. Just click on the appropriate buttons in the bottom left corner of the Zoom meeting window.
Note: If Screen Sharing is being used, you can access these same controls by hovering over the Screen Share tab at the top centre of the screen.
Screen Sharing
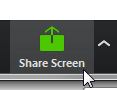
In Zoom, both the host and attendees (when granted permission by the host) can share their screen with the meeting. Just click the Share Screen button.
Select which window you want to share, or click “Desktop” to share everything on your screen.

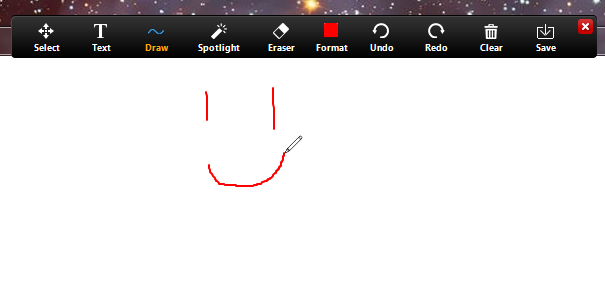
You can also select “Whiteboard” to create a whiteboard space where you and others in the meeting can interact.
When you’ve made your selection, click the “Share Screen” button.
Note: If you are sharing audio or video content from your computer, make sure to tick the “share computer sound” and “Optimize for full screen video clip” boxes at the bottom of this window.
During Screen Share, the controls will move to the top of the screen. When you’re finished sharing, click the “Stop Share” button.

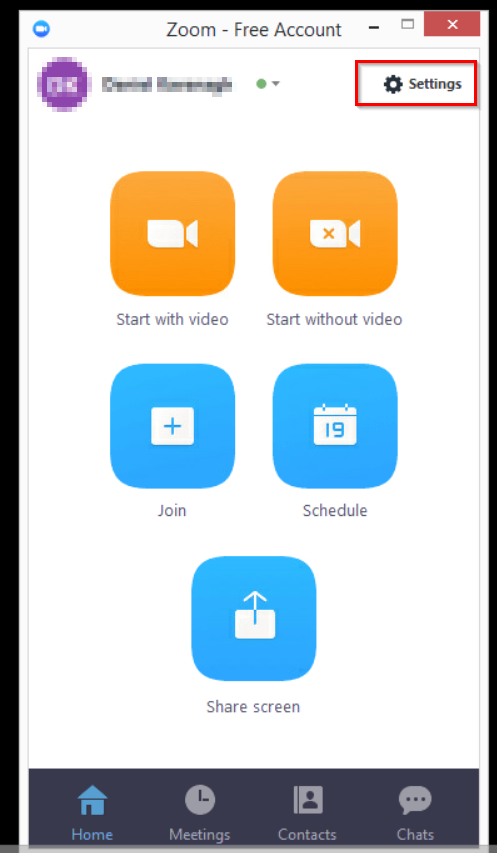
Before Starting the Meeting
- From the Zoom main console select Settings
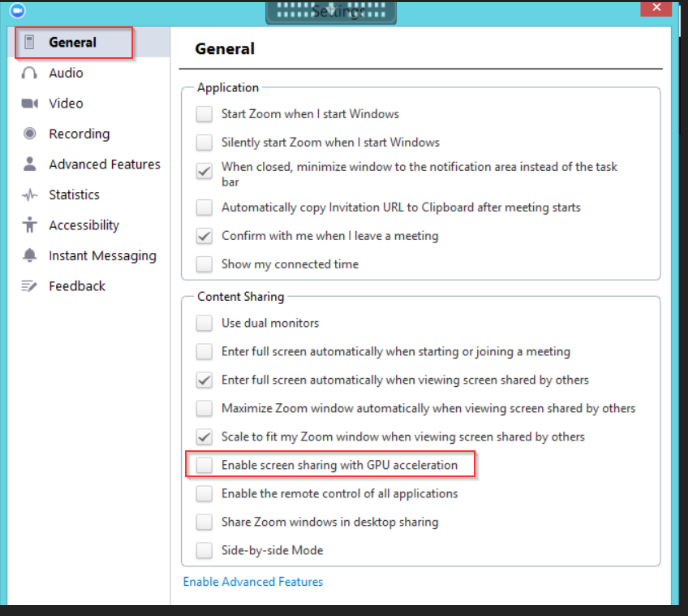
- Uncheck “Enable screen sharing with GPU acceleration
Chat
In Zoom, you can chat with everyone in the meeting, or privately with specific user(s).
Click on Chat.

Under the “To” dropdown, choose the recipients for your chat and type your message. Press Enter to send.

NOTE: Be aware that though you can send private messages to other participants during a meeting, the host will be able to see all messages sent after the meeting has ended.
Back to top of pageRecord a Meeting
If you are the host, you can record a meeting. Just click the Record button. You will see an indicator that the recording has begun, and stop/start or pause the meeting at any time. Note that everything on the screen will be recorded.
By default, all recordings will be placed in a Zoom folder found in the following file path on these devices:
PC: C:\Users\User Name\Documents\Zoom
Mac: /Users/User Name/Documents/Zoom
Once the meeting ends, the recording will take several minutes to render. All Zoom recordings are stored locally, on your own computer.
You can then upload them to MediaSpace and share them in your Brightspace course, or elsewhere. This can be particularly helpful when recording group presentations. Click here for more information on recording meetings.
Back to top of pageMobile and Browser Options
Though a wired Internet connection is recommended for the best audio and video quality, mobile (both iOS and Android) and browser versions of Zoom are available.
Not all versions offer the full set of features.
Click here for the full list of Zoom applications: https://langara.zoom.us/download
Back to top of pageUsing Zoom on Citrix (on-campus labs)
Zoom is installed on all campus machines, but you will only be able to watch and listen. Webcams and microphones are not available on campus lab computers.
Back to top of pageThe Zoom Outlook Plugin
The Zoom Outlook plugin allows you to add Zoom meetings to appointments and meetings in your Outlook calendar. Find more information about the plugin by clicking here.
Note: The Zoom plugin is only available in the desktop version of Outlook. It cannot be used in the browser-based version of your Outlook account.
When adding Zoom meetings to your Outlook events using your Langara Zoom account, you will be required to log in with your Langara email address and password. Make sure to scroll down in the login box to click “Sign in with SSO.”

If you try to log in before clicking the SSO button, you will get an “Wrong username or password” error.
Back to top of pageAuthenticated Users Only (logging in before joining a meeting)
Hosting
When setting up your own Zoom meetings, you can choose to allow only authenticated users to join. This requires anyone joining via your meeting link to log in to a Zoom account. When you’re setting up a new meeting, this setting can be found under Advanced Options in the Zoom mobile or desktop app, and under Meeting Options if you’re setting up a meeting via https://langara.zoom.us in your browser.
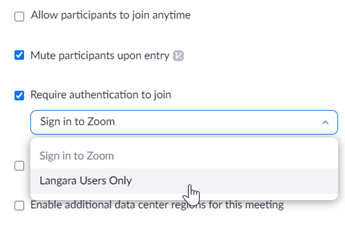
When using this option, please make sure to choose “Langara Users Only.” This limits participants to only people with Zoom accounts connected with langara.ca or mylangara.ca email addresses, rather than allowing any personal Zoom account to join.
Back to top of pageParticipating
Most instructors don’t require you to log in with your Langara Zoom account before joining a meeting. If your instructor has chosen to use this feature, you can log in to Zoom with your Langara Office 365 credentials. See the following video for a demonstration.
Basic Meeting Etiquette
Here are a few guidelines for having a pleasant and successful video meeting.
Display Names and Avatar Pictures
It’s important that people in a meeting know who is speaking. Always use your “real” name or Langara username (the first part of your Langara email address, before the @, e.g. jsmith) as your display name, or at least a name your instructor knows is you (discuss this with them beforehand if the name you’re using isn’t the one on your Langara account). Nicknames (e.g. gaming handles) and display names containing inappropriate language may get you removed from the meeting.
Most class meetings do not require you to log in to Zoom before joining. Instead, you will be asked to enter a display name after clicking on the meeting link, before you’re allowed into the meeting. If you do log in to Zoom using your Langara Zoom account, your default display name will be your username.
Use the same consideration when choosing your profile picture. This does not necessarily need to be a picture of you, but offensive or inappropriate images are not acceptable. Click here to learn how to change your profile picture.
Back to top of pageInappropriate Language and Behaviour
Be polite and considerate to your instructor and classmates. Harassment, or use of inappropriate or offensive language, may result in you being removed from the meeting, or the involvement of Student Conduct and Judicial Affairs.
You also shouldn’t take screenshots, pictures of the meeting screen, or otherwise record the meeting, your classmates, or your instructor without express permission.
Back to top of pageEnvironment and Noise Level
Try to be as mindful as you can of your environment when in a meeting. This means trying to join meetings from quiet places where you aren’t likely to be interrupted (e.g. by barking dogs, roommates or family members). If you can, use headphones, and if possible, an external microphone rather than the built-in speakers and microphone on your computer (a set of earbuds with a built-in mic is fine, but if you must choose between a microphone or headphones, choose the headphones). This cuts down on other people in the meeting hearing echoes and interference from your speakers, and results in a more pleasant meeting experience for everyone. If you’re using your webcam, try to make sure you’re facing a light source, like a window or a lamp, so that people in the meeting can see your face.
Back to top of page