See below for instructions on using Brightspace tools.
- How to Login and Access Your Courses
- How to Navigate through Your Courses
- How to Use the Assignments Tool
- How to Use the Discussions Tool
- How to Use the Quizzes and Surveys Tools
- How to Use the Email Tool
- How to Insert Video/Audio and Images in Brightspace
- How to Enable Brightspace Notifications
- How to Self-Register for a Brightspace Course
- Sharing Awards in Brightspace
- How to Join Self-Enrolment Groups
- Displaying Pronouns in Brightspace
- Brightspace Text to Speech
- Student Guide to Reading Lists
How to Login and Access Your Courses
Registered courses will become available in Brightspace at 12AM on the first day of the semester, and not before. If your instructor has not set your specific course to Active, you won’t see it. Contact your instructor about this.
- On the Langara homepage, click Log In
- Under Students, click on Brightspace
- Log in with your Langara email address and password (e.g. jsmith00@mylangara.ca)
- Once you have logged in, you will see your Brightspace My Home page; choose a course from the main area of the page
If you are having trouble logging in, contact the IT Service Desk.
Back to top of pagePlease note: It can take up to 24 hours after registration for a Brightspace course to become available to students. If it has been 24 hours and you still cannot see your course, please contact your instructor.
How to Navigate through Your Courses
Due to length, these instructions are available in PDF for easier reading.
How to navigate within your Brightspace courses, and find:
- Assignments
- Quizzes
- Discussions
- Other course materials
Depending on the layout chosen by your instructor, your Course Home page might contain:
- An Announcements widget, showing items to your instructor wants to bring to your attention
- An Updates widget, displaying links to items like unattempted Quizzes, new Discussion postings and unread emails
You can use the Navbar to access most of your course content; tools are arranged by category. Just click a category to see the available tools.
- Under Course Materials, you’ll find:
- Course Content, to reach the Table of Contents
- And Links, a list of external links that are part of the course
- Under Communication you’ll find:
- Links to Discussions, Email, and all Announcements.
- The Assessments category contains links to lists of items under the
- Assignments
- Quizzes
- Self Assessments
- and Surveys tools
- Finally, My Tools gives you links to:
- Calendar
- Classlist
- Class Progress, which will show statistics of your progress in the course
- Grades, posted by your instructor
- Groups, for viewing your group memberships, if your instructor has set up groups for discussions or assignments
- Your file Locker
- My Media, which shows all media you have uploaded to Kaltura MediaSpace
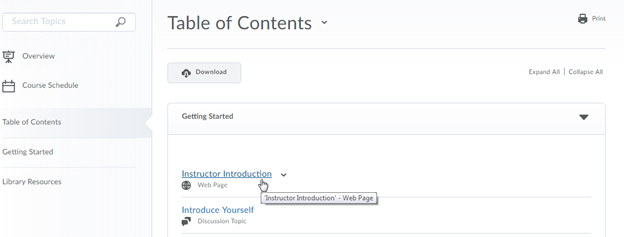
Depending on how your instructor has set up the course, the Content tool is usually the best way to navigate through a course. The content may be organized in a variety of ways, for example: by week, by textbook chapters or by topic. This content may contain course readings, slides, web links, links to quizzes and assignments.
From the top level of Content, you can use the Table of Contents on the left to select a module, or open a content item from the main area of the page.
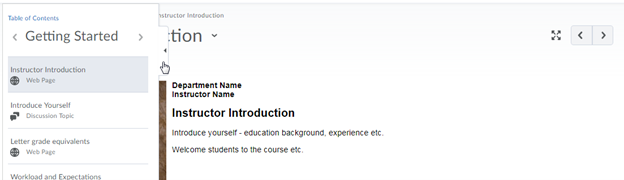
Once you open a content item, you can click the pull-out tab on the left to access the Table of Contents. You can also use the navigation arrows in the upper-right corner to go to the next and previous items.
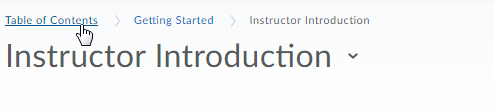
You can return to the top level of the Table of Contents at any time by clicking Table of Contents in the breadcrumbs at the top of the page.
Use the Course Home link on the Navbar to return to the Course Home page.
And at any time, you can click on the HELP link to get help with Brightspace questions.
Back to top of pageHow to Use the Assignments Tool
Overview
Due to length, these instructions are available in PDF for easier reading.
[Download/View as a PDF ]
The Assignments tool in Brightspace. How to:
- Find assignments
- Submit assignments
- View feedback and grades
The Brightspace Assignments tool is used for submitting assignments like papers or projects.
Back to top of pageTurnitin
Turnitin is only available to students from within the Brightspace Assignments tool.
Learn more about Turnitin in Brightspace.
Back to top of pageSubmitting to an Assignment Folder
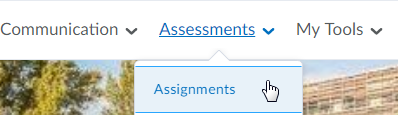
The quickest way to access the assignments for a course is from the navigation bar, by clicking on Assignments in the Assessments menu.
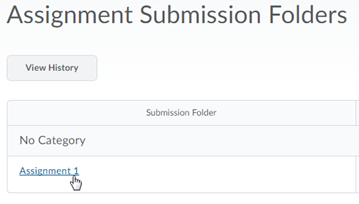
From the list of assignment folders, select the one you want.
In an Assignment folder, you’ll see folder information that explains the assignment. Depending on the assignment, you might be expected to attach files, or record an audio file directly into Brightspace.

In the HTML Editor (labelled Comments here), there is a toolbar with a number of options. If you can’t see everything, click the ellipsis (three dots) to show the missing options on the next line.
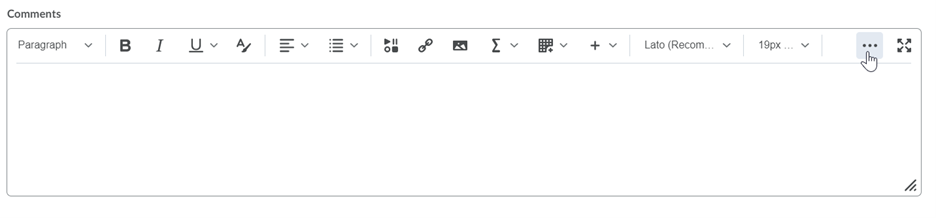
You can insert pictures or media, create links to external websites, format text with bold, italics or underline, use text justification or lists, change font face, size or colour, or insert equations or tables.
If you want to enter HTML directly, click this button to bring up the HTML source editor.
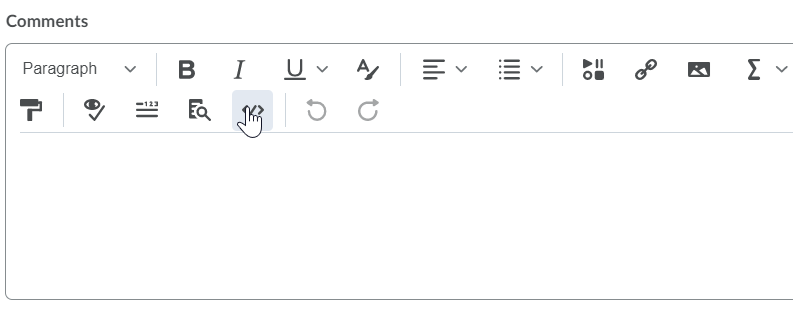
You can also Preview (right) your text as it will appear when posted, or toggle the entry box to full-screen mode.

Attaching a file is simple. You just click Add a File, and the Add a file window will appear. You can add files from your hard drive, or from your file locker or Group locker, if this is a group assignment.
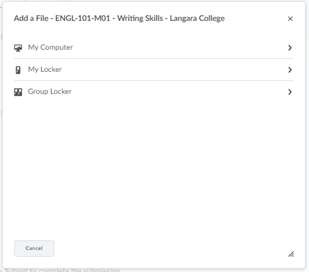
To attach files from your computer, click My Computer, navigate to the file on your hard drive that you want to attach, and click Open. When you’re done adding files, click Add to attach it to the Assignment. Once you’ve completed the assignment, just click Submit.
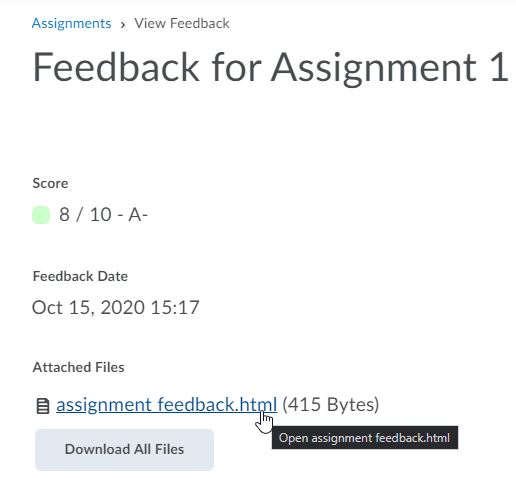
Back to top of pageSeeing Assignment Feedback
You can see submitted assignments by clicking on the link in the Submissions column.
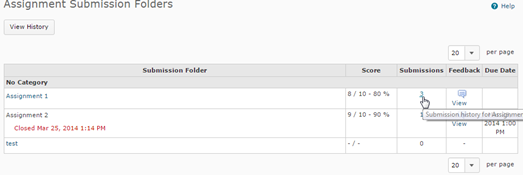
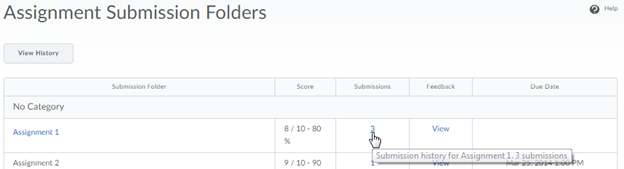
In Assignments, you can see your grade next to the assignment. If there’s feedback, there will be a link in the Feedback column. By clicking on this you can see your grade as well as any comments your instructor may have made on your submission. Your instructor might also attach files to feedback, also available from Feedback.
Listening to Audio Recordings in Assignment Feedback
To play back these recordings, you must download or open the attached HTML file.
From Assessments > Assignments, click the Feedback link in the Assignment.
Click on the HTML file attached to the feedback.
Depending on your browser, you may be offered one or two options: to download the file and then open it, or to simply open it in a new browser tab or window. Either will do. If downloading the file, most browsers will show the completed download in the bottom left or top right corner of the window. Click on it to open.
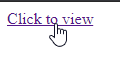
Click “click to view” to see the player.
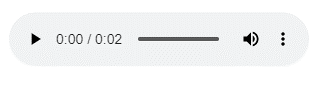
Click the play button to listen to the recording.
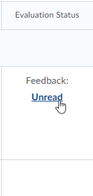
And whenever you have unread feedback on an assignment, it will show up as a notification in the Updates widget on your Course Home page.
Back to top of pageHow to Use the Discussions Tool
Overview
Due to length, these instructions are available in PDF for easier reading.
Reading and responding to Discussions in Brightspace. How to:
- Find Discussions
- Understand how Discussions are organized
- Read and post messages
- Respond to messages
- Read feedback to your posts
Access Discussions
Click on Communication > Discussions in the navigation bar. This which will show you a list of all of the discussions to which you have access.
If you’re working on a project with a group, your instructor might create a discussion forum or topic just for your group.
Back to top of pageForums and Topics
Discussions are organized into two main levels:
- Forums: These might often correspond with other organizational units within the course. For example, your instructor might create a forum for each week or module of your course, or for major projects or assignments.
- Topics: Within forums, there are Topics. You might have a Discussion Topic for that week’s discussions about the readings. Or you might have one for an assignment.
Posting Messages
Within topics, you can make posts, or respond to what other people have posted. Say that you need to introduce yourself as part of the syllabus for Module 1.
- Click on the topic
- Click Start a New Thread; the Compose screen will appear

- The New Post screen contains the Brightspace Editor with all the usual composition options: you can insert pictures or media, create links to external websites, format text with bold, italics or underline, use text justification or lists, change font face, size or colour, or insert equations or tables
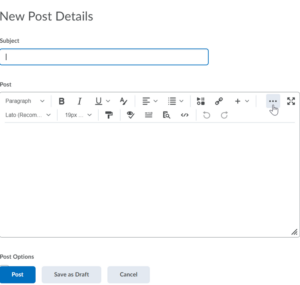
- If you can’t see everything, click the ellipsis to show the missing options on the next line
- You can enter a subject and then enter your text in the box below
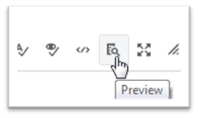
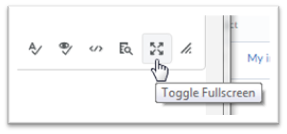
- You can also Preview your text as it will appear when posted, or toggle the entry box to full-screen mode
- Clicking the Subscribe to this thread box will allow you to get updates any time someone posts a new message in response to the same thread
- Under Attachments, you can attach a file to your message. You can:
- upload a file from your harddrive (Add a File > My Computer)
- select a file from your file locker (or, if this is for a group assignment, from a group locker – Add a File > My Locker or Group Locker)
- record a response directly into Brightspace (Record Audio)
- To post your message, click Post
Respond to a Message
Responding to a Message in a Discussion is easy.
- Click on the topic title to open the topic
- Click on the message title
- Click Reply; the Reply window will appear
- Type your message in the entry field, just like when you’re writing an original message; you can add a file or record an audio response
- When you’re done, just click Post
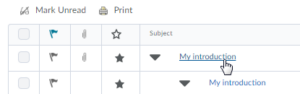
- Your message response shows up underneath the original thread.
Sorting Messages
You can sort messages in a number of different ways.
Use the Show menu to view them threaded, sort by date, author name, or subject, or choose to show posts with file attachments first. Click Apply to apply your choice.
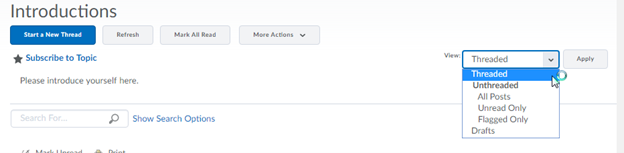
The default view for discussions in Brightspace is Threaded.
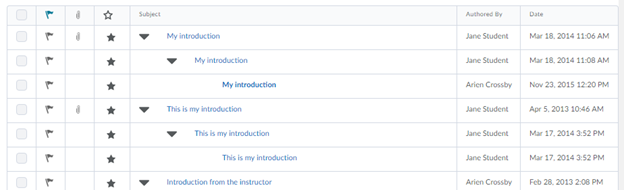
A thread consists of the original message and all the replies to that message. In Threaded view, a reply will be indented, and the reply to the reply will be indented again, as you can see here.
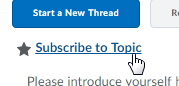
You can subscribe to responses to this thread by clicking on Subscribe to Topic. Click it again to unsubscribe.
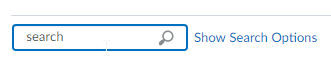
You can also search within a thread using a keyword, or click the arrows to move to the next thread in the topic.
Discussion Notifications
Any time there have been new messages posted in a Discussion since the last time you logged in, you’ll automatically get a notification in the Updates widget on your Course Home page (if your instructor has enabled this widget), as well as the Update Alerts icon at the top of the page.

How to Use the Quizzes and Surveys Tools
Overview
Due to length, these instructions are available in PDF for easier reading.
How to do Quizzes and Surveys in Brightspace. All about:
- Finding your quizzes
- Completing quizzes
- Viewing your submissions and seeing your grades
- Completing surveys
Quizzes
Finding Your Quizzes
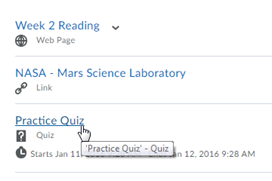
You can reach Quizzes and Surveys through your Course Content…
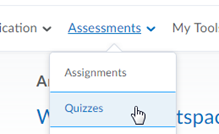
…or via the Navbar, by clicking on the appropriate tool under Assessments.
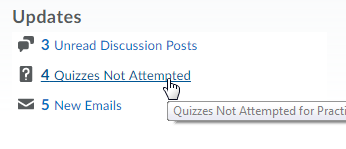
If your instructor has enabled this widget, unattempted quizzes will appear as notifications in the Updates widget on your Course Home page.
Completing a Quiz
When you enter a quiz, there will be a set of instructions. Make sure to read these before you start your quiz, at least the first time.
The quiz details will give you information like the dates the quiz will be available, the amount of time you’ll be given to complete the quiz, and how many attempts you’ll be allowed to make.
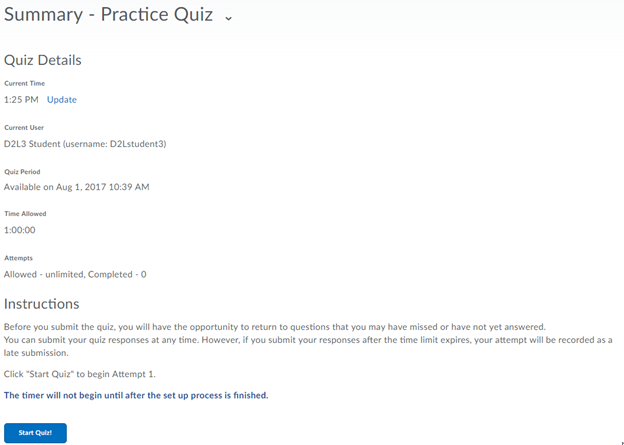
Keep in mind that once you’ve entered a quiz with a time limit, the timer does not stop counting down, even if you log out and log back in; so make sure you have a reliable Internet connection. If you get disconnected during a quiz, you can log back in to Brightspace and continue, as long as the time hasn’t run out. If you have trouble logging back in while a quiz is in progress, contact your instructor.
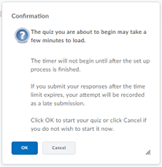
When you’re ready to begin, click Start Quiz.
A confirmation will appear. If you’re ready, click OK.
Back to top of pageTiming Options in Quizzes
As of July 28th, 2023, the following improved Quiz Timing options will be available for learners:
- Option to show or hide the timer, which may help reduce anxiety during quiz taking. Click the Hide Timer button beside the quiz timer to hide the timer from the view.
Note: Once a learner sets this preference, the setting preserves across all quizzes.
- Warnings are displayed at certain times to support awareness of time left. The following warnings are applied:
- 1 minute remaining on the quiz
- 5 minutes remaining (only on quizzes with 10 minutes or longer quiz time limit)
- Half of the elapsed time (only on quizzes with 20 minutes or longer quiz time limit)

The Timer Warning dialog indicates how much longer a learner has in a quiz.
- There is also an option to review quiz instructions and details without leaving the quiz. Just click the Quiz Information link at the bottom of the lefthand pane.

Completing a Quiz
Quizzes might have a number of different question types, like:
- multiple choice
- short answer
- true or false
- matching
- long answer
Question answers are auto-saved as you complete them, except for Written Answer questions which have the formatting bar enabled. To save Written Answer questions as you type, click anywhere outside of the text entry box.
Other question types, and Written Answer questions without the formatting bar, will auto-save approximately every 30 seconds.
Back to top of pageQuiz Results Page
The simplified Quiz Results page appears when a learner completes a quiz attempt or returns later to view their quiz results. The page now displays the text ‘Your work has been saved and submitted’ to all learners, along with your score, if your instructor has enabled the option.
Recording Audio in Quiz Questions
In both Assignment feedback, and in certain types of Quiz question, you have probably seen the Record Audio button. Previously, clicking this button launched a recorder window that then requested your permission to run Flash in your browser. As most browsers have stopped supporting Flash, the new version uses a technology called HTML5, which captures audio directly in the browser without the need for additional plugins. Now, to record audio, just click the Record Audio button.

The tool will request your permission to use the microphone. Grant this permission, then create your recording. You may also wish to click the “remember this decision” checkbox.
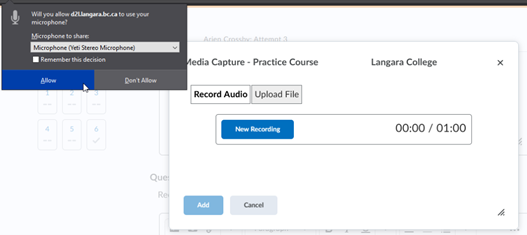
Click New Recording to start your recording. Click Stop Recording to stop when finished. Then click Add to proceed.
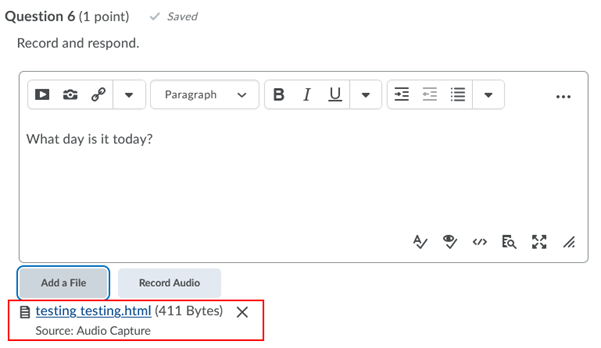
In the next screen, under Title, enter something descriptive, like your name, or something describing the question you’re answering. If you don’t enter anything under Title, the file name will be a random alphanumeric string.
Click Add again to attach the recording. It will appear as an HTML file in the same area as other file attachments.
Submitting a Quiz
When you’re finished, click “Submit.” You will see a confirmation screen asking if you’re certain you’re done; if you are, click Submit.
Back to top of pageViewing Your Submissions and Seeing Your Grades
Depending on your instructor’s settings, part or all of the quiz might be graded and available to you immediately. Otherwise, once it’s been graded, you’ll be able to find it in the list of quizzes, under Submissions.
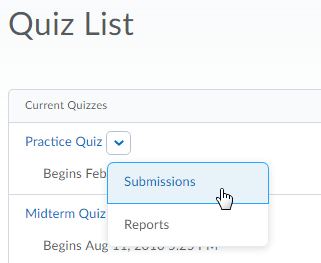
Click on Submissions, and on the next page, click on the attempt.
Back to top of pageSurveys
Surveys work in much the same way as Quizzes. You might access them via the course content browser, or from the Surveys tool under Assessments.
To start the survey just click on the survey name, answer the questions and click save. Then Submit.
Like in a quiz, a window will appear asking if you’re sure you want to submit your survey. If you are sure, click Yes.
Back to top of page Back to top of pageHow to Use the Email Tool
Brightspace Send-Only Email
As of December 2019, it is no longer possible to receive email messages in Brightspace. You can still compose and send messages, and your message will be sent from your Langara Office365 email address and sent to your recipient’s Langara email address. Any correspondence from that point will take place within Langara’s Outlook email system.
Back to top of pageSending a Message
In your course, go to My Tools > Classlist
- Click the checkbox to the left of the name(s) of your desired recipient(s)
- This will open a Compose New Message new window with all of your recipients added
- Add a Subject, compose your email, and click Send
The message will be sent to your recipients’ Langara email account. If they reply, it will come to your Langara Office365 email only.
Back to top of pageWant to see email sent from Brightspace?
- Click on the Email icon
- Click on the Sent Mail button
- Click on a message to view it
Brightspace Email Settings
Brightspace email settings have changed. To see your settings, click on the Email icon and click on Settings.

By default, all sent messages are saved in your Brightspace Sent folder. If you would also like a copy of sent messages sent to your Langara address, click the box next to “Send a copy of each outgoing message to username@domain.ca.” This will allow you to forward messages you’ve already sent, for example if you send a message to someone and later need to send the same message to someone else.
Back to top of page Back to top of pageHow to Insert Video/Audio and Images in Brightspace
Overview
The recommended method for inserting video or audio in Brightspace is to upload it to Kaltura MediaSpace, or to record it using the Web Recorder, and them embed it in the Brightspace Editor in Assignments, Quizzes, or Discussions. Please do not upload video or audio files as file attachments to Assignments, Quizzes, or Discussions unless your instructor specifically requests it.
Back to top of pageHow to Embed Audio or Video
Refer to Sharing Media in Brightspace to learn how to upload/embed Kaltura videos in Brightspace.
Back to top of pageHow to Insert Images
To embed images so that they appear within your submission (rather than needing to be downloaded by your instructor before they can be viewed), use the Insert Image button in the HTML Editor. The HTML Editor appears everywhere in Brightspace where you can enter text, unless your instructor has specifically disabled it. If you do not see the Insert Image button, ask your instructor to enable the HTML Editor.
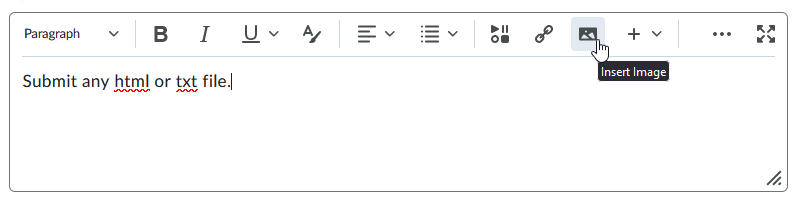
To use Insert Image, click the Insert Image button.
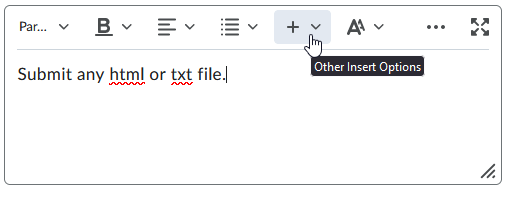
If you can’t see the Insert Image button (E.g., in areas where the HTML Editor is very small, like in some Quiz question types, or if your screen uses high magnification), you may need to expand the Other Insert Options (the plus sign) in order to see it.
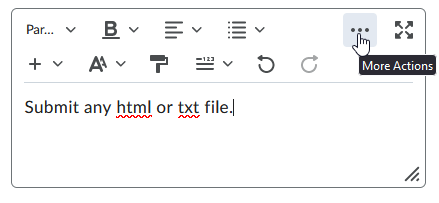
If the editor’s format bar has been collapsed, you may sometimes need to click the More Actions (ellipsis/three horizontal dots) button in order to see Other Insert Options.
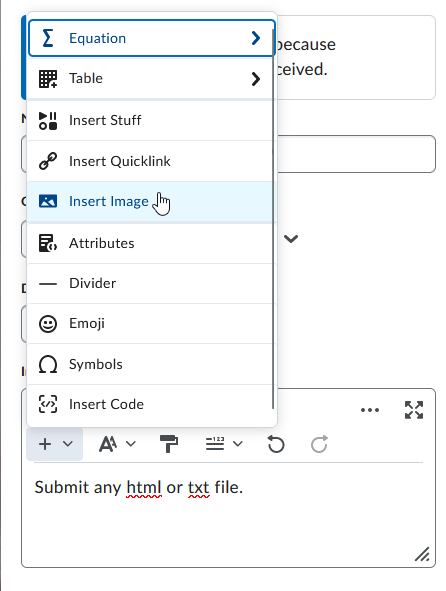
Once you have clicked Insert Image, click My Computer, locate the image on your computer or other device, and click Add to insert it.
Back to top of pageHow to Enable Brightspace Notifications
By default, most tools do not send notifications when there are updates. Notifications are controlled on a per-user basis, in that user’s own account settings.
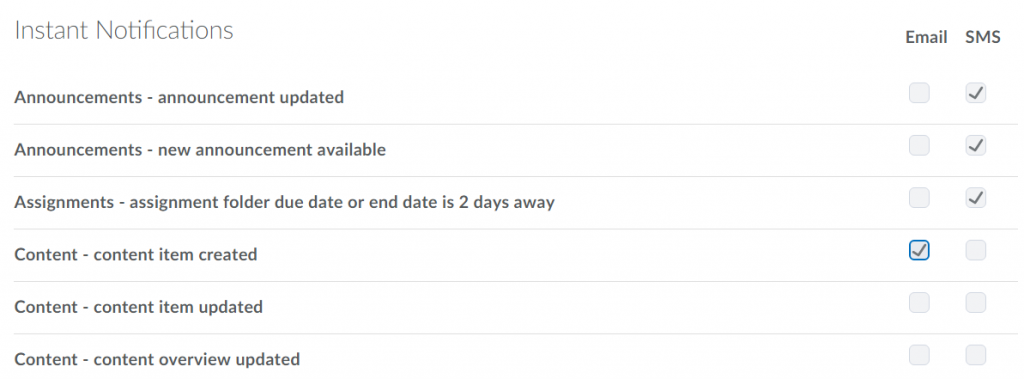
You can choose if and how you receive notifications of discussion subscriptions, newly posted grades, Assignment feedback, Quiz marks, and more, on the Brightspace Notification Settings page.
Note: Currently, you can choose either Email or SMS notifications. SMS notifications will be discontinued at the end of April 2024.
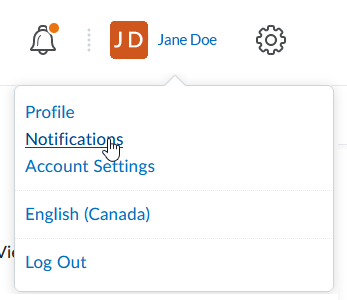
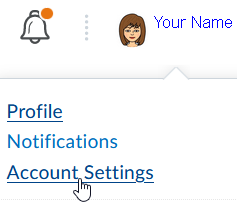
- Login to Brightspace, then click your name in the upper right corner.
- Select Notifications
- You can choose to receive notifications by email or SMS message
- Email notifications will be sent to your mylangara.ca email
- To receive SMS/text notifications, click Register my mobile (Note: if text messages do not arrive, this is most likely an issue with your mobile carrier, and we cannot offer support in troubleshooting)
- Select your notification type (Email or SMS) for each type of notification
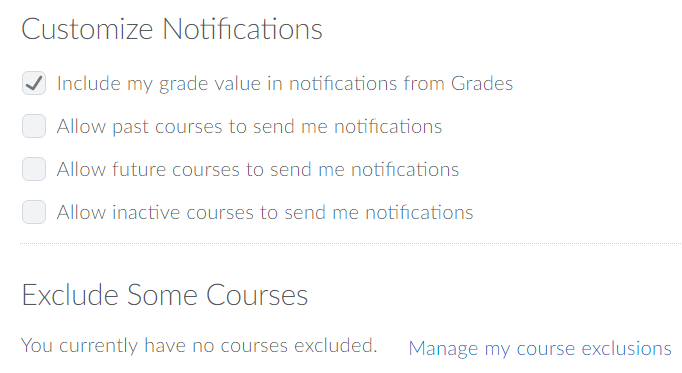
- You can also set Custom Notifications and choose to exclude specific courses from the general Notifications settings
- Click Save
How to Self-Register for a Brightspace Course
Sometimes you may be instructed or invited to self-register in a course. To do this:
- From the Brightspace homepage, click Self Registration
- Click the course in which you want to register
- Click the Register button
Depending on the course, you may receive an email confirming your registration, or it may appear immediately in your My Courses widget. If the course has co-requisites or restrictions, you may receive an email rejecting your application, or your registration may need to be confirmed by the instructor or course manager before you will be able to see the course. If you still can’t see your course and believe you should be able to, contact the course manager or instructor for help.
Back to top of pageSharing Awards in Brightspace
If you’ve taken courses that use Badges or Certificates, such as the Langara Student Success Course, you might need to be able to make those badges visible to other people. Watch the video below for a demonstration of how to do this.
See below for instructions on sharing your Badge or other Award to your Brightspace profile.
- From the course homepage, click Assessments > Awards
- Underneath your badge, click Share
- In the Share My Award window that appears, click Share to Profile
- From the course homepage or your Brightspace homepage, click your name (at the top right corner) and Profile to view the badge on your profile, under Awards Showcase
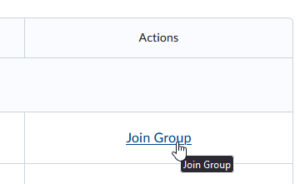
How to Join Self-Enrolment Groups
- Go to My Tools > Groups

- Click View Available Groups
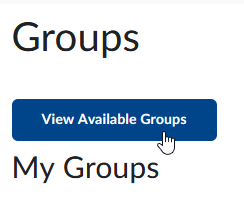
- Next to the group you’d like to join, click Join Group


Displaying Pronouns in Brightspace
- In Brightspace, click your name and select Account Settings
- Under Pronouns, choose Display Pronouns
- Choose Display Different Pronouns
- Enter your pronouns, e.g. she/her, they/them, he/him
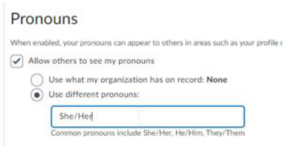
- Click Save and Close
Please note that the addition of your pronouns will only be reflected in Brightspace.
Back to top of page Back to top of pageBrightspace Text to Speech
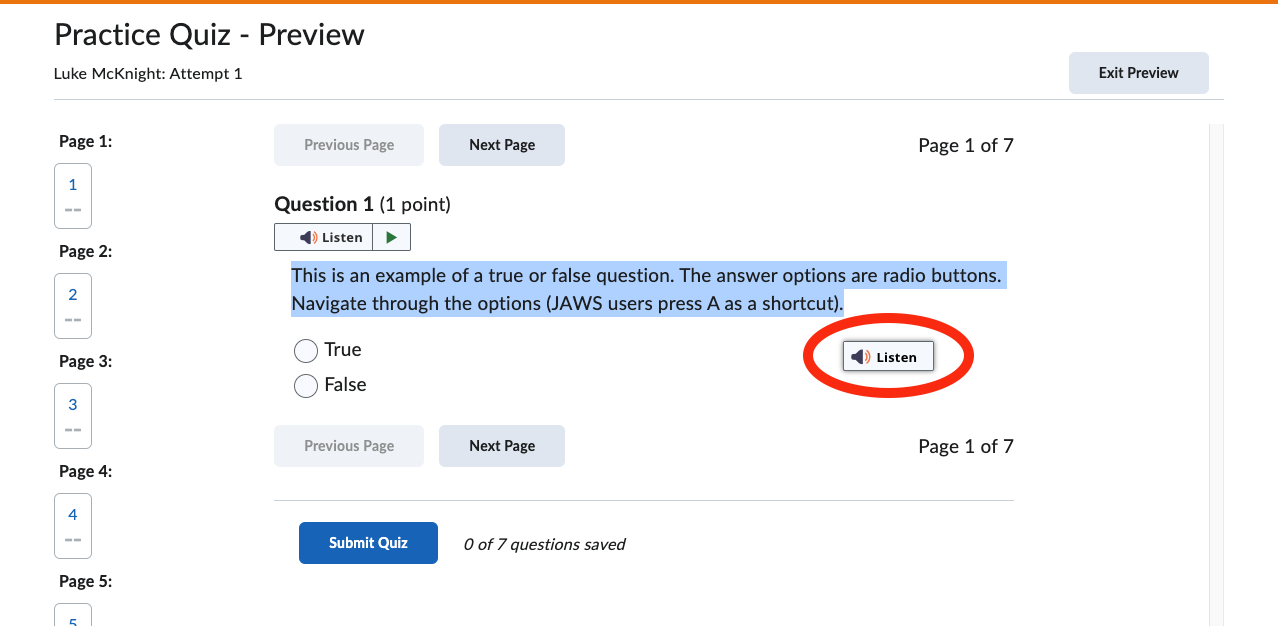
ReadSpeaker is integrated into Brightspace and the Listen button will appear on Content topic, Discussion, and Quiz pages:
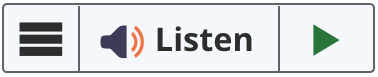
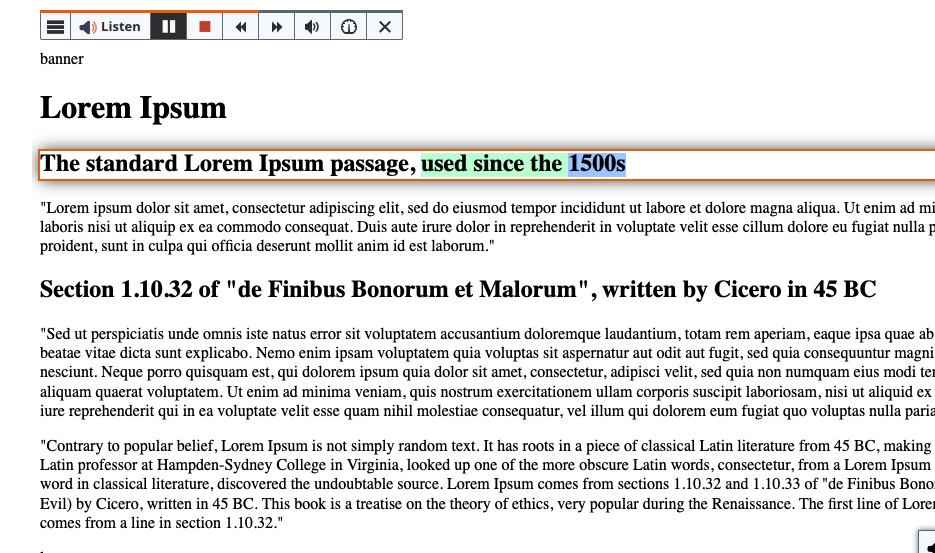
Activating the Listen button will reveal the Player:

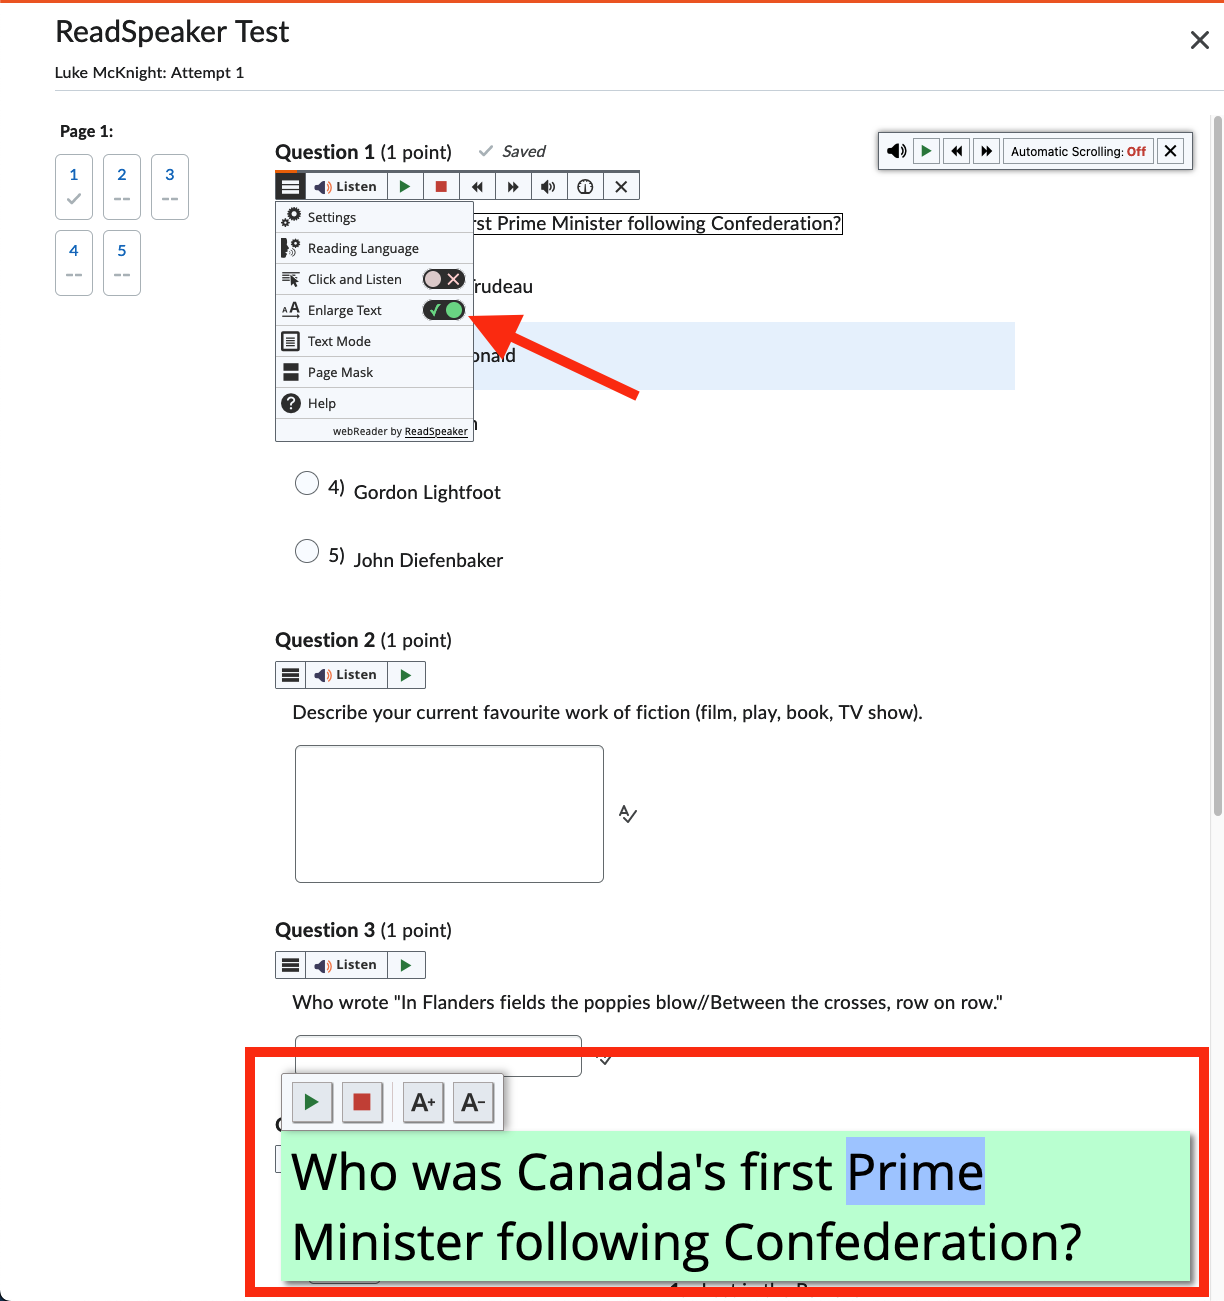
The player will read aloud, and (by default) highlight, content as it is read. There are several options on the Player for speed, volume, and controls. Additional settings and tools are available in the Settings menu:

Under Settings you can customize the appearance, including colours and highlighting.
Choose Reading Voices to change voices.
Back to top of pageHighlight Content
You can highlight content and a small menu will appear:
Choose Listen to hear the selected text.
Back to top of pageEnlarge Text
Enlarge text opens a window at the bottom of your screen that shows the text being read. There are options to change the appearance.
- Select the player menu button
- Toggle Enlarge Text to on
- Click Listen
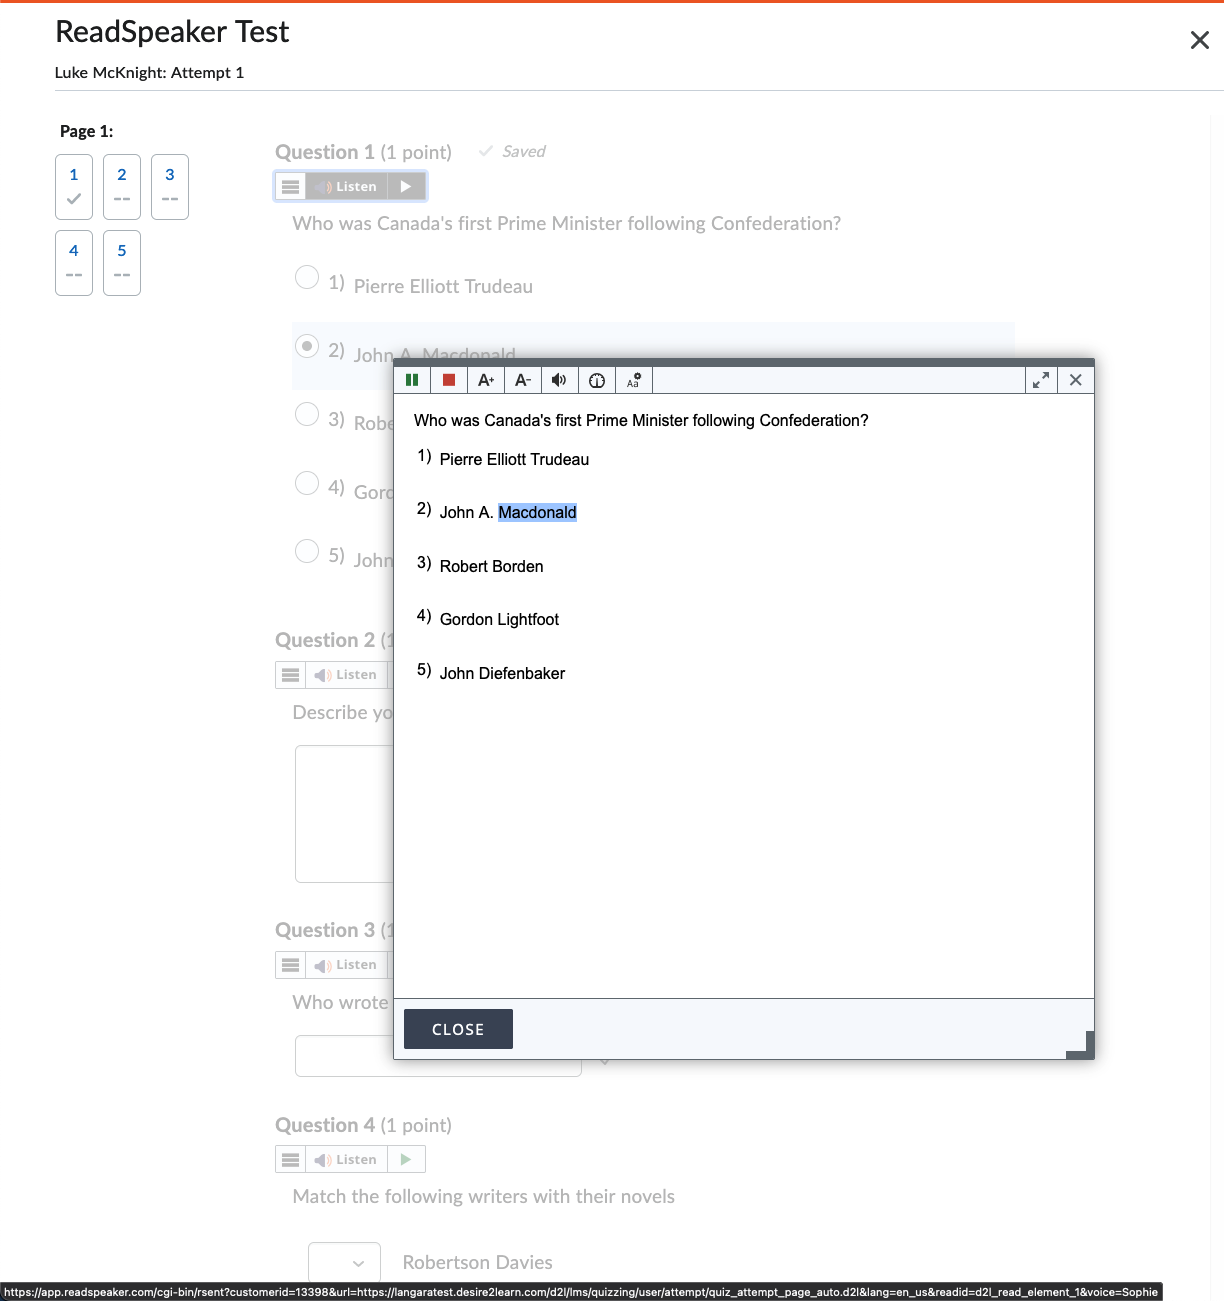
Text Mode
Text mode simplifies the view of a page. Keep in mind, this may temporarily alter the appearance of the page.
- Select the player menu button
- Choose Text Mode
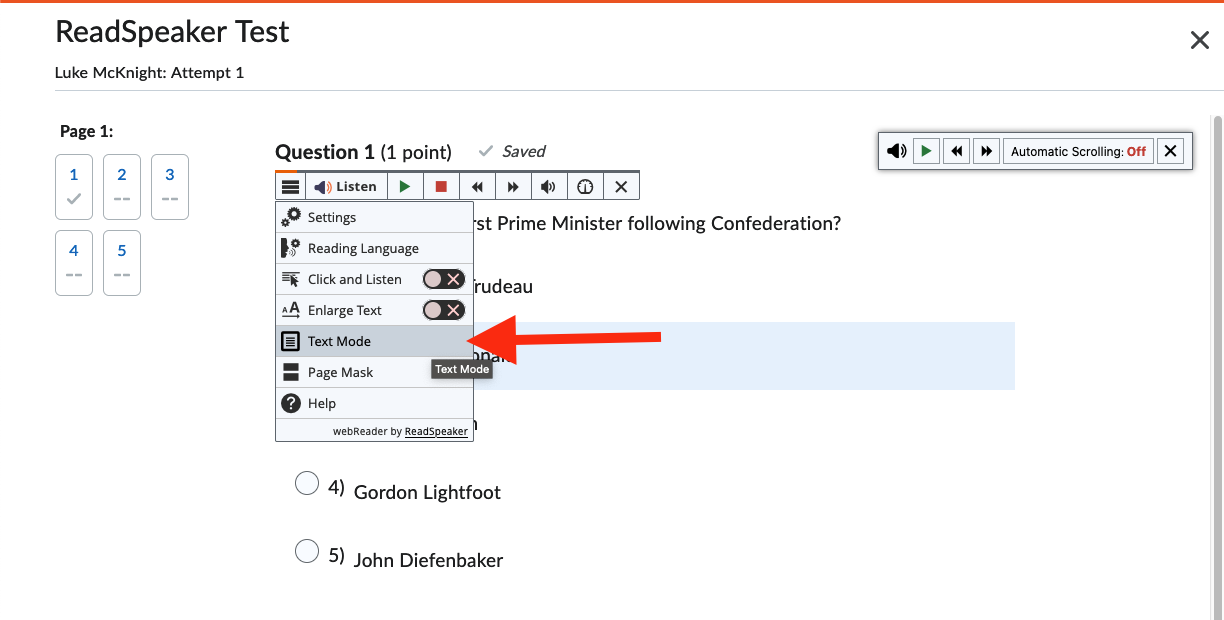
- A new overlay window will open showing the simplified version of the page
Page Mask
Page mask dims the page except for where your mouse is. This may help you focus on what is being read.
- Select the player menu button
- Choose Page Mask
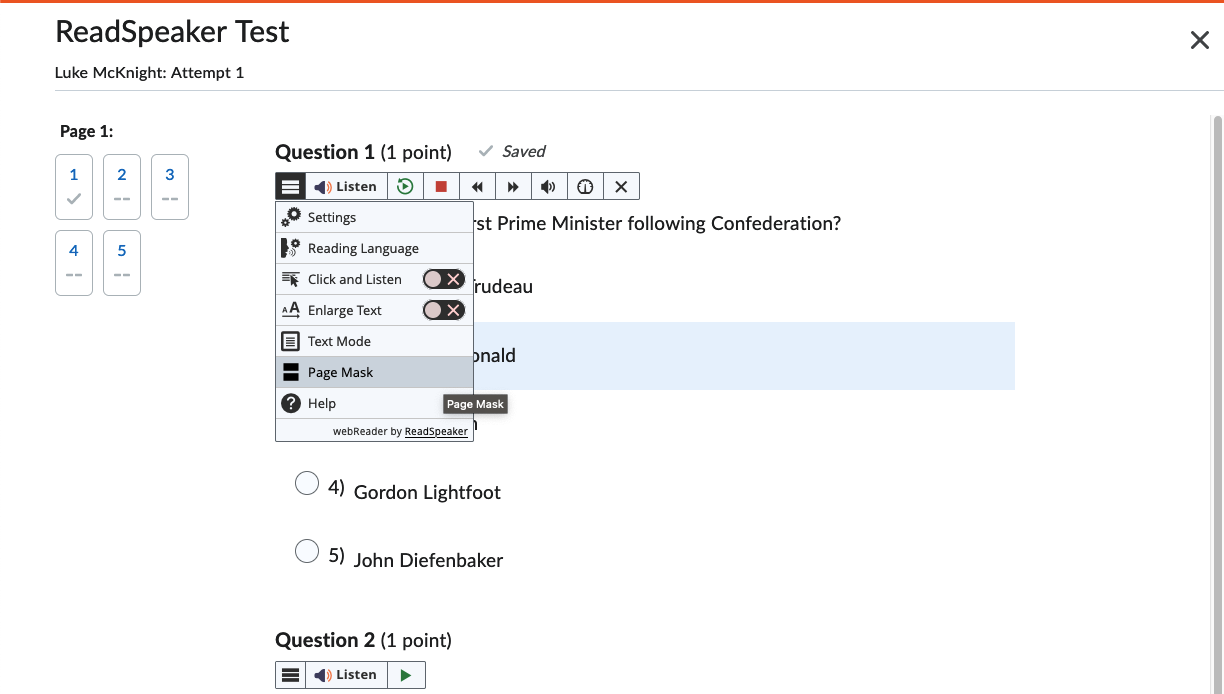
- The screen will dim except for a horizontal line that follows your mouse

You can change the size of the mask using the + and – buttons on the right side of the mask.
Click and Listen
This tool is not available in the quiz tool to prevent accidentally clicking an incorrect answer. In other parts of Brightspace, this option allows you to click on text and have that section read aloud.
- Select the player menu button
- Toggle Click and Listen to on
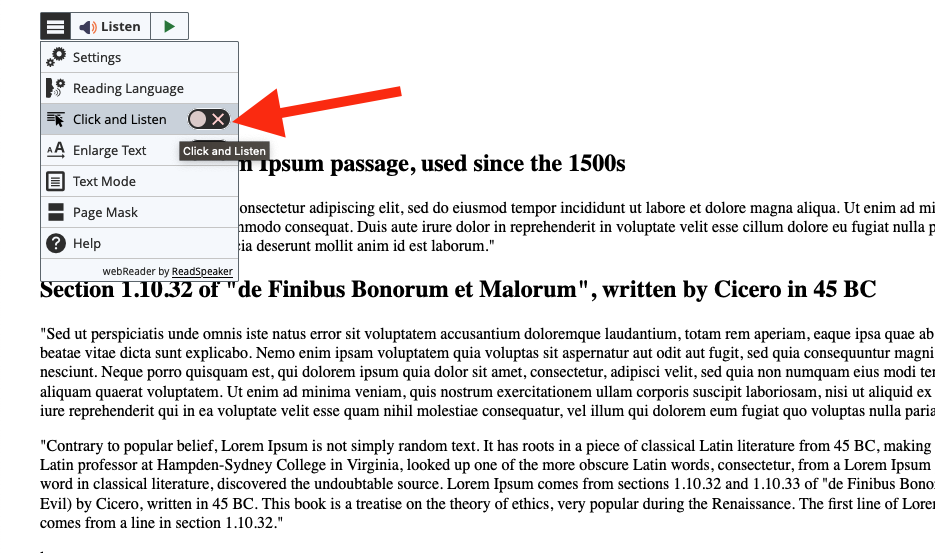
- Click on text on the page, you will see a red outline around what is being read as well as the highlighting of sentences and words
Student Guide to Reading Lists
A growing number of Langara instructors are moving away from traditional textbooks, and instead using an array of resources (book chapters, journal articles, websites, and more) to support course curricula.
Reading lists bring these diverse materials together seamlessly, and ensure that your readings don’t get ‘lost’ amongst other course content.
Reading lists also improve the learning experience. Instructors can add annotations to readings to highlight important information. Students can track their progress by marking completed readings and adding personalized notes.
The Student Guide to Reading Lists provides an overview of helpful reading list features for students.
Back to top of page